

Indulging in creamy ice cream is a treat that many busy families often miss out on, but worry not! Our No Churn Biscoff Espresso Ice Cream is the perfect answer to your cravings. This delightful dessert combines the rich, warm flavors of Biscoff and espresso into a creamy, dreamy treat that’s both satisfying and guilt-free. Whether you’re winding down after a long day or planning a weekend treat with the family, this ice cream is not just a dessert; it’s a moment of joy that fits seamlessly into your healthy lifestyle.
This no-churn recipe means you can easily whip it up in your kitchen without an ice cream maker, making it perfect for spontaneous cravings. Imagine pulling a scoop of this luscious, velvety dessert out of your freezer, the aroma of Biscoff wafting through the air as you dig in. Each bite offers a perfectly balanced flavor and creamy texture that’s reminiscent of your favorite café. Best of all? It’s high-protein, low-calorie, and designed with your nutrition goals in mind.
If you’re a meal prep planner or looking for something special yet simple to satisfy the family, keep reading. Let’s create something unforgettable and delicious that can fuel your busy days with joy and energy.
Why You’ll Love No Churn Biscoff Espresso Ice Cream (Creamy, Easy, and Cozy)
This no churn ice cream is easy to make and incredibly delicious—no ice cream maker required! It’s creamy, rich, and perfect for any health-conscious individual or family.
This delightful dish provides comfort and indulgence without the guilt. With its unique blend of flavors, this dessert caters to your cravings while still aligning with your wellness goals. The combination of Biscoff and espresso not only gives you a sweet treat but also a delightful pick-me-up for your busy afternoons. Make it ahead of time and enjoy it whenever the mood strikes!
- Quick and easy preparation—no special equipment needed.
- Perfect texture—creamy and satisfying with each spoonful.
- Uses pantry-friendly ingredients, making it convenient for meal prep.
- High in protein and low in calories, fitting seamlessly into your healthy lifestyle.
- Kid-friendly and adult-approved—everyone will love it!
- Meal-prep friendly, ideal for busy weekdays.
- Gluten-free, making it suitable for a variety of dietary needs.
{image_template}
Ingredients for No Churn Biscoff Espresso Ice Cream
- Heavy Cream – adds rich creaminess and texture.
- Sweetened Condensed Milk – brings sweetness and depth to the flavor.
- Biscoff Spread – introduces dreamy caramel and spice notes.
- Brewed Espresso – provides a bold coffee flavor and richness.
- Vanilla Extract – enhances the overall flavor profile.
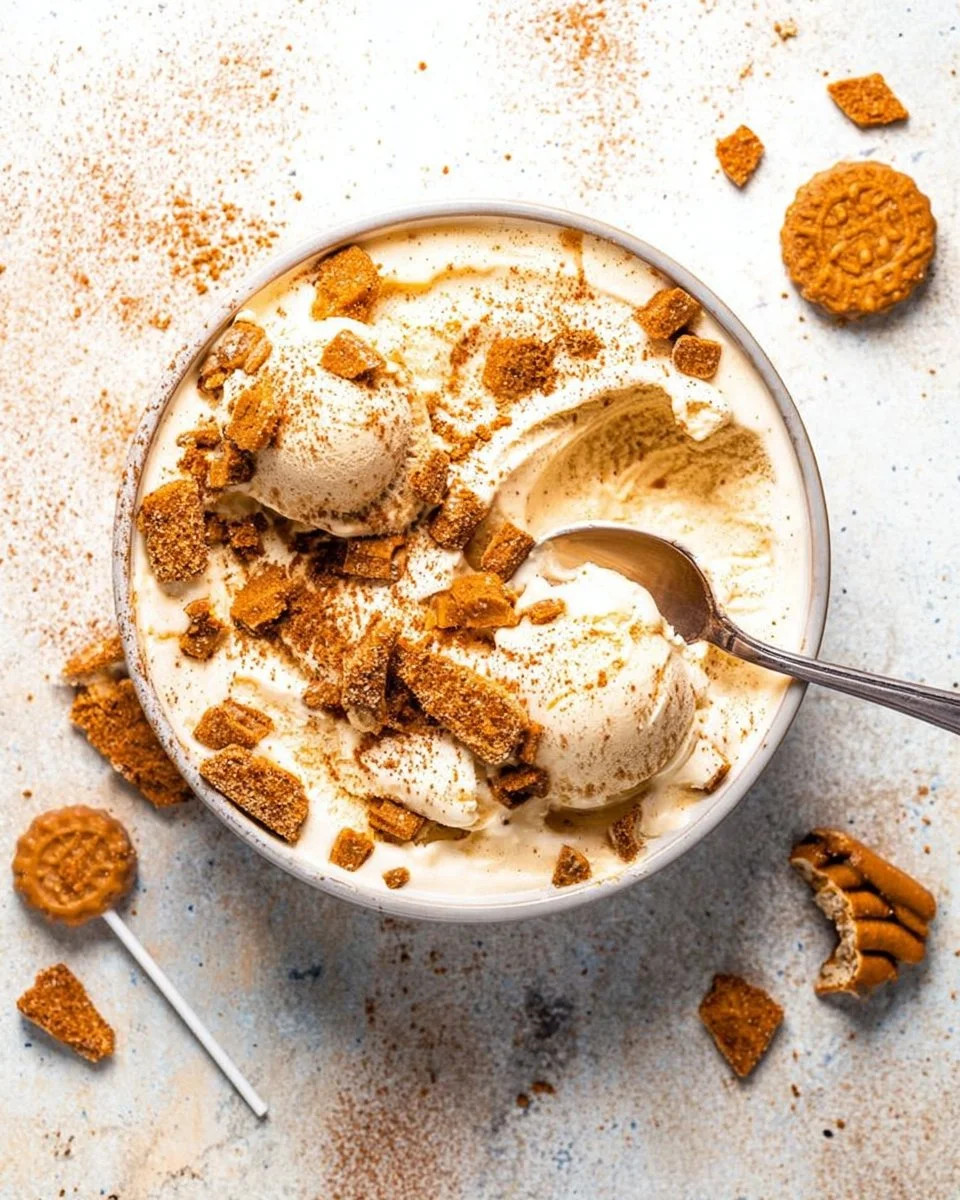
- Biscoff Cookies – crumbled for a delightful crunchy topping.
Ready to cook? See the recipe card for exact measurements below.
How to Make No Churn Biscoff Espresso Ice Cream
Phase 1 – Prep
- Start by brewing your espresso and allowing it to cool completely. This step ensures that the heat doesn’t affect the cream.
- Next, gather your ingredients and a large mixing bowl. This will keep everything organized and streamlined during the mixing process.
- Prepare your serving dishes or ice cream containers to hold the finished product.
Phase 2 – Cook/Assemble
- In your large bowl, whip the heavy cream until stiff peaks form. This will give your ice cream its delightful, fluffy texture. Expect about 3-5 minutes of mixing.
- In a separate bowl, combine the cooled espresso, sweetened condensed milk, Biscoff spread, and vanilla extract. Mix until smooth and well-blended.
- Gently fold the whipped cream into the Biscoff and espresso mixture, being careful not to deflate the whipped cream. You want it to stay fluffy and airy!
- Once fully combined, transfer the mixture into your prepared container, smoothing it out to create an even layer.
Phase 3 – Serve
- Cover the container tightly with a lid or plastic wrap and place it in your freezer. Let it freeze for at least 6 hours, or until firm.
- To serve, scoop out the desired amount and sprinkle with crushed Biscoff cookies for the perfect finishing touch.
- Enjoy the ice cream straight from the freezer on a hot day or plate it to impress your guests!
Pro Tips for the Best Results
- Chill your mixing bowls before whipping the cream for an extra fluffy texture.
- For a stronger coffee flavor, increase the amount of espresso to your taste.
- Layer your ice cream with crushed cookies in the container for added crunch throughout.
- If you want to save time, prepare this ice cream a day in advance.
- Store leftovers in an airtight container to maintain freshness and texture.
Common Mistakes to Avoid
One common mistake when making no-churn ice cream is overmixing the whipped cream. This can lead to a grainy texture rather than the light, airy consistency desired. To avoid this, whisk until you see stiff peaks, and stop right then!
Another issue can arise with freezing time. If not given enough time in the freezer, your ice cream will turn out soft and soupy. Ensure it spends at least six hours freezing to achieve that perfect scoopable texture.
Lastly, remember to let your ice cream sit out for a few minutes before serving, as it can become too hard from the freezer. This helps make scooping easier and enhances the flavor experience once it slightly softens.
Recipe Variations
- Make it gluten-free by using gluten-free cookies for the topping.
- For a dairy-free option, try coconut cream in place of heavy cream.
- Add a dash of cayenne pepper or chili powder for a spicy kick.
- Incorporate fresh herbs like mint for a unique twist.
How to Serve No Churn Biscoff Espresso Ice Cream
- Best Pairings: Serve alongside chocolate brownies or fresh berries for a delightful contrast.
- Toppings: Drizzle with chocolate syrup or sprinkle with sea salt for an unexpected burst of flavor.
- Garnishes: Fresh mint leaves or whipped cream enhance the visual and flavor appeal.
Make Ahead & Storage
Can I Meal Prep This?
Yes! This no churn Biscoff espresso ice cream is perfect for meal prep, simply whip up a batch over the weekend, and enjoy it throughout the week.
Storing Leftovers
Store leftover ice cream in an airtight container in the freezer for up to two weeks. This will ensure the best texture and taste experience.
Freezing
In the freezer, it can last for about a month, but be mindful that over time, the texture may change slightly. Still delicious, but best consumed sooner!
Reheating
Since this is ice cream, there’s no need for reheating. For easier scooping, simply remove from the freezer and let it sit at room temperature for about 5-10 minutes before enjoying.
{image_1}
FAQs
Can I use decaf espresso for this recipe? Absolutely! Decaf espresso will work perfectly if you’re avoiding caffeine but still want the rich flavor.
What can I use instead of Biscoff spread? You may opt for any cookie butter or speculoos spread. Nut butters will alter the flavor slightly but can work in a pinch.
How long does it take to thaw before scooping? Aim for about 5-10 minutes at room temperature for easier scooping without losing its delightful texture.
Can I add mix-ins like chocolate chunks? Yes! You can fold in chocolate chips or nuts before freezing for extra flavor and texture.
If you’re craving a sweet treat that checks all the boxes—delicious, high protein, and guilt-free—then this No Churn Biscoff Espresso Ice Cream is a must-try. Perfect for busy families managing time, health, and happiness. Don’t forget to rate your experience and explore our related recipes for more satisfying meals!

No Churn Biscoff Espresso Ice Cream
Ingredients
Method
- Start by brewing your espresso and allowing it to cool completely.
- Gather your ingredients and a large mixing bowl.
- Prepare your serving dishes or ice cream containers.
- Whip the heavy cream in a large bowl until stiff peaks form (about 3-5 minutes).
- In a separate bowl, mix the cooled espresso, sweetened condensed milk, Biscoff spread, and vanilla extract until smooth.
- Gently fold the whipped cream into the Biscoff and espresso mixture.
- Transfer the mixture into a prepared container and smooth it out.
- Cover the container tightly and freeze for at least 6 hours or until firm.
- Scoop out the ice cream and sprinkle with crushed Biscoff cookies before serving.