
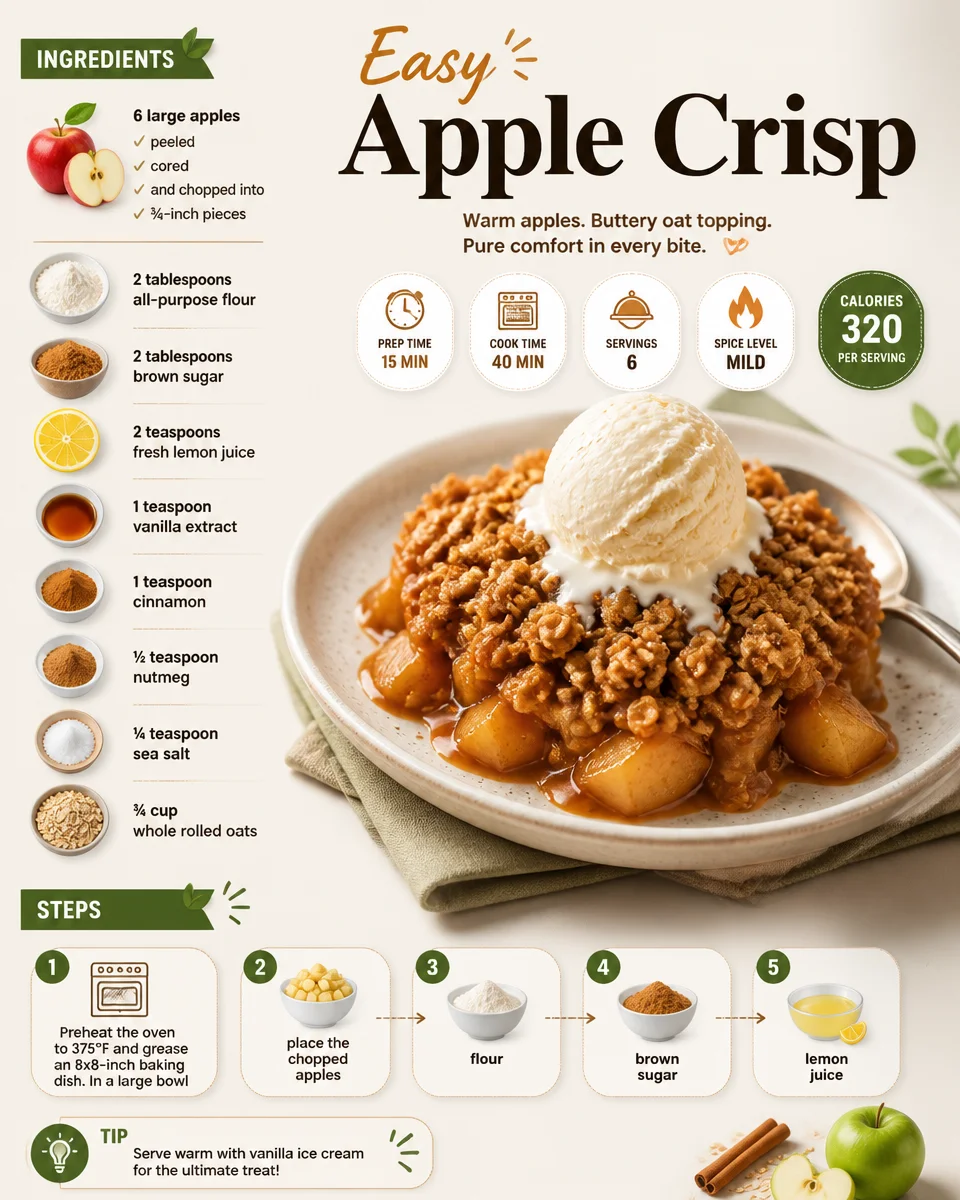
There’s something undeniably comforting about a warm dessert emerging from the oven, especially when it fills your kitchen with the sweet and spicy aroma of baked apples. This easy apple crisp brings together tender, juicy apples with a deliciously crispy topping, making it the perfect choice for a cozy family gathering or a simple everyday treat. A scoop of vanilla ice cream or a dollop of whipped cream melts delightfully on top, combining textures in every bite. With its golden, crunchy topping and soft, flavorful apple filling, this dessert promises to evoke sweet memories of autumn and family gatherings around the dinner table. Get ready for a heartwarming treat that’s both simple and satisfying!
Quick Answer
This easy apple crisp recipe combines tender baked apples with a crunchy oat topping, creating a delightful dessert that’s both comforting and delicious.
Why You’ll Love This Recipe
This apple crisp recipe offers a myriad of benefits that make it a go-to dessert for any occasion.
- Simple preparation that takes minimal time and effort.
- Perfectly brings out the natural sweetness of fresh apples.
- Versatile enough for any season—ideal for fall and winter gatherings!
- Easy to customize by adding nuts or choosing different fruits.
- Delicious served warm with ice cream or chilled on its own.
- Great for meal prep; leftovers can easily be stored.
- Makes your home smell amazing while baking!
What Makes This Recipe Special
This easy apple crisp stands out for its delightful combination of flavors and textures. The contrast of warm, tender apples with a colorfully golden, buttery oat topping creates a satisfying dessert experience. The addition of lemon juice enhances the natural sweetness of the apples while providing a refreshing zing that balances the richness of the butter. With spices like cinnamon and nutmeg subtly intertwined, each bite is layered with warmth and nostalgia, reminiscent of home and happy gatherings. This recipe not only highlights the beauty of simple ingredients but also showcases the delightful harmony achieved when they come together in the oven. Perfectly balanced and ever so comforting, it’s a dish that everyone loves to savor.
Kitchen Tools You’ll Need
- 8×8-inch baking dish – ideal size for even cooking and serving.
- Mixing bowls – for combining ingredients smoothly.
- Whisk – helps mix dry ingredients evenly.
- Pastry cutter or forks – great for achieving a crumbly topping.
- Peeler and corer – for preparing the apples quickly.
- Oven mitts – to safely handle the hot baking dish.
Ingredients
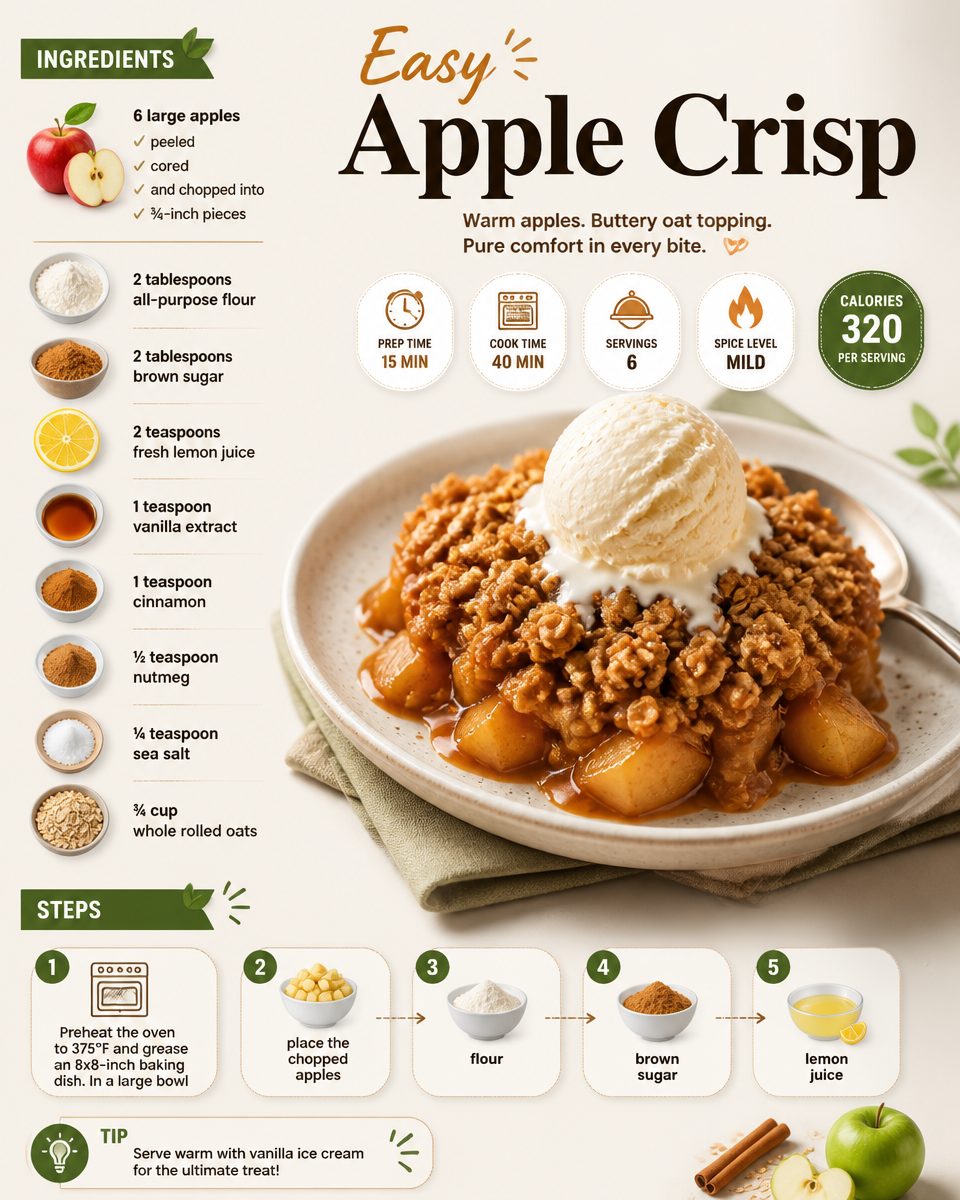
large apples: Provide a sweet and juicy base for the crisp, becoming tender as they bake.
all-purpose flour: Adds structure to the filling and topping, helping bind ingredients.
brown sugar: Adds a rich, caramel-like sweetness that enhances the flavor of the dish.
fresh lemon juice: Brightens the flavor of the apples and adds a touch of acidity.
vanilla extract: Infuses the dish with warm, aromatic notes that deepen the flavor profile.
cinnamon: Offers a warm spiciness that complements the apples beautifully.
nutmeg: Adds a hint of earthiness and warmth, enhancing the fall flavors.
sea salt: Balances the sweetness and intensifies all the flavors.
whole rolled oats: Provides a chewy texture and a hearty flavor to the topping.
cold unsalted butter: Creates a rich, crumbly topping that adds flavor and texture contrast.
Ready to cook? Scroll to the recipe card below for exact measurements.
How to Make Easy Apple Crisp
Phase 1 – Prep
STEP 1. Preheat the oven. Set it to 375°F and grease an 8×8-inch baking dish.
STEP 2. Prepare the apples. In a large bowl, place the chopped apples, flour, brown sugar, lemon juice, vanilla extract, cinnamon, nutmeg, and salt. Toss to coat the apples.
STEP 3. Transfer to baking dish. Spread the apple mixture evenly in the prepared baking dish.
Phase 2 – Cook
STEP 4. Make the topping. In a medium bowl, whisk together the oats, flour, brown sugar, cinnamon, and salt.
STEP 5. Combine butter. Use two forks, a pastry cutter, or your hands to work in the butter until the mixture is crumbly.
STEP 6. Top the apples. Sprinkle the crumbly mixture evenly over the apples.
STEP 7. Bake covered. Cover the baking dish and bake for 35 to 40 minutes, or until the apples are bubbling.
Phase 3 – Serve
STEP 8. Bake uncovered. Uncover and bake for 10 to 15 more minutes until tender and the topping is golden brown.
STEP 9. Cool before serving. Let cool for at least 10 minutes before serving.
Why This Recipe Works
The appeal of this easy apple crisp lies in the balance of textures and flavors it offers. The tender apples, melded with spices, deliver a soft and juicy interior, acting as the base for a crunchy topping that contrasts perfectly. The blend of oats, flour, and butter creates a delightful crust that is both crumbly and slightly chewy, adding depth to each bite. This recipe’s method of layering flavors—where the spices infuse into the apples and the topping bakes to a golden perfection—ensures that every mouthful is a comforting experience. Moreover, the simplicity of the baking process allows for minimal fuss, making it a family-friendly option that yields impressive results.
Pro Tips
For the best results, consider these tips when making your apple crisp:
- Use a mix of apple varieties for complex flavors—Granny Smith for tartness paired with sweeter apples like Fuji can be delightful.
- Slice the apples uniformly to ensure even cooking throughout the dish.
- Let the crisp cool slightly before serving; this helps the filling to set up a bit more, making it easier to serve.
- Experiment with the addition of nuts like walnuts or pecans in the topping for an extra crunch.
- Monitor the baking closely towards the end to prevent over-browning.
Common Mistakes to Avoid
Making a perfect apple crisp can be simple, but avoid these common pitfalls:
Mistake: Using only one type of apple.
Why it happens: Many cooks rely on their favorite apple variety without considering flavor balance.
How to fix it: Blend tart and sweet apples for depth in flavor.
Mistake: Overcooking the topping.
Why it happens: Focusing solely on baking time can lead to a burnt topping.
How to fix it: Check the crisp frequently; once it’s golden brown, it’s done!
Mistake: Too much liquid from the apples.
Why it happens: Apples release juices during cooking.
How to fix it: Allow the crisp to rest after baking; it thickens as it cools.
Variations
- Add nuts like pecans or walnuts in the topping for extra crunch.
- Experiment with different fruits like peaches or berries for a twist.
- Try adding oats to the apple filling for more fiber.
- Incorporate spices like ginger or cardamom for a flavor kick.
- Serve with yogurt instead of ice cream for a lighter option.
Nutrition Highlights
| Nutrient | Role |
|---|---|
| Fiber | Supports digestion and provides fullness. |
| Vitamin C | Boosts the immune system and promotes healthy skin. |
| Antioxidants | Help protect the body from free radicals. |
Serving Ideas
Pair your apple crisp with vanilla ice cream or whipped cream for a decadent treat. Alternatively, serve it warm with a dollop of Greek yogurt on the side for a balanced snack. You can also enjoy it topped with caramel sauce for an extra touch of sweetness, or alongside a cup of tea or coffee for a cozy evening dessert. The warm flavors enhance any gathering, making each serving a comforting reminder of home.
Best Occasions for This Recipe
This easy apple crisp is perfect for a range of occasions. It’s a crowd-pleaser at family gatherings, an ideal dessert for holiday gatherings, and a delightful way to celebrate the autumn season. Enjoy it as a comforting treat after a long day or share it with friends during a cozy movie night. Its warm, inviting aroma and satisfying flavors make it suitable for both casual and festive occasions.
Meal Prep & Storage
Meal Prep
You can prep the apple mixture ahead of time and keep it refrigerated until you’re ready to bake. The topping can also be made in advance and stored separately.
Refrigeration
Store any leftovers in an airtight container in the refrigerator for up to 5 days. Reheat portions in the oven or microwave before serving.
Freezing
For longer storage, you can freeze the unbaked crisp for up to three months. To bake, simply increase the cooking time from frozen.
Reheating
To reheat, place in a preheated oven at 350°F until warmed through. You can also microwave individual servings for a quick treat.
{image_template}
FAQs
How do I store leftovers? Leftovers should be stored in an airtight container in the refrigerator and can be enjoyed for up to five days.
Can I make this apple crisp ahead of time? Yes! You can prepare the apple filling and topping separately in advance, then bake just before serving.
What apples are best for this recipe? A mix of sweet and tart apples, like Fuji or Granny Smith, works best for a balanced flavor.
Can I freeze apple crisp? Yes, you can freeze the crisp before baking. Just make sure to cover it tightly.
How do I know when the crisp is done baking? The apples should be bubbling, and the topping should be golden brown. Let it cool before serving.
Save This Recipe for Later
If you’re looking for an easy and comforting dessert, be sure to save this apple crisp recipe. It’s a must-try for any home cook!
Conclusion
This easy apple crisp represents the best of homemade comfort food, effortlessly combining sweet and tender baked apples with a crunchy topping that everyone will love. It’s a dish that easily adapts to any occasion while bringing a sense of nostalgia and warmth. So gather your ingredients and get ready to indulge in a delightful dessert that fills the heart as much as the stomach!