
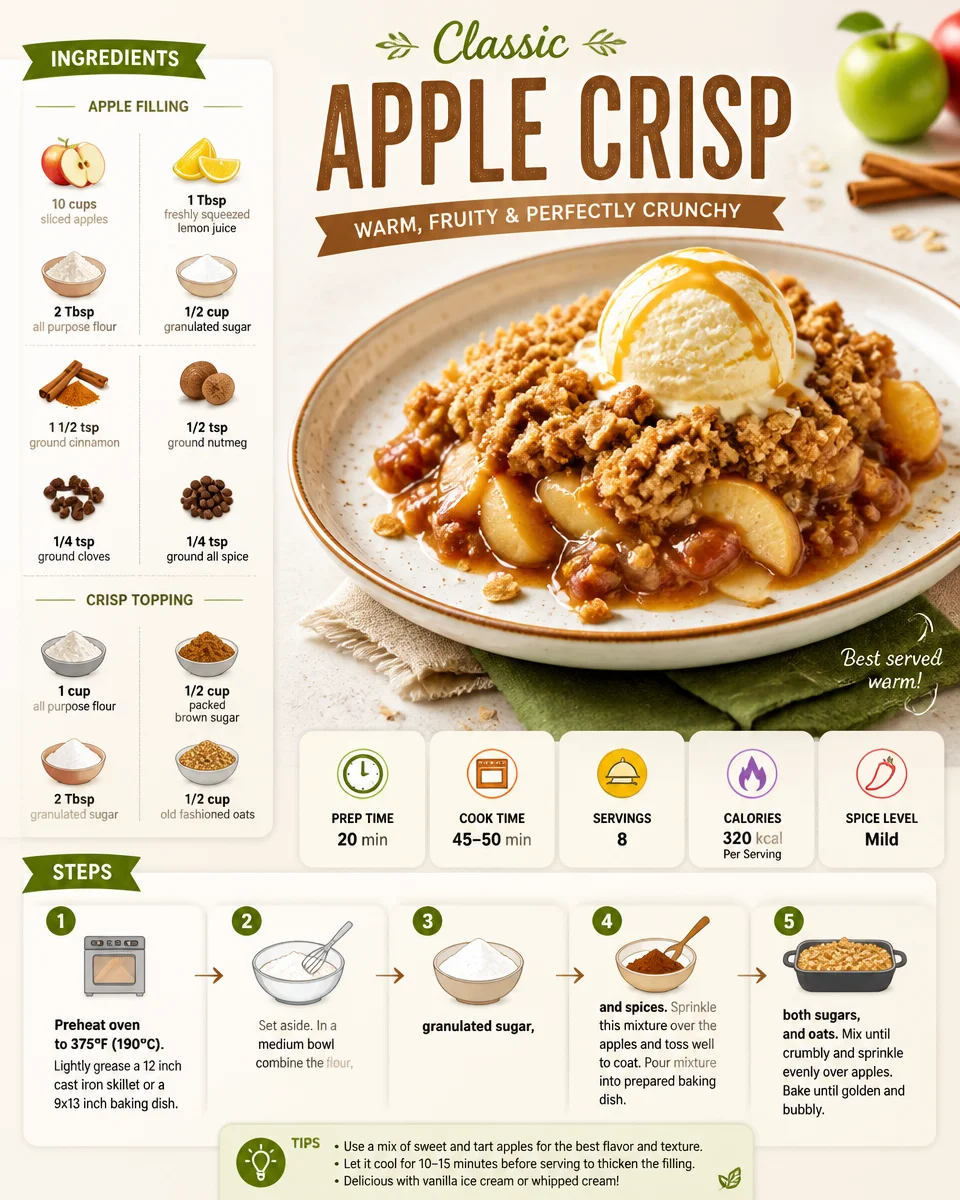
Nothing says cozy comfort quite like a warm, bubbling dish of homemade apple crisp. With its sweet and tart apple filling nestled beneath a buttery, crumbly topping, this classic dessert brings the flavors of autumn to your kitchen, no matter the season. Imagine the aroma of cinnamon dancing through the air as the dessert bakes, beckoning everyone to the table. Each bite offers a delightful contrast of textures, from the tender, juicy apples to the crispy oat topping that adds a satisfying crunch. Serve it warm, drizzled with rich salted caramel and a scoop of vanilla ice cream for an indulgent treat that makes any occasion special. It’s not just a dish; it’s a hug in a bowl that evokes memories and brings loved ones together.
Quick Answer
Apple crisp is a delightful dessert featuring sweetened apples beneath a crispy oat topping, often served warm with caramel sauce and ice cream. It’s easy to make and perfect for gatherings!
Why You’ll Love This Recipe
This apple crisp recipe is sure to become a family favorite for several reasons:
- Simple ingredients that are easy to find, ensuring a quick prep.
- Classic flavors combined to create a comforting dessert everyone loves.
- Warm, crispy texture that provides a perfect contrast to the tender apples.
- Serve it with vanilla ice cream or custard for a decadent touch.
- Perfect for meal prep, making it easy to enjoy any day of the week.
- Customizable topping options to fit your taste preferences.
What Makes This Recipe Special
This apple crisp stands out not only for its delicious flavor but also for its wonderful texture. The combination of tart apples and a spiced, buttery oat topping creates a perfect balance that satisfies cravings for both sweetness and richness. The use of freshly squeezed lemon juice brightens the apples, enhancing their natural flavor. The added pecans deliver a delightful crunch, while the salted caramel provides just the right amount of indulgence. Together, these components make this recipe a comforting classic that resonates with nostalgia and warmth.
Kitchen Tools You’ll Need
- Cast Iron Skillet – Ideal for baking and serving the crisp, providing even heat distribution.
- Baking Dish – A versatile dish for even cooking and easy cleanup.
- Mixing Bowls – Helps combine ingredients effectively without mess.
- Pastry Blender – Useful for cutting in the butter to achieve a crumbly topping.
- Measuring Cups and Spoons – Essential for accurate ingredient measurements.
Ingredients
sliced apples: Provide a juicy, sweet-tart base for the dessert, creating a succulent filling.
freshly squeezed lemon juice: Adds brightness and balances the sweetness of the apples.
all-purpose flour: Acts as a thickener for the apple filling, contributing to the overall texture.
granulated sugar: Sweetens the apple filling and enhances its natural flavors.
ground cinnamon: Infuses warmth and spice, making it a comforting dessert option.
ground nutmeg: Adds a touch of warmth and complexity to the flavor profile.
ground cloves: Offers a hint of earthiness, rounding out the spice mix.
ground all spice: Introduces a unique blend of warm spices, enhancing the apple’s flavor.
brown sugar: Contributes moisture and deepens the sweetness of the topping.
old-fashioned oats: Provides a hearty crunch in the topping, balancing the tender apples.
chopped pecans: Adds richness and texture, complementing the oats in the topping.
baking powder: Gives the topping a lightness, ensuring it remains crumbly.
unsalted butter: Essential for richness in the topping, creating a buttery crumb.
salted caramel sauce: Adds a luxurious finishing touch, blending sweet and salty flavors.
flaky sea salt: Optional sprinkle to enhance flavors when serving.
vanilla ice cream: Optional accompaniment that pairs perfectly with warm apple crisp.
Ready to cook? Scroll to the recipe card below for exact measurements.
How to Make Apple Crisp
Phase 1 – Prep
STEP 1. Preheat the oven. Set your oven to 375 degrees Fahrenheit to ensure even baking.
STEP 2. Prepare the dish. Lightly grease a 12-inch cast iron skillet or 9×13 inch baking dish.
STEP 3. Toss the apples. Place the sliced apples in a bowl and toss them with lemon juice; set aside.
STEP 4. Mix the dry ingredients. In another bowl, combine flour, granulated sugar, and spices.
STEP 5. Coat the apples. Sprinkle the flour mixture over the apples and toss to coat.
STEP 6. Set aside. Pour the apple mixture into the prepared baking dish.
Phase 2 – Cook
STEP 7. Combine topping ingredients. In a large bowl, mix flour, both sugars, oats, chopped pecans, baking powder, nutmeg, and cinnamon.
STEP 8. Incorporate butter. Cut in the cold butter using a pastry blender or two forks until the mixture resembles coarse meal.
STEP 9. Sprinkle topping. Evenly distribute the topping mixture over the apple layer.
STEP 10. Bake in the oven. Place the dish in the preheated oven and bake for 45 to 50 minutes, until the topping is golden and apples are tender.
Phase 3 – Serve
STEP 11. Finishing touches. Drizzle with salted caramel sauce and serve warm, optionally with a sprinkle of flaky sea salt and a scoop of ice cream.
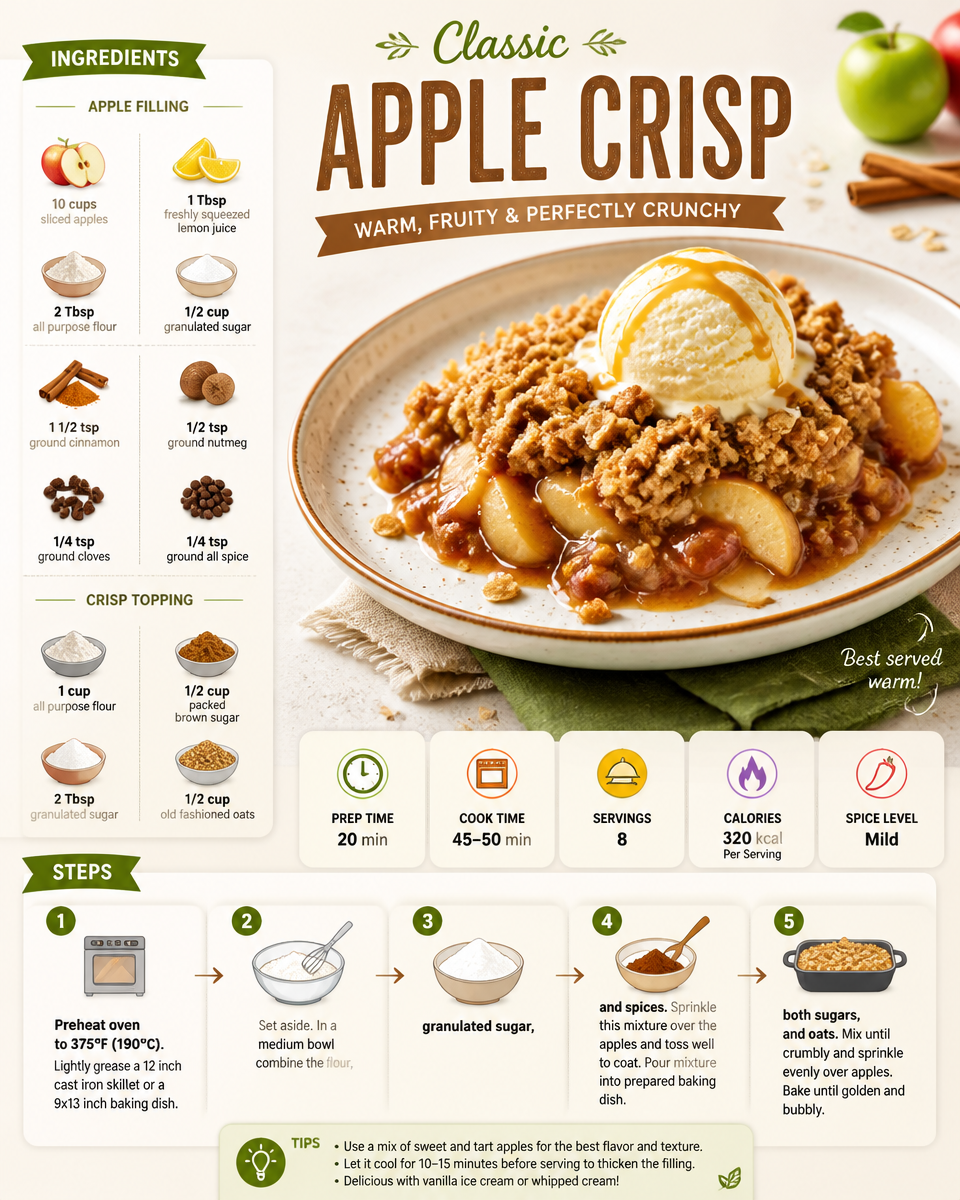
Why This Recipe Works
The beauty of this recipe lies in the balance of textures and flavors. The tender apples create a juicy base that is enhanced by the sweetness of both granulated and brown sugar. This combination prevents the filling from becoming overly watery while maximizing sweetness. The spiced oat topping, with the addition of chopped pecans, provides a satisfying crunch that contrasts beautifully with the soft apples beneath. Baking the dish brings all these flavors together, allowing the spices to mingle and deepen. The baking process also caramelizes some sugars, enriching the overall taste experience.
Pro Tips
For the best results with your apple crisp:
- Use a mix of apple varieties for a more complex flavor; Granny Smith and Honeycrisp work well together.
- Let the apples sit with lemon juice and sugar for a few minutes to enhance their natural sweetness and flavor.
- Chill your butter before cutting it into the dry ingredients for a flakier topping.
- Don’t over-mix your topping; a few lumps of butter will keep it crumbly.
- If you want a more fragrant topping, consider adding a bit of vanilla extract to the mixture.
- Serve it warm; the flavors meld and develop further as it cools slightly after baking.
Common Mistakes to Avoid
Here are some potential pitfalls when making apple crisp:
- Mistake: Using only one type of apple.
- Why it happens: Many home cooks don’t realize the importance of combining flavors.
- How to fix it: Use a variety of apples to create a more balanced filling.
- Mistake: Overbaking the crisp.
- Why it happens: It can be hard to judge when it’s done in the oven.
- How to fix it: Keep an eye on the crisp in the last 10 minutes; it should be golden brown but not burnt.
- Mistake: Not letting the apples sit with sugar beforehand.
- Why it happens: Some may want to skip this step to save time.
- How to fix it: Always allow time for the apple mixture to marinate.
Variations
- Substitute chopped walnuts for pecans for a different nutty flavor.
- Use gluten-free flour in the topping for a gluten-free version.
- Add dried cranberries or raisins for a fruity twist.
- Incorporate spices like ginger or cardamom for a unique flavor profile.
- Top with whipped cream instead of ice cream for a lighter option.
Nutrition Highlights
| Nutrient | Role |
|---|---|
| Fiber | Supports digestive health and helps maintain a feeling of fullness. |
| Vitamins | Apples provide vitamin C, promoting immune function and skin health. |
| Healthy Fats | Pecans contribute healthy fats, supporting heart health and satiety. |
Serving Ideas
Apple crisp pairs wonderfully with various side options. Serve it warm or at room temperature, topped with a generous scoop of vanilla ice cream for an indulgent treat. It can also be paired with whipped cream or crème fraîche for a lighter finish. For an extra layer of flavor, consider serving it alongside a rich custard or warm caramel sauce. This dessert is equally delightful at potlucks, holiday gatherings, or simply a cozy night at home.
Best Occasions for This Recipe
This comforting dessert shines brightest during family gatherings, fall festivals, and cozy winter evenings. Its nostalgic flavors and aromas make it the perfect ending to Thanksgiving dinners or holiday feasts. Apple crisp also serves as a delicious celebratory treat for birthdays or casual get-togethers with friends, effortlessly bringing everyone together over a shared love for warm desserts.
Meal Prep & Storage
Meal Prep
To prepare in advance, slice your apples and toss them with lemon juice and sugar, then store in the refrigerator for up to a day before baking. You can also prep the topping mixture and keep it in the fridge, ready to sprinkle on the apples just before baking.
Refrigeration
If you have leftovers, cover the apple crisp and store it in the fridge for up to three days. Reheat portions in the microwave or oven before serving.
Freezing
For longer storage, you can freeze unbaked apple crisp. Before baking, cover the dish tightly with aluminum foil or plastic wrap and store it for up to three months. Bake straight from the freezer, adding a few extra minutes to the cooking time.
Reheating
To reheat, simply place the crisp in the oven at a low temperature until warmed through. You can also use the microwave for single servings, ensuring not to overheat to maintain texture.
{image_template}
FAQs
How can I make this apple crisp gluten-free?
You can substitute all-purpose flour with a gluten-free blend to make the topping safe for gluten-sensitive individuals.
Can I use other fruits besides apples?
Yes! Pears, berries, or a combination of fruits can be used for a tasty twist on the classic recipe.
How do I store leftover apple crisp?
Cover the apple crisp and store it in the refrigerator for up to three days, or freeze it for longer storage.
Can I make this recipe ahead of time?
Absolutely! The apple filling and topping can be prepared separately and assembled just before baking.
What should I serve with apple crisp?
It’s delicious with vanilla ice cream, whipped cream, or custard for a real treat. Salted caramel sauce is also a favorite addition.
Save This Recipe for Later
Love this apple crisp recipe? Be sure to pin it for later, and share it with friends and family to enjoy together!
Conclusion
This apple crisp recipe is an easy and satisfying way to enjoy the flavors of autumn any time of year. Whether you’re gathering with friends, celebrating a special occasion, or enjoying a cozy night in, this dessert brings warmth and delight to the table. With its blend of sweet, tart, crunchy, and creamy elements, it’s a treat that promises to please every palate. Don’t forget to take a moment to enjoy the delightful aroma as it bakes—it’s a heartwarming experience that you’ll want to repeat time and time again!
Apple Crisp
Ingredients
Method
- Preheat the oven to 375°F (190°C).
- Grease a 12-inch cast iron skillet or a 9x13 inch baking dish.
- In a bowl, toss the sliced apples with lemon juice and set aside.
- In another bowl, combine flour, granulated sugar, cinnamon, nutmeg, cloves, and all spice.
- Sprinkle the flour mixture over the apples and toss to coat.
- Pour the apple mixture into the prepared baking dish.
- In a large bowl, mix oats, brown sugar, flour, chopped pecans, baking powder, nutmeg, and cinnamon.
- Cut the cold butter into the dry mixture until it resembles coarse meal.
- Evenly distribute the topping mixture over the apple layer.
- Bake in the preheated oven for 45 to 50 minutes, until the topping is golden and apples are tender.
- Drizzle with salted caramel sauce and serve warm with optional flaky sea salt and ice cream.