

As the leaves begin to turn and the air fills with the scent of cinnamon and nutmeg, the craving for classic pumpkin pie undoubtedly surfaces. However, for those watching their carbs or following a keto lifestyle, the traditional recipe can feel out of reach. Enter the Creamy Keto Pumpkin Pie—a delicious solution that satisfies your taste buds without straying from your health goals. This pie is designed for those seeking a warm, nostalgic treat that remains aligned with dietary preferences, so you can enjoy family gatherings and special occasions without the guilt. Let’s dive into how this recipe can become a staple in your home.
Kitchen Frustration That Makes This Recipe a Lifesaver
Many of us experience kitchen fatigue, especially during busy seasons or when trying to stick to a meal plan. It can feel overwhelming to balance healthy eating with the demands of daily life. If you’re like me, you might find yourself torn between wanting to indulge in familiar flavors while also being mindful of your health. This Creamy Keto Pumpkin Pie serves as a refreshing solution to that dilemma.
With ingredients that are both easy to find and budget-friendly, this pie allows you to savor the comforting essence of fall without compromising your macros. It’s especially ideal for family gatherings when you want to provide a scrumptious dessert that everyone can enjoy. Plus, this recipe’s simple preparation process saves time in the kitchen—allowing you more moments to connect with loved ones rather than being stuck at the stove.
Why This Creamy Keto Pumpkin Pie (Optional Crust) Works So Well
Quick Answer: This Creamy Keto Pumpkin Pie combines full-fat coconut milk and sweet pumpkin puree, providing a rich texture and delightful flavor while keeping carbs low and ensuring flavor with every bite.
Unlike traditional pumpkin pies loaded with sugar and carbs, this keto-friendly version uses wholesome ingredients like coconut flour and stevia glycerite. The creamy filling is further enhanced with warm spices, making it not only a great low-carb option but also a fantastic way to satisfy your sweet tooth. The texture is silky and smooth—perfect for those who enjoy a rich dessert.
In just a few simple steps, you can whip up a pie that is not only delicious but also supportive of your nutrition goals, making it a smart choice for anyone looking to enjoy seasonal flavors while remaining health-conscious.
Ingredients, Substitutions & Foolproof Tips
- 1 teaspoon coconut oil (for the pan): Used to prevent sticking; can substitute with butter if desired.
- 3 large eggs: Essential for setting the pie; no substitutes recommended.
- 15 ounces pure pumpkin puree (unsweetened): A must-have for flavor and creaminess; avoid pumpkin pie filling.
- 1 ½ teaspoons stevia glycerite (equals ½ cup of sugar): For sweetening; can replace with other keto-friendly sweeteners as needed.
- 1 tablespoon pumpkin pie spice: Provides warmth and fall flavor; homemade blends can also be used.
- 1 tablespoon vanilla extract: Enhances flavor; no substitutes.
- 1 cup canned coconut milk (full-fat, unsweetened): Gives creaminess; can use heavy cream or almond milk (though it will change the flavor slightly).
- 2 tablespoons coconut flour (14 grams): A low-carb thickener; can substitute with almond flour for a different texture.
Step-by-Step Directions
- Preheat the oven and prepare the pan: Preheat your oven to 350°F. Grease a 9-inch pie plate with coconut oil to ensure easy removal after baking.
- Whisk the eggs: In a large bowl, using a hand whisk, lightly whisk the eggs until they are fully mixed.
- Combine pumpkin and spices: Add the pumpkin puree, stevia glycerite, pumpkin pie spice, and vanilla extract to the eggs. Whisk vigorously until everything is well incorporated.
- Add coconut milk: Shake the coconut milk can well before opening. Stir the contents thoroughly, measure 1 cup, and add it to the pumpkin mixture. Mix until smooth and free of lumps.
- Incorporate coconut flour: Gradually whisk in the coconut flour until fully combined, ensuring no dry patches remain.
- Transfer to pie plate: Using a rubber spatula, pour the mixture into the prepared pie plate and spread it evenly.
- Bake the pie: Place the pie in the oven and bake until the center appears set, with just a slight jiggle, about 40-45 minutes.
- Cool and refrigerate: Remove from the oven and let the pie cool on a cooling rack for 2 hours. Cover the pan with plastic wrap and refrigerate for at least 2 more hours (preferably overnight) before slicing and serving.
- Slice and serve: When ready to serve, gently run a knife along the edges to release it from the pan. Use a sharp knife to cut slices, carefully sliding a cake server underneath each piece.
Common Mistakes to Avoid & Pro Tips
- Mistake: Overbaking the pie will lead to a dry texture.
- Fix: Keep an eye on it, removing from the oven when it’s set but still slightly jiggly in the center.
- Mistake: Not whisking the coconut milk well could lead to lumps.
- Fix: Ensure to shake the can and thoroughly stir before measuring.
- Mistake: Using pumpkin pie filling instead of pure pumpkin puree.
- Fix: Always check labels to avoid added sugars and spices.
Pro Tips:
- Let the pie cool completely before refrigerating; this ensures the best texture.
- For a deeper flavor, allow the pie to sit overnight; flavors continue to develop.
- Experiment with different low-carb sweeteners until you find your favorite.
Serving, Storage & Freezer Guide
How to Serve Creamy Keto Pumpkin Pie (Optional Crust)
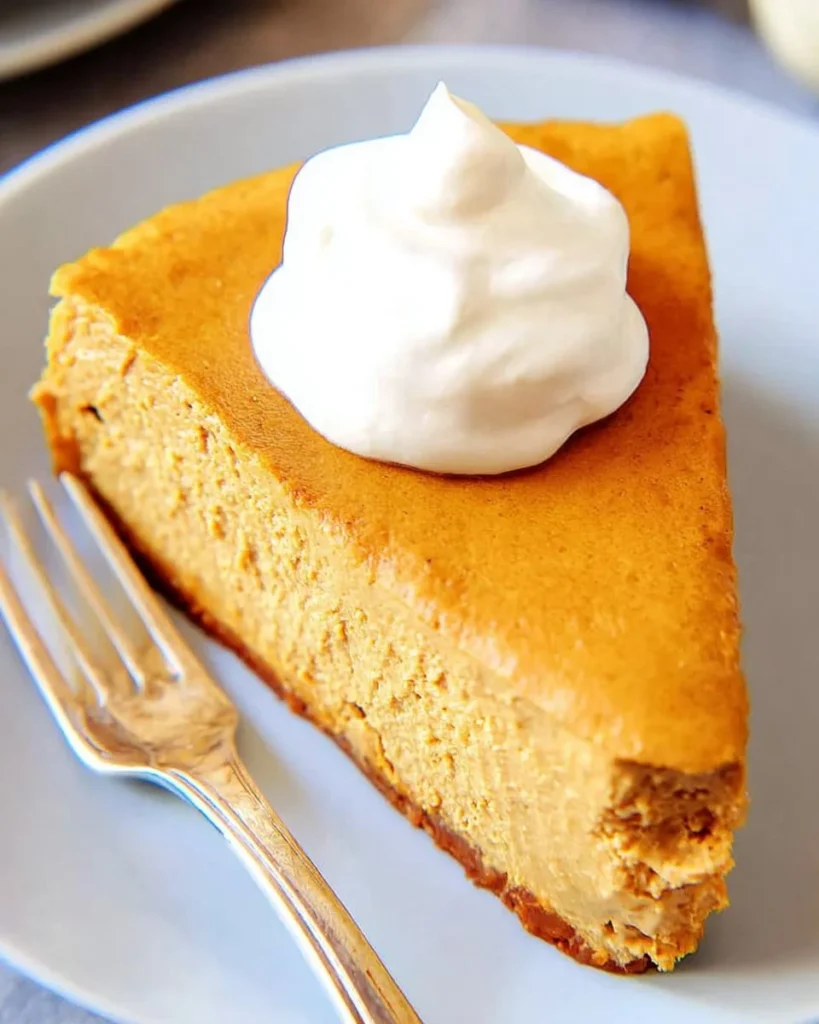
This pie is delightful on its own but pairs wonderfully with whipped cream—consider a keto-friendly version made with heavy cream and a sweetener. Garnish with a sprinkle of additional pumpkin pie spice or finely chopped nuts for added texture.
It’s an excellent dessert for family gatherings, holiday dinners, or even a cozy night in. Present it with pride, knowing it caters to various dietary needs while remaining delicious.
How to Store Creamy Keto Pumpkin Pie (Optional Crust)
To preserve its freshness, store any leftovers in the refrigerator. It’s best to keep it covered with plastic wrap to prevent drying out. The pie can last for up to 4-5 days in the fridge, making it a great candidate for meal prep.
Can You Freeze Creamy Keto Pumpkin Pie (Optional Crust)?
Yes, you can freeze this Creamy Keto Pumpkin Pie! Wrap it tightly in plastic wrap and then in foil to protect against freezer burn. It’s best to consume it within a month, but it can last for up to three months if properly stored. When you’re ready to enjoy it, thaw it in the refrigerator overnight before serving.
Frequently Asked Questions
Can I use a different sweetener besides stevia?
Yes, you can substitute stevia glycerite with other low-carb sweeteners like erythritol or monk fruit, just be sure to adjust the amount according to the product’s sweetness level.
Is this pie gluten-free?
Yes, this recipe is gluten-free due to the use of coconut flour and the absence of traditional wheat-based ingredients.
How can I enhance the flavor?
Consider adding a dash of salt or a touch of almond extract along with the vanilla for an extra depth of flavor.
What can I serve with this pie?
Aside from whipped cream, it pairs beautifully with coffee or chai tea, making it a perfect after-dinner treat.
Conclusion
The Creamy Keto Pumpkin Pie (Optional Crust) blends nostalgia with a modern take on a classic favorite, allowing you to indulge without the extra carbs. It’s more than just dessert; it’s an invitation to gather around the table and create memories while adhering to your health journey. If this recipe reminds you of someone you love, share it with them. Your memories keep recipes alive.
Creamy Keto Pumpkin Pie
Ingredients
Method
- Preheat your oven to 350°F. Grease a 9-inch pie plate with coconut oil.
- In a large bowl, whisk the eggs until fully mixed.
- Add pumpkin puree, stevia glycerite, pumpkin pie spice, and vanilla extract to the eggs. Whisk vigorously until well incorporated.
- Shake the coconut milk can well before opening. Add 1 cup to the pumpkin mixture and mix until smooth and free of lumps.
- Gradually whisk in the coconut flour until fully combined, ensuring no dry patches remain.
- Pour the mixture into the prepared pie plate and spread it evenly.
- Place the pie in the oven and bake for 40-45 minutes until the center appears set with a slight jiggle.
- Remove from the oven and let cool on a cooling rack for 2 hours. Cover with plastic wrap and refrigerate for at least 2 hours before slicing and serving.
- Run a knife along the edges to release from the pan. Use a sharp knife to cut slices and carefully slide a cake server underneath each piece.