

Creating a perfect breakfast or dessert can sometimes feel daunting, especially when you want to provide a touch of sweetness without compromising on health. With the seasonal hustle and bustle of family gatherings, it’s easy to face kitchen frustration that leads to repetitive meal choices. Enter Homemade Coconut Syrup – a solution that not only brings nostalgia but also allows you to stick to your nutrition goals while being budget-friendly. With its creamy texture and delightful flavor, this syrup is a heart-healthy option perfect for drizzling on pancakes, waffles, or even ice cream.
Kitchen Frustration That Makes This Recipe a Lifesaver
As busy women juggling family responsibilities and personal health, it’s common to feel overwhelmed. Perhaps you’ve found yourself in a cooking slump, repeatedly reaching for the same pre-packaged syrups filled with added sugars and artificial flavors. Such kitchen fatigue doesn’t nourish our bodies nor do they fulfill our cravings for something genuinely delightful.
Homemade Coconut Syrup stands out as a simple, yet impactful solution. It transforms ordinary meals into extraordinary experiences and helps you stay on track with your meal plan while feeding a crowd or impressing guests. The beauty of this recipe lies in its ease. Just a few wholesome ingredients come together to create a velvety syrup that is not only delicious but also fits seamlessly into your macro-balanced diet. So, the next time you’re feeling uninspired in the kitchen, remember this recipe, and watch it become a staple in your home.
Why This Homemade Coconut Syrup Works So Well
Quick Answer: This Homemade Coconut Syrup combines simple ingredients to create a sweet, creamy topping that offers a wholesome alternative to store-bought syrups, making it ideal for any family meal.
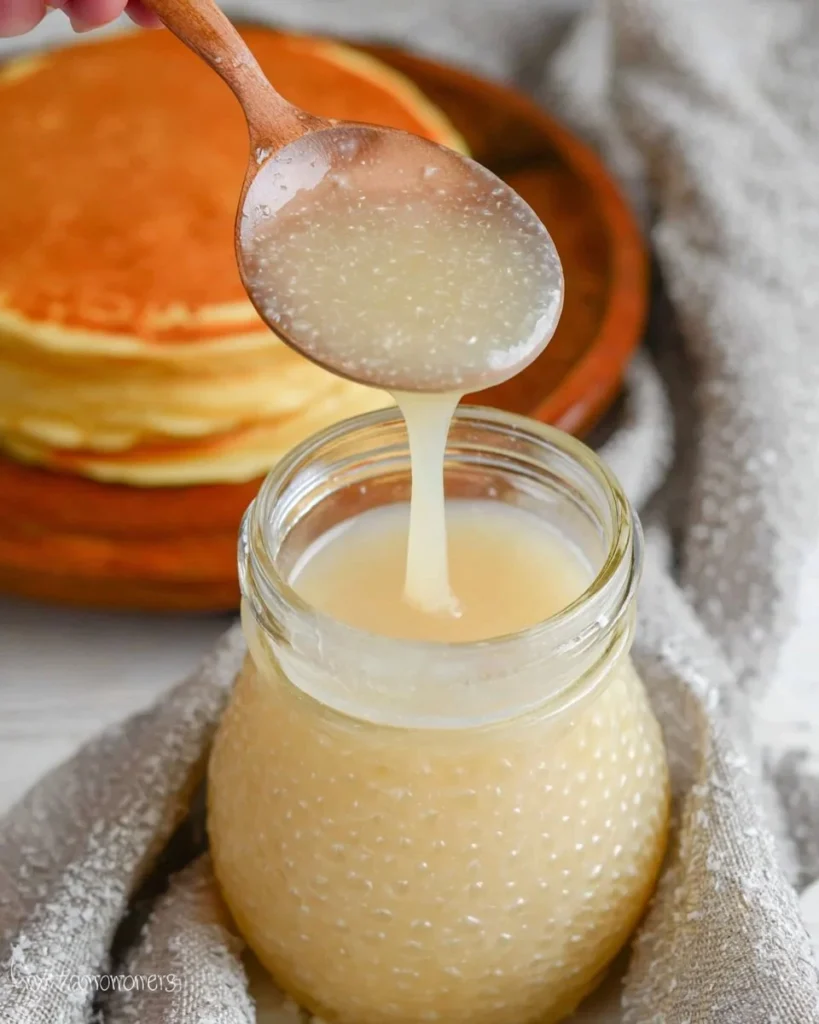
The emotional warmth of homemade is irreplaceable. Picture this: pouring a warm, rich coconut syrup over freshly made pancakes, watching your loved ones’ faces light up with joy. This syrup not only brings a delightful flavor that complements any breakfast but also adds a creamy texture that enhances the dining experience.
From a practical perspective, this recipe is time-saving, allowing you to whip up a batch in just 15 minutes. It’s also a fantastic way to use coconut milk creatively while keeping the calorie count in check. It’s the perfect union of sweetness and nostalgia – truly a treat that serves your family’s health and satisfies taste buds, all in one jar.
Ingredients, Substitutions & Foolproof Tips
- 1 cup coconut milk: This provides the creamy base for your syrup. Use full-fat for a richer taste, or light coconut milk for a lower-calorie option.
- 1 cup sugar: Regular granulated sugar works best, but you can substitute with coconut sugar for a different flavor profile.
- 1 teaspoon vanilla extract: Enhances the sweetness and adds a wonderful aroma. Use pure vanilla for the best flavor.
- 1/4 teaspoon salt: Balances the sweetness, ensuring a fuller flavor.
Tip: You can infuse this syrup with additional flavors by adding a cinnamon stick or a splash of almond extract during cooking.
Step-by-Step Directions
- Combine Coconut Milk and Sugar: In a saucepan, combine 1 cup of coconut milk with 1 cup of sugar. Stir gently as you bring the mixture to a boil.
- This step is crucial; you want the sugar to dissolve completely to avoid any graininess in your syrup.
- Cook Over Medium Heat: Cook the mixture over medium heat, stirring continuously until the sugar is fully dissolved.
- Around 3-5 minutes will suffice. You’ll notice the syrup beginning to thicken slightly.
- Add Vanilla Extract and Salt: Once the sugar is dissolved, add 1 teaspoon of vanilla extract and 1/4 teaspoon of salt.
- This addition enhances the flavor and aroma, making your syrup even more enticing.
- Bring to a Simmer: Allow the mixture to come to a gentle simmer, stirring occasionally.
- Let it simmer for about 10-15 minutes. You will see the syrup thicken to a pourable consistency.
- Cool Before Serving: Remove from heat and allow the syrup to cool completely before transferring it to a glass jar.
- Cooling will help thicken the syrup even more as it sets.
Common Mistakes to Avoid & Pro Tips
- Mistake: Using low-quality coconut milk.
- Fix: Always opt for a brand that is creamy and free from additives.
- Mistake: Not stirring frequently while cooking.
- Fix: Stay attentive to prevent the syrup from burning or sticking to the bottom.
- Pro Tip: Adjust the sweetness by adding more or less sugar based on your personal preference or dietary needs.
- Pro Tip: This syrup can easily be made ahead of time for meal prep or entertaining, storing well in the refrigerator.
Serving, Storage & Freezer Guide
How to Serve Homemade Coconut Syrup
Homemade Coconut Syrup can elevate many dishes. Drizzle it generously over fluffy pancakes or waffles for a delightful breakfast treat. It can also be served alongside fresh fruits or even over yogurt for a nutritious snack. Experiment with pairing it on dessert options like ice cream or rice pudding to satisfy those sweet cravings.
How to Store Homemade Coconut Syrup
Store your coconut syrup in an airtight jar in the refrigerator. It should last about 2-3 weeks. Make sure to give it a good shake or stir before using, as it may separate over time.
Can You Freeze Homemade Coconut Syrup?
Yes, you can freeze Homemade Coconut Syrup. Portion it into ice cube trays for easy use later. Simply thaw what you need in the refrigerator overnight or heat it gently in a saucepan when ready to use. This allows you to enjoy this sweet treat without it going to waste, fitting perfectly into a budget-friendly kitchen routine.

Frequently Asked Questions
Question 1
Can I use a sugar substitute in this coconut syrup recipe?
Yes, you can experiment with sugar substitutes, but ensure they are suitable for cooking at high temperatures. Options like agave syrup or monk fruit sweetener could alter the flavor, so start with small amounts.
Question 2
What if my syrup is too thin?
If you find your syrup isn’t thickening as expected, continue simmering it for a few more minutes. Patience is key as the syrup thickens gradually.
Question 3
Is this syrup suitable for vegan diets?
Yes, this Homemade Coconut Syrup is entirely plant-based, making it a wonderful option for vegans and those looking for dairy-free alternatives.
Question 4
How can I use this syrup beyond breakfast?
Get creative! This syrup is versatile and can be drizzled over desserts, used as a sweetener in smoothies, or incorporated into dressings for a unique flavor.
Conclusion
In the world of busy kitchens and evolving meal plans, Homemade Coconut Syrup is a heart-healthy, budget-friendly creation that brings joy to every family gathering. Full of flavor and easy to prepare, it stands as a delightful solution to cooking fatigue. If this recipe reminds you of someone you love, share it with them. Your memories keep recipes alive.
Homemade Coconut Syrup
Ingredients
Method
- In a saucepan, combine 1 cup of coconut milk with 1 cup of sugar. Stir gently as you bring the mixture to a boil.
- Cook the mixture over medium heat, stirring continuously until the sugar is fully dissolved, about 3-5 minutes.
- Add 1 teaspoon of vanilla extract and 1/4 teaspoon of salt once the sugar is dissolved.
- Allow the mixture to come to a gentle simmer, stirring occasionally, for about 10-15 minutes, until the syrup thickens to a pourable consistency.
- Remove from heat and allow the syrup to cool completely before transferring it to a glass jar.