

There’s something truly comforting about the smell of freshly baked bread wafting through the house. Homemade Soft Dinner Rolls are not just a delightful treat; they hold the power to bring families together around the dinner table. For those of us who may feel the weight of everyday meal preparation, this recipe serves as a reassuring solution. Deliciously soft, warm, and adaptable, these rolls can enhance any meal while easing the stress of feeding a crowd.
Kitchen Frustration That Makes This Recipe a Lifesaver
As a busy woman juggling work, family, and daily life, it’s easy to feel overwhelmed when it comes to meal planning. Cooking fatigue creeps in, leaving you reaching for pre-packaged options that often don’t hit the mark in flavor or nutrition. Homemade Soft Dinner Rolls can be a lifesaver on these days. With their simple ingredients and step-by-step approach, they allow you to provide a wholesome, comforting side that your loved ones will rave about.
Take a moment to remember the joy of sharing bread at family gatherings, where stories are exchanged, and laughter fills the air. By adding these soft dinner rolls to your meal plan, you not only satisfy hungry bellies but also nourish those emotional connections. Quick tip: keep this recipe handy for last-minute dinners or family events. You’ll be prepared to whip up a batch that feels both nostalgic and nutritious.
Why This Homemade Soft Dinner Rolls Works So Well
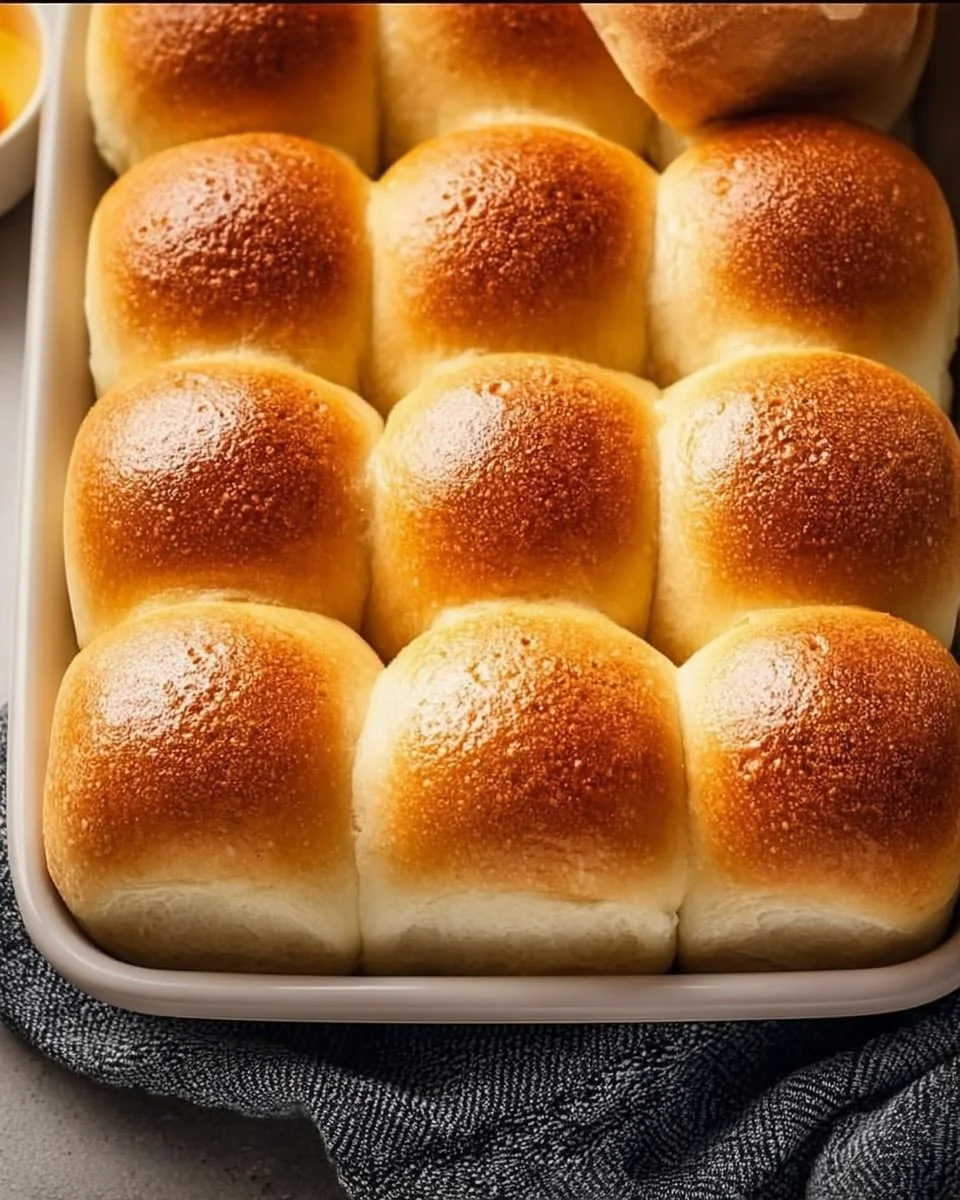
Quick Answer: These rolls have a fluffy texture, a subtly sweet flavor, and a budget-friendly ingredient list.
Homemade Soft Dinner Rolls are known for their fluffy, tender texture, which comes from a perfect blend of ingredients. When made from scratch, they carry an aroma that fills your kitchen and nourishes your soul. The use of warm milk activates the yeast beautifully, ensuring each roll rises perfectly.
Health-conscious eaters will appreciate that these rolls allow for portion control as opposed to buying pre-packaged options, often loaded with preservatives. Plus, the cooking process is incredibly time-saving since it’s mostly hands-off. By the time you’re gathering for dinner, not only will your table be adorned with warm rolls, but you will also feel accomplished in meeting your family’s nutrition goals.
Ingredients, Substitutions & Foolproof Tips
- 4 cups all-purpose flour: Provides a sturdy base.
- 1 cup warm milk: Activates yeast; aim for lukewarm, not hot.
- 2 1/4 tsp active dry yeast: The key rising agent.
- 3 tbsp granulated sugar: Adds sweetness and nourishes the yeast.
- 1 tsp salt: Balances flavors.
- 1 large egg: Binds the dough and enriches the flavor.
- 4 tbsp melted butter: Adds richness and helps with texture.
- 2 tbsp oil: Keeps rolls soft and fresh longer.
Tip: If you are out of any ingredient, substitutes like almond milk for regular milk or whole wheat flour for all-purpose can work, although the texture may vary slightly.
Step-by-Step Directions
- Warm the milk: Heat 1 cup of milk until lukewarm (not hot). Combine with 3 tablespoons of sugar and the 2 1/4 teaspoons of active dry yeast in a bowl. Allow to sit for 5 minutes until foamy.
- Combine wet ingredients: Add 1 egg, 4 tablespoons of melted butter, 2 tablespoons of oil, and 1 teaspoon of salt to the bubbly yeast mixture. Stir until thoroughly combined.
- Add flour: Gradually incorporate the 4 cups of flour, mixing until a soft, slightly tacky dough forms. It should hold together but not stick to your fingers.
- Knead the dough: Transfer the dough to a floured surface and knead for 8 to 10 minutes, or until the dough is smooth and elastic to the touch.
- First rise: Place the dough in a greased bowl, cover it with a cloth, and let it rise for 1 hour, or until doubled in size.
- Shape the rolls: Once risen, punch down the dough and divide it into 12 equal pieces. Shape each piece into a ball and place in a greased baking dish.
- Second rise: Let the shaped rolls rise for an additional 30 minutes.
- Bake: Preheat the oven to 375°F. Bake the rolls for 20 to 25 minutes until golden brown, brushing with melted butter during the last few minutes for a glossy finish.
Common Mistakes to Avoid & Pro Tips
Common Mistakes:
- Using hot milk: This can kill the yeast; ensure it’s lukewarm.
- Not kneading enough: For the best texture, knead thoroughly.
- Overbaking: Keep an eye on them; they should be golden, not dark brown.
Pro Tips:
- Make-ahead option: Prepare the dough up to the shaped rolls, then refrigerate them overnight. Allow to come to room temperature before baking.
- Flavor variations: Add herbs, cheese, or garlic to the dough for a twist.
- Use a kitchen scale: For precision in measuring ingredients.
Serving, Storage & Freezer Guide
How to Serve Homemade Soft Dinner Rolls
These dinner rolls are a versatile addition to any meal. Serve them alongside hearty soups, pasta, or within a family-style feast. You can also use them for sliders by slicing them in half and adding your favorite fillings. Their fluffy texture pairs beautifully with spreads like butter, honey, or jam, making them a delightful breakfast option too.
How to Store Homemade Soft Dinner Rolls
To keep your homemade rolls fresh, store them in an airtight container at room temperature. They can last for about 2 to 3 days, though their texture may slightly change as time goes on. If you prefer them to stay soft, you can wrap them in a kitchen towel before placing them in the container.
Can You Freeze Homemade Soft Dinner Rolls?
Absolutely! These rolls freeze wonderfully. Once cooled, place them in a zip-top bag, squeezing out as much air as possible. They can be frozen for up to 3 months. When ready to enjoy, simply let them thaw on the counter or warm them in the oven at a low temperature for that fresh-baked feel.
placeholder
Frequently Asked Questions
How can I tell when the dough has risen enough?
The dough should double in size and feel light and airy when you press it gently with your finger. A small indentation should remain, indicating it’s ready for the next step.
Can I make these rolls without eggs?
Yes! You can use a flaxseed meal mixture or applesauce as substitutes for eggs if needed, although this may change the texture a bit.
What’s the best way to reheat leftover rolls?
For warm, fresh-tasting rolls, place them in the oven at 350°F for about 5 to 10 minutes, covered in foil to prevent drying out.
Can I add ingredients like cheese or herbs to the dough?
Certainly! Incorporating grated cheese or herbs will enhance flavor and make these rolls even more delightful.
Conclusion
Homemade Soft Dinner Rolls are more than just a culinary feat; they are a heartfelt way to create memories and bring your family together. Easy to make and incredibly satisfying, they align perfectly with your health goals while being a comforting treat. If this recipe reminds you of someone you love, share it with them. Your memories keep recipes alive.

Homemade Soft Dinner Rolls
Ingredients
Method
- Warm the milk: Heat 1 cup of milk until lukewarm (not hot). Combine with 3 tablespoons of sugar and the 2 1/4 teaspoons of active dry yeast in a bowl. Allow to sit for 5 minutes until foamy.
- Combine wet ingredients: Add 1 egg, 4 tablespoons of melted butter, 2 tablespoons of oil, and 1 teaspoon of salt to the bubbly yeast mixture. Stir until thoroughly combined.
- Add flour: Gradually incorporate the 4 cups of flour, mixing until a soft, slightly tacky dough forms. It should hold together but not stick to your fingers.
- Knead the dough: Transfer the dough to a floured surface and knead for 8 to 10 minutes, or until the dough is smooth and elastic to the touch.
- First rise: Place the dough in a greased bowl, cover it with a cloth, and let it rise for 1 hour, or until doubled in size.
- Shape the rolls: Once risen, punch down the dough and divide it into 12 equal pieces. Shape each piece into a ball and place in a greased baking dish.
- Second rise: Let the shaped rolls rise for an additional 30 minutes.
- Bake: Preheat the oven to 375°F. Bake the rolls for 20 to 25 minutes until golden brown, brushing with melted butter during the last few minutes for a glossy finish.