
When was the last time you bit into something that transported you instantly to childhood? For many of us, it’s that first taste of a freshly baked cherry hand pie. As the flaky crust crumbles and the sweet, tart cherry filling explodes in your mouth, those familiar childhood memories of kitchen warmth and love come rushing back. But let’s face it—life can be hectic. Between juggling responsibilities and navigating the chaos of modern living, finding time to whip up a nostalgic treat like homemade cherry hand pies can feel nearly impossible.
Hi there! I’m Jacqueline, and baking has always been my refuge, a way to unwind and connect with those I love. I remember my grandmother’s kitchen filled with aromas that embraced you like a warm hug. It’s those moments, surrounded by family and sweet flavors, that have inspired me to create this Homemade Cherry Hand Pies recipe. Despite my busy schedule, I’ve learned how to embrace baking as a cherished ritual rather than a mere task, and today, I want to share that joy with you.
The Kitchen Frustration: Do You Crave Homemade Treats But Stressed for Time?
It seems the perfect hand pie is always an elusive treasure, often found only in quaint cafés or someone else’s home. I’ve certainly felt that frustration—it’s tough when cravings hit, yet the thought of a long baking session seems impossible. But here’s the good news: homemade cherry hand pies can be simple yet satisfying. Imagine the joy of having that flaky crust in your own kitchen, filled with the burst of cherry goodness, all baked to perfection.
When I finally learned to master hand pies, it felt like discovering a hidden gem. They’re quick to assemble, easy to make, and they bring a sense of accomplishment that’s hard to resist. I still remember the first time I served them at a gathering, watching people’s faces light up with each bite. That’s the magic of food—it has this incredible power to connect us.
Take it from me, baking these Homemade Cherry Hand Pies doesn’t have to be time-consuming. In the bustle of daily life, they offer a delicious and quick escape to simpler times. With just a handful of ingredients, you can create a piece of delightful nostalgia.
Reflecting on those memories, I always remind myself: Food is love, and these hand pies encapsulate that love beautifully.
Why Homemade Cherry Hand Pies Work So Well
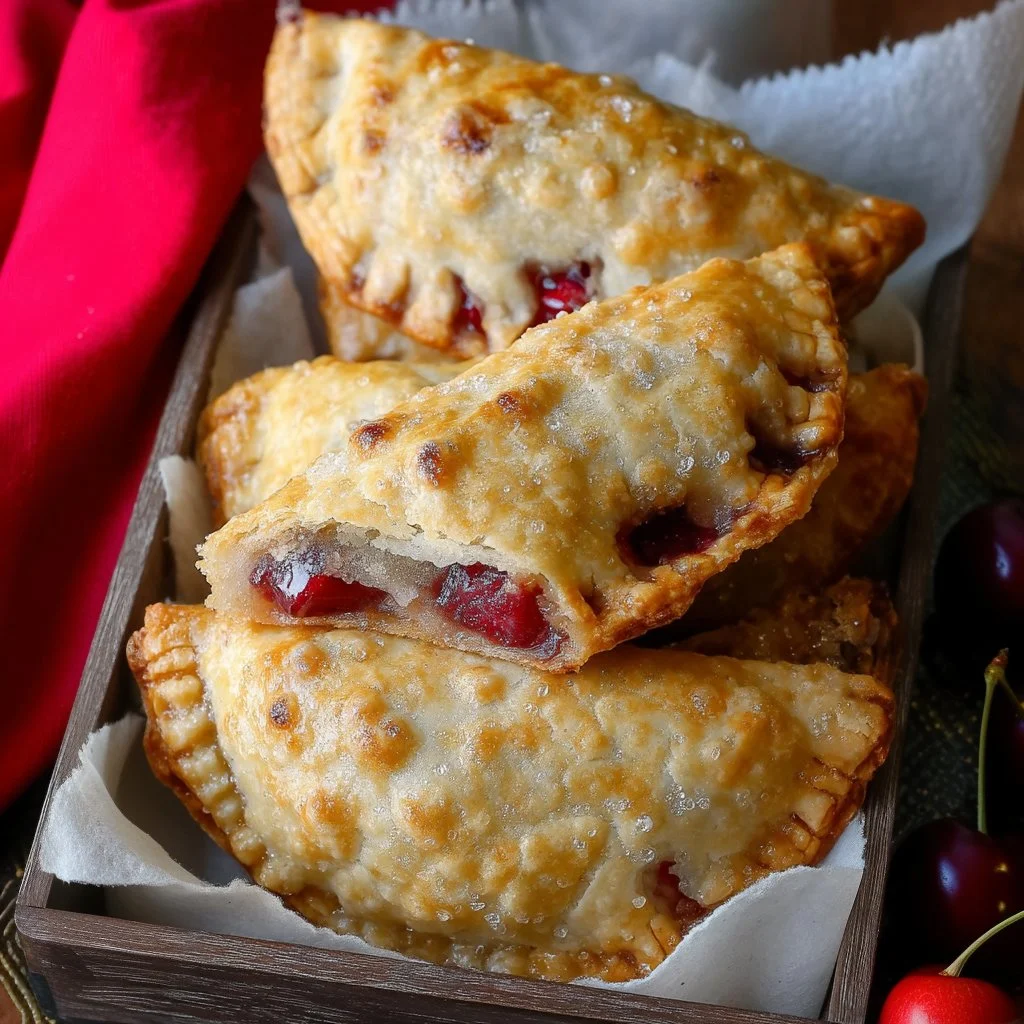
What sets these Homemade Cherry Hand Pies apart is their perfect balance of flaky crust and sweet, tart filling. The fresh flavors meld seamlessly to create an irresistible dessert that’s not just about satisfying your sweet tooth. It’s about reliving cherished memories and sharing history, one bite at a time.
Quick Answer: The secret to perfect Homemade Cherry Hand Pies is ensuring you seal the edges well to keep all that delicious filling inside!
This recipe works wonders because it’s versatile; you can use fresh cherries or a store-bought filling depending on the season and your schedule. And let’s not overlook how these little pockets of joy can revive long-lost connections; serve them at family gatherings, and watch the world slow down as everyone shares stories over warm pies.
Ingredients, Substitutions & Foolproof Steps
Here’s what you’ll need to create these delightful homemade cherry hand pies:
- 1 pie crust — The star of the show; you can use a store-bought crust for ease or make your own for that home-baked feel.
- 1 cup cherry filling — Go for fresh cherries in season or a quality canned filling for simplicity.
- 1 egg (for egg wash) — This gives your pies that beautiful golden sheen; vegan alternatives like almond milk can work too.
- Sugar (for sprinkling) — Adds that sweet crunch on the surface; feel free to use coarse sugar for a more pronounced effect.
- 1 tablespoon butter (melted) — A finishing touch that adds richness; optional, but highly recommended!
Directions / Steps:
- Preheat the oven to 375°F (190°C).
- Roll out the pie crust on a floured surface and cut it into squares.
- Place a spoonful of cherry filling in the center of each square.
- Fold the square over to create a triangle and seal the edges with a fork.
- Brush the top with egg wash and sprinkle with sugar.
- Bake for about 20-25 minutes or until golden brown.
- Remove from the oven and brush with melted butter. Allow to cool before serving.
Common Mistakes to Avoid
- Not sealing the edges properly: Make sure your edges are well-sealed so the filling doesn’t leak out.
- Overfilling: Use just enough filling to avoid spills; a spoonful is plenty!
- Skipping the egg wash: This crucial step ensures that golden finish that makes these pies irresistible.
Pro Tips:
- Chill the crust before rolling for easier handling.
- For an extra pop of flavor, add a splash of vanilla extract to the cherry filling.
- Experiment with spices; a sprinkle of cinnamon or nutmeg can add depth to the pie’s flavor profile.
How to Serve Homemade Cherry Hand Pies
These comforting bites can be served warm or at room temperature, making them perfect for picnics, birthday parties, or cozy family nights. Pair them with a scoop of vanilla ice cream or a dollop of whipped cream for a delicious treat.
How to Store Homemade Cherry Hand Pies
To keep your hand pies fresh, store them in an airtight container in the fridge for up to three days. They’re best enjoyed warm, so consider reheating them briefly in the oven to restore that flaky texture.
Can You Freeze Homemade Cherry Hand Pies?
Absolutely! These hand pies freeze beautifully. Simply place them in a single layer on a baking sheet, freeze until solid, then transfer to a freezer-safe bag. They will keep for up to three months. Bake them straight from the freezer, adding a few extra minutes to the cooking time.
Personal Reflection
Thinking back on those kitchen moments, it’s incredible how a simple recipe can shape our lives and memories. With Homemade Cherry Hand Pies, I find each batch represents a connection—not only to my own past but to all the shared experiences of laughter and love. Baking isn’t just about the food; it’s about creating memories.
FAQ Section
- Can I use other fruits instead of cherries?
- Absolutely! These hand pies can be made with various fruits like blueberries, apples, or peaches. Just ensure to adjust the sweetness according to the fruit’s tartness.
- What if I don’t have a fork to seal the edges?
- No worries! You can use your fingers to crimp the edges or even a knife to make a simple decorative pattern.
- Can I make the dough ahead of time?
- Yes! You can prepare the dough and keep it wrapped in the refrigerator for up to three days before using it.
- What’s the best way to reheat these pies?
- Reheat in a preheated oven for about 10-15 minutes until warmed through for best results.
Conclusion
In a world filled with chaotic schedules and endless responsibilities, embracing the joys of cooking—particularly with recipes like Homemade Cherry Hand Pies—gives us a breather. They are not just treats but also a way to preserve those sweet connections with family and friends.
If this recipe reminds you of someone you love, share it with them. Your memories keep recipes alive, and nothing brings people together quite like a warm pie straight from the oven. Happy baking!
Cherry Hand Pies
Ingredients
Method
- Preheat the oven to 375°F (190°C).
- Roll out the pie crust on a floured surface and cut it into squares.
- Place a spoonful of cherry filling in the center of each square.
- Fold the square over to create a triangle and seal the edges with a fork.
- Brush the top with egg wash and sprinkle with sugar.
- Bake for about 20-25 minutes or until golden brown.
- Remove from the oven and brush with melted butter. Allow to cool before serving.