

Are you craving a quick and delightful dessert that brings back fond memories of family gatherings? Look no further than Cherry Pineapple Dump Cake. This simple yet delectable treat is perfect for those busy evenings when you deserve a comforting dessert but lack the time or energy to bake from scratch. The combination of sweet cherry pie filling and tangy crushed pineapple with a buttery cake layer creates a flavor explosion that will warm your heart and satisfy your taste buds. Plus, it’s a crowd-pleaser that your family will adore!
Kitchen Frustration That Makes This Recipe a Lifesaver
Finding the time and energy to whip up a homemade dessert can sometimes feel impossible. With busy schedules filled with work, errands, and family commitments, many of us face cooking fatigue that leaves us yearning for something sweet yet simple. The pressure of meal planning often comes with the added stress of figuring out what to make that everyone at the dinner table will love. That’s where this Cherry Pineapple Dump Cake shines—it’s a lifesaver!
Not only does it require minimal effort, but it also delivers satisfying flavors that evoke nostalgia and comfort, reminding us of simpler times with loved ones. Just imagine scooping warm cake topped with a dollop of whipped cream as the delicious aroma fills your home. This recipe allows you to create sweet memories without spending all day in the kitchen, offering you a delightful escape from the hustle and bustle of everyday life.
Why This Cherry Pineapple Dump Cake Works So Well
Quick Answer: Cherry Pineapple Dump Cake combines flavor, texture, and convenience, making it a perfect dessert for busy families who still want to indulge in something special.
The burst of flavor from the cherry pie filling pairs beautifully with the sweetness of crushed pineapple, while the dry yellow cake mix creates a perfectly soft and crumbly topping. The melt-in-your-mouth texture is complemented by the buttery drizzle that transforms the surface into a golden crust. This cake is not just an easy dessert; it’s also a family-style treat that can be a highlight of your meal prep or a comforting finish to a hectic day, fitting seamlessly into your calorie-conscious nutrition goals.
Moreover, it aligns well with budget-friendly strategies, using simple, affordable ingredients that you likely already have in your pantry. It’s time-saving and offers a satisfying portion that encourages sharing, making it an excellent choice for feeding the whole family.
Ingredients, Substitutions & Foolproof Tips
- 1 can cherry pie filling: Adds sweetness and a fruity flavor that is synonymous with comfort desserts.
- 1 can crushed pineapple (with juice): Provides a tangy contrast that enhances the overall taste and keeps the cake moist.
- 1 box yellow cake mix: The base for the cake layer that gives it a light and fluffy texture.
- 1 cup butter (melted): Brings richness and moisture, helping form a crispy topping when baked.
- Optional: chopped nuts or coconut for topping: Adds a delightful crunch and enhances the flavor profile.
Feel free to experiment with the optional ingredients, but remember not to stray from the foundational recipe for the best results!
Step-by-Step Directions
- Preheat the oven: Set your oven to 350°F (175°C) to prepare for baking.
- Spread cherry pie filling: In a greased 9×13 inch baking dish, evenly distribute the cherry pie filling on the bottom.
- Add crushed pineapple: Pour the crushed pineapple over the cherry pie filling, ensuring it’s spread evenly for consistent flavor in every bite.
- Sprinkle cake mix: Evenly sprinkle the dry yellow cake mix over the fruit layer, creating a cake base that will rise beautifully during baking.
- Drizzle melted butter: Pour the melted butter over the top of the cake mix without stirring—this will form a delicious crust.
- Optional toppings: If desired, sprinkle the top with chopped nuts or coconut for added texture and flavor.
- Bake it: Place the baking dish in the preheated oven and bake for 40-45 minutes. It’s done when the top is golden brown and a toothpick inserted into the cake mix comes out clean.
- Cool and serve: Allow the cake to cool slightly before serving. Enjoy warm for the best flavor experience!
Common Mistakes to Avoid & Pro Tips
- Mistake: Using a cold butter for drizzling.
- Fix: Always melt butter to ensure it evenly soaks into the cake mix.
- Mistake: Forgetting to mix the fruit layers properly.
- Fix: Layer the cherry pie filling and crushed pineapple for balanced flavor.
- Pro Tip: Letting the cake cool slightly before serving maximizes flavor and texture.
- Pro Tip: This cake can be served warm with vanilla ice cream or whipped cream for added delight.
Serving, Storage & Freezer Guide
How to Serve Cherry Pineapple Dump Cake
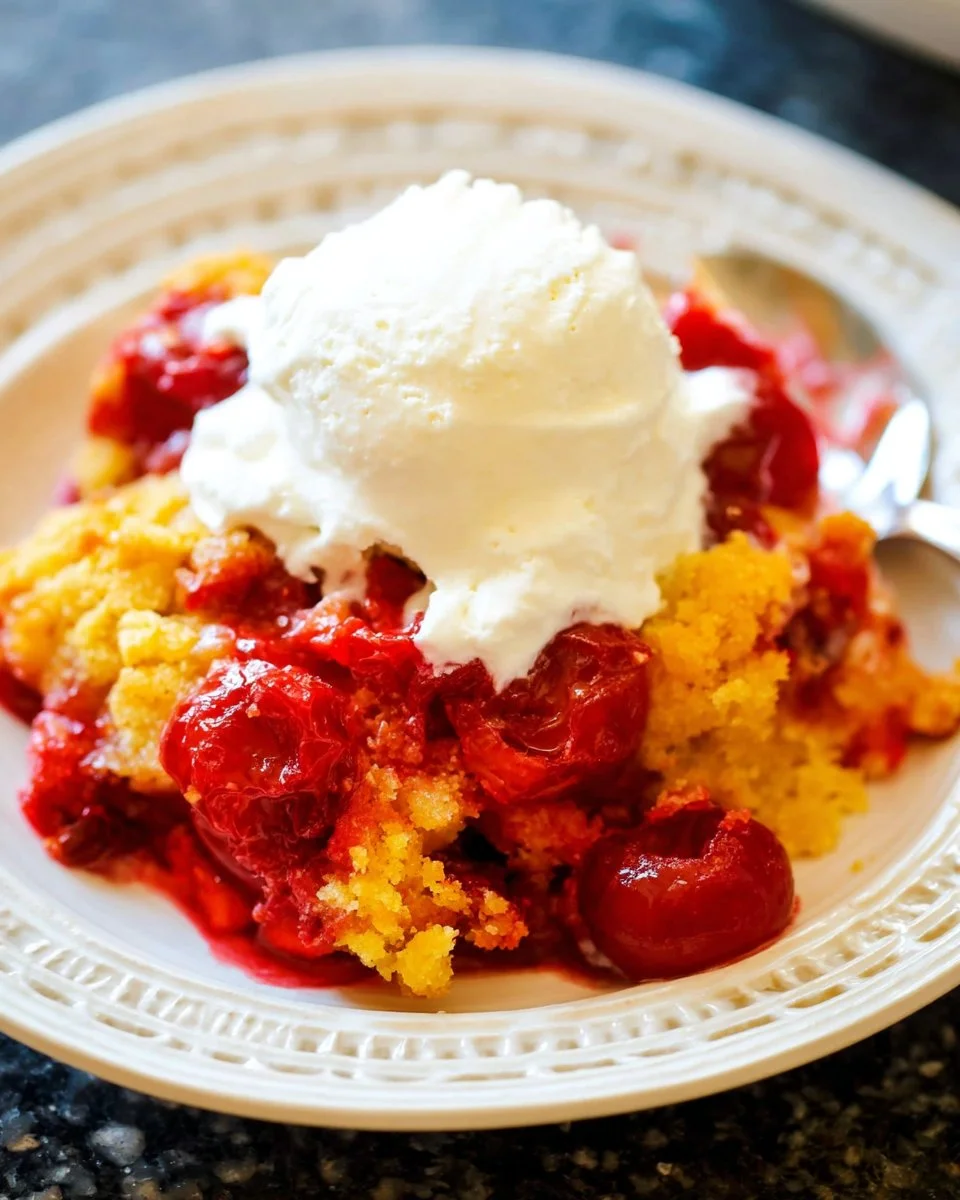
Serve this delightful Cherry Pineapple Dump Cake warm and consider garnishing it with a dollop of whipped cream or a scoop of vanilla ice cream. It’s a great dessert for summer cookouts, holiday gatherings, or simply as a sweet ending to a family dinner. Pair it with fresh berries or a drizzle of chocolate sauce for an extra indulgent touch!
How to Store Cherry Pineapple Dump Cake
To store leftovers, keep the cake covered in an airtight container in the refrigerator for up to 3-4 days. Make sure it’s completely cooled before sealing to maintain freshness.
Can You Freeze Cherry Pineapple Dump Cake?
Yes, you can freeze Cherry Pineapple Dump Cake. Wrap it tightly in plastic wrap and then in aluminum foil to prevent freezer burn. It will maintain its best quality for up to 3 months. To thaw, place it in the refrigerator overnight before serving, expecting that the texture may soften slightly.
Frequently Asked Questions
Can I use different fruits for this recipe?
Yes! While cherries and pineapple are classic combinations, feel free to experiment with other canned fruits like peaches or blueberries.
How do I achieve a golden crust on top?
Ensure your butter is melted and evenly drizzled over the cake mix. Baking until golden brown is key to getting that perfect crust.
Is this cake gluten-free?
This recipe uses regular yellow cake mix, but you can use a gluten-free cake mix as a substitute for a gluten-free version.
How long does it take to prepare?
Preparation takes about 15 minutes, and baking is approximately 40-45 minutes, making it a quick and easy dessert choice!
Conclusion
In a world where time is often limited, the Cherry Pineapple Dump Cake emerges as a comforting, easy dessert that satisfies sweet cravings without adding stress to your day. Its delightful blend of cherry and pineapple flavors, along with the warm, inviting texture, mirrors the sentiment of nostalgic family gatherings.
If this recipe reminds you of someone you love, share it with them. Your memories keep recipes alive.

Cherry Pineapple Dump Cake
Ingredients
Method
- Preheat the oven to 350°F (175°C).
- In a greased 9x13 inch baking dish, evenly spread the cherry pie filling.
- Pour the crushed pineapple over the cherry pie filling.
- Evenly sprinkle the dry yellow cake mix over the fruit layer.
- Pour the melted butter over the top of the cake mix without stirring.
- If desired, sprinkle the top with chopped nuts or coconut.
- Place in the oven and bake for 40-45 minutes, or until the top is golden brown.
- Allow the cake to cool slightly before serving.