
Imagine the aroma of warm dough sizzling on the grill, mingling with your favorite toppings, and melting cheese creating that irresistible pull. Grilled flatbread pizza brings the comfort of homemade pizza outdoors, perfect for spontaneous gatherings or cozy family dinners. With a crispy crust that forms beautifully from grilling, this delightful dish caters to every taste, allowing you to customize each flatbread with toppings of your choice. Whether you prefer a classic margherita, loaded veggies, or a meaty extravaganza, this recipe not only sparks creativity but delivers a mouthwatering meal that feels like a culinary celebration.
It’s time to gather around the grill and enjoy a hands-on cooking experience that fills the air with a warm, inviting scent. Easy to prepare and cook, these flatbread pizzas offer a fun option for busy weeknights or relaxed weekends. Get ready to impress your friends and family with this delicious outdoor twist on a classic favorite!
Quick Answer
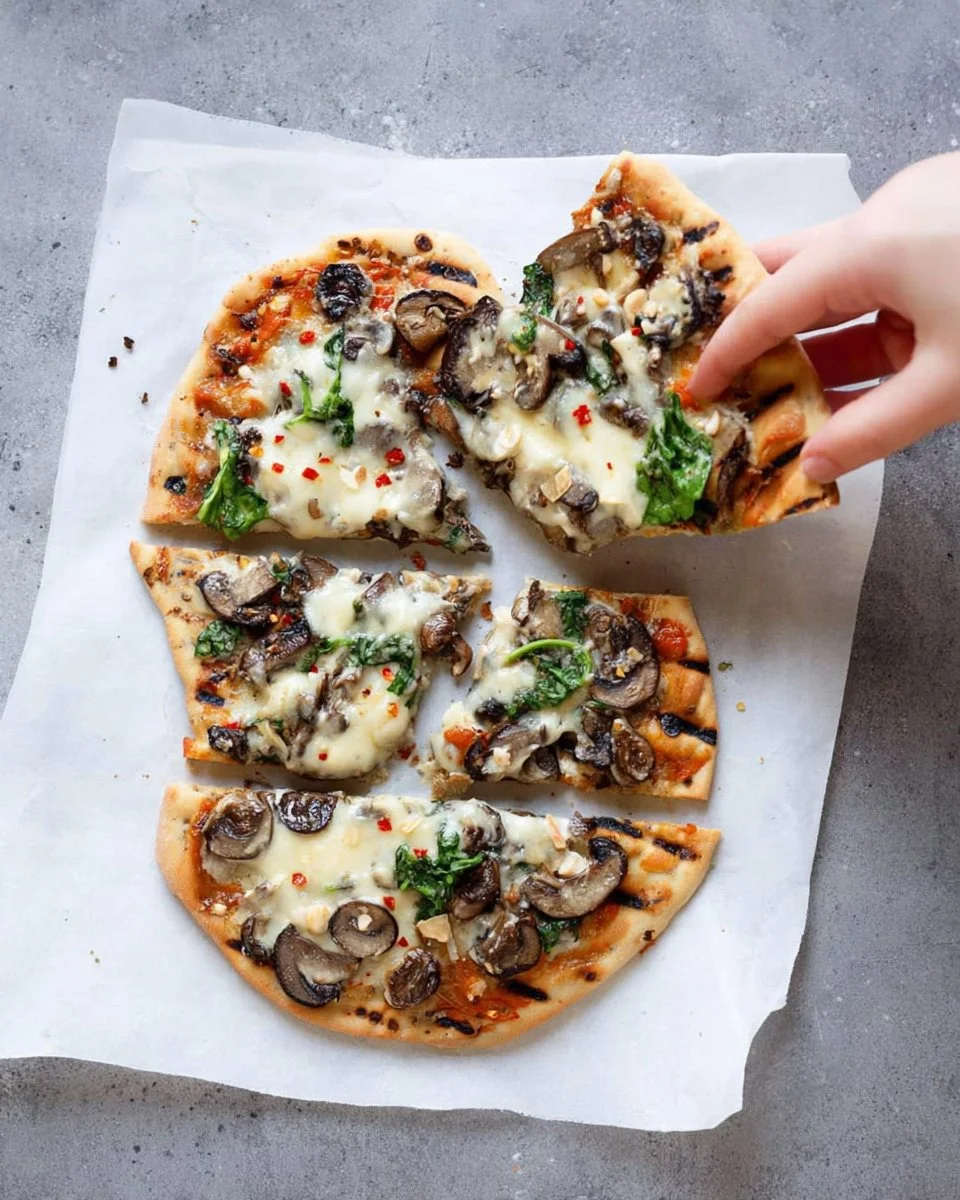
Grilled flatbread pizza is a simple and delicious way to enjoy homemade pizza outdoors using fresh dough and your favorite toppings.
Why You’ll Love This Recipe
This grilled flatbread pizza recipe is not just delicious but comes with a host of benefits that make it a must-try:
- Easy to Make: With straightforward steps, even novice cooks can create a flavorful pizza.
- Customizable: Top with your favorite ingredients for a personalized meal.
- Perfect for Grilling: The grill adds a smoky flavor and crispy texture that’s hard to beat.
- Family Friendly: Fun and interactive, perfect for cooking with kids.
- Quick Cooking Time: Perfect for busy weeknights and last-minute get-togethers.
- Fresh Ingredients: Use quality toppings for a healthy, satisfying meal.
What Makes This Recipe Special
This recipe shines with its blend of simplicity and flavor. The inclusion of honey and yeast creates a deliciously bubbly flatbread, while the grilling technique locks in moisture and produces a beautifully charred crust. Each step emphasizes the balance between ease and quality, making it accessible for everyone. The versatility of toppings allows for endless creativity, whether you’re in the mood for a classic slice or something more adventurous. The grilling method not only enhances the texture but also infuses a hint of smokiness that elevates the overall taste experience. It’s a dish that embraces the joys of sharing good food with loved ones.
Kitchen Tools You’ll Need
- Stand Mixer – To easily mix and knead the dough.
- Grill – Essential for achieving the perfect charred crust.
- Plastic Wrap – For covering the dough while it rises.
- Baking Sheet – To hold the dough discs during the rising phase.
- Grilling Brush – Useful for adding olive oil to the dough and toppings.
Ingredients
warm water: Activates the yeast and forms the base of the dough, contributing to a soft texture.
honey: Adds a touch of sweetness and helps to feed the yeast for a better rise.
active dry yeast: Causes the dough to rise, creating an airy texture in the flatbread.
all-purpose flour: Provides structure and chewiness, essential for a good crust.
kosher salt: Enhances the overall flavor of the dough for a balanced taste.
olive oil: Adds richness and moisture to the dough, and is also used for grilling.
Olive oil for grilling: Ensures the dough doesn’t stick to the grill and helps with crisping.
Toppings of your choosing: Allow for creativity and personalization, from veggies to meats.
Ready to cook? Scroll to the recipe card below for exact measurements.
How to Make Grilled Flatbread Pizza
Phase 1 – Prep
STEP 1. Activate the Yeast. Mix the warm water and honey in the bowl of a stand mixer. Sprinkle the yeast on top and set aside for 10-15 minutes until foamy.
STEP 2. Incorporate Flour. Add two cups of the flour and mix until thoroughly incorporated. Cover with plastic wrap and set aside in a warm place for an hour.
STEP 3. Knead the Dough. Add the kosher salt, olive oil, and remaining two cups of flour. Mix with a dough hook for 5-7 minutes to knead the dough. Coat the dough in oil, place it in a clean bowl, and cover with plastic wrap. Set aside to rise for about an hour until doubled in size.
STEP 4. Divide the Dough. Punch the dough down with floured hands and divide it into four discs. Place on a lightly floured baking sheet, cover with a clean kitchen towel, and set aside to rise for 30 minutes.
Phase 2 – Cook
STEP 5. Preheat the Grill. Preheat the grill to high. Flour your hands and spread each dough disc into a thin oval. Brush olive oil onto the top of each oval.
STEP 6. Grill the Dough. Carefully place the pizza dough on the grill, oiled side down, and cook for 2-3 minutes.
STEP 7. Add Toppings. Brush the tops with oil, flip carefully, and layer with desired toppings.
STEP 8. Melt the Cheese. Close the grill and cook for 2-3 more minutes until the cheese is melted.
Phase 3 – Serve
STEP 9. Cut and Serve. Remove from the grill, slice, and serve hot.
Why This Recipe Works
The combination of ingredients creates a flatbread pizza that beautifully balances flavor and texture. The dough’s natural chewiness complements the crispiness from grilling, making each bite satisfying. Using a grill instead of a traditional oven also allows for a unique layer of smoky flavor, giving your pizza an added depth. The toppings meld beautifully under the heat, resulting in a harmonious blend of tastes. This method ensures an evenly cooked, golden crust while keeping the toppings fresh and vibrant. The overall experience is a perfect example of how simplicity can lead to extraordinary results in your kitchen.
Pro Tips
For best results, consider the following tips: Use a pizza stone or grill pan for an easier time transferring the flatbreads to the grill. Don’t overcrowd the grill; cook in batches to ensure even cooking. Customize the thickness of the flatbreads based on your preference for chewier versus crispier crusts. Make sure to preheat your grill to achieve a great rise and prevent sticking. Experiment with toppings and sauces; a light brush of pesto or marinara can add layers of flavor. Lastly, let the grilled flatbread cool slightly before adding toppings to prevent sogginess.
Common Mistakes to Avoid
Mistake: Not allowing the dough to rise properly.
Why it happens: Yeast needs time to activate and grow. Without proper rising, the dough may be dense.
How to fix it: Ensure the dough is kept in a warm place and be patient with the rising time.
Mistake: Overcrowding the grill.
Why it happens: Trying to cook too many pizzas at once can lower the grill’s temperature.
How to fix it: Grill in smaller batches for better heat distribution.
Mistake: Skipping oil on the grill.
Why it happens: Some cooks believe it’s unnecessary, but it can lead to sticking.
How to fix it: Always brush the grill grates and the top of the dough with oil.
Variations
- Veggie Delight: Load your flatbread with fresh vegetables like bell peppers, onions, and spinach.
- Meat Lovers: Add pepperoni, sausage, or grilled chicken for a heartier option.
- Margherita Style: Use fresh mozzarella and basil for a classic pizza experience.
- BBQ Chicken: Use BBQ sauce, cooked chicken, red onions, and cilantro for a sweet and tangy twist.
- Dairy-Free: Substitute traditional cheese with plant-based cheese alternatives.
Nutrition Highlights
| Nutrient | Role |
|---|---|
| Protein | Helps support satiety and balanced meals. |
Serving Ideas
Grilled flatbread pizza pairs wonderfully with a fresh side salad tossed with vinaigrette for a lighter meal. Consider serving it alongside roasted vegetables or a charcuterie board for a party. Adding dips like marinara or pesto can elevate the experience. For a heartier offering, serve it with grilled corn on the cob or potato wedges, rounding out a perfect outdoor feast.
Best Occasions for This Recipe
Grilled flatbread pizza is ideal for summer barbecues, family gatherings, or any casual get-together. It’s a great option for game day parties where everyone can customize their own pizzas. Perfect for outdoor cooking enthusiasts and those looking to enjoy a culinary experience in the fresh air, this recipe fits beautifully into any celebration.
Meal Prep & Storage
Meal Prep
Prepare the dough in advance and let it rise in the refrigerator overnight. This not only saves time but allows the flavors to develop further.
Refrigeration
Store leftover grilled flatbread pizza in an airtight container in the refrigerator for up to three days.
Freezing
For longer storage, you can freeze the cooked flatbreads, separating them with parchment paper, for up to three months.
Reheating
Reheat the flatbreads in the oven at a low temperature or on the grill for a few minutes to bring back the crispy texture.
FAQs
Can I use store-bought flatbread instead of making my own?
Yes, using store-bought flatbread can save time while still allowing for customization with toppings.
How do I know when the dough has risen enough?
The dough should be about double its original size and feel puffy to the touch.
Can I make the dough ahead of time?
Absolutely! You can make the dough a day before and store it in the fridge until ready to use.
What if my dough doesn’t rise?
This may indicate that the yeast was not activated properly. Always check expiration dates and ensure water isn’t too hot or cold.
How can I make this gluten-free?
You can substitute the all-purpose flour with a gluten-free flour blend designed for baking.
Save This Recipe for Later
If you enjoyed this recipe, consider saving it to your favorite Pinterest board for easy access later! Perfect for family gatherings or casual weeknight dinners, it’s an excellent addition to your collection.
Conclusion
Grilled flatbread pizza not only transforms a beloved dish into an outdoor celebration but also invites creativity and personalization. With simple ingredients and a straightforward process, it makes for a delightful meal that’s sure to become a favorite in your home. Gather your friends, fire up that grill, and indulge in a pizza experience that’s fresh, flavorful, and fun!

Grilled Flatbread Pizza
Ingredients
Method
- STEP 1: Combine warm water and honey in the bowl of a stand mixer. Sprinkle the yeast on top and set aside for 10-15 minutes until foamy.
- STEP 2: Add 2 cups of flour and mix until incorporated. Cover with plastic wrap and set aside in a warm place for 1 hour.
- STEP 3: Add kosher salt, olive oil, and 2 cups of remaining flour. Mix with a dough hook for 5-7 minutes until dough is kneaded. Coat dough in oil, place it in a clean bowl, and cover with plastic wrap. Let rise until doubled in size, about 1 hour.
- STEP 4: Punch down the dough and divide it into 4 discs. Place on a lightly floured baking sheet, cover with a towel, and let rise for 30 minutes.
- STEP 5: Preheat the grill to high. Spread each dough disc into a thin oval and brush with olive oil.
- STEP 6: Place the dough on the grill, oiled side down, and cook for 2-3 minutes.
- STEP 7: Brush the tops with oil, flip carefully, and layer with desired toppings.
- STEP 8: Close the grill and cook for an additional 2-3 minutes until cheese is melted.
- STEP 9: Remove from the grill, slice, and serve hot.