

Cooking fatigue is a common dilemma for many one-pot meal enthusiasts, especially when trying to stick to a meal plan. Balancing health, family preferences, and time can feel overwhelming. That’s why these Vegetable Chicken Roll Ups, packed with protein and vibrant veggies, serve as the perfect solution. They offer a nutritious meal that delights the whole family while supporting your health-conscious goals. This dish is not only macro-balanced but also easy on the wallet, allowing you to meet your nutrition needs without breaking the bank.
Kitchen Frustration That Makes This Recipe a Lifesaver
Imagine coming home after a long day, exhausted and not wanting to cook. The thought of preparing a meal that satisfies everyone at the dinner table may send you into a frenzy. These Vegetable Chicken Roll Ups are designed for those hectic evenings, revealing how simple cooking can be. By flattening chicken breasts and filling them with colorful vegetables, you not only solve the dilemma of “What’s for dinner?” but also create an engaging family activity in the kitchen.
The beauty of this recipe lies in its versatility; you can easily adjust the ingredients based on what you have on hand or your family’s preferences. When faced with cooking fatigue, remember to embrace the joy of stuffing and rolling—it’s less daunting than you might think. A practical tip? Involve your loved ones in the preparation. Not only does this save time, but it also creates lasting memories around a shared meal.
Why This Vegetable Chicken Roll Ups Works So Well
Quick Answer: These Vegetable Chicken Roll Ups deliver a satisfying balance of protein, vegetables, and mouth-watering glaze, making them an excellent choice for a cozy family dinner.
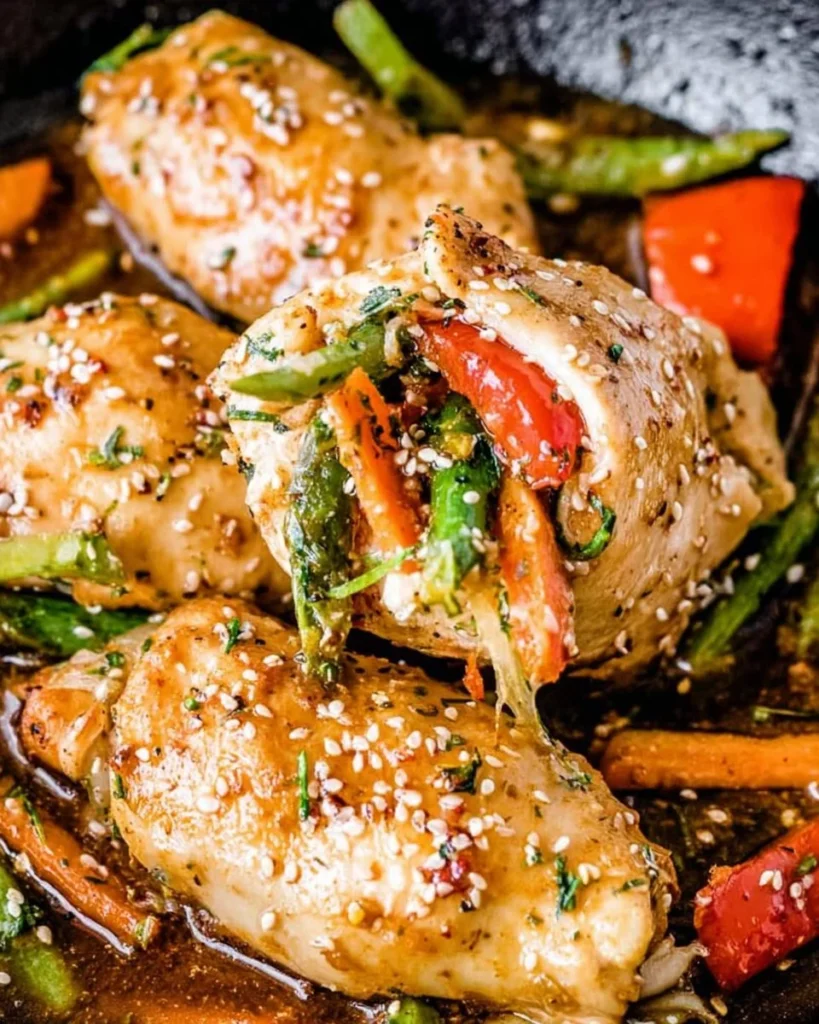
This recipe stands out because it combines delightful textures and flavors in every bite. The outside gives a satisfying crisp from searing, while the inside remains juicy and packed with nutrients. Thanks to the honey garlic sauce, each roll-up is infused with a natural sweetness that complements the hearty elements without overwhelming them.
Moreover, the preparation is time-saving. From prepping to plating, you can whip up this dish in under an hour. Plus, it offers peace of mind—all the nutrients you need to support your health goals are rolled right into the chicken itself, making it a meal you can feel good about serving.
Ingredients, Substitutions & Foolproof Tips
- 4 boneless skinless chicken breasts: Lean protein that serves as the main component.
- Salt and freshly ground black pepper (to taste): Essential for seasoning the chicken.
- 1 tablespoon olive oil: For searing the chicken to a beautiful golden brown.
- 2 colored bell peppers (cut into thin strips): Adds color, crunch, and nutrition.
- 2 carrots (halved and cut into thin strips): Provides sweetness and texture.
- Handful sugar snap peas: Brings in a delightful snap.
- Handful green beans: Perfect for added crunch and nutrition.
- 4 garlic cloves (minced): Adds a robust flavor.
- ½ cup honey: For a naturally sweet glaze.
- ¼ cup soy sauce (or liquid aminos): Adds umami flavor.
- ¼ cup ketchup (low-sodium sugar-free): A base for the sauce that complements the sweetness.
- ½ teaspoon dried oregano: Imparts an aromatic touch.
- 2 tablespoons chopped fresh parsley: For garnish and fresh flavor.
- ½ tablespoon toasted sesame seeds: Adds a nutty crunch.
Substitutions:
- Swap chicken with turkey or tofu for a different protein source.
- Use any vegetables in your fridge, like zucchini or spinach, to reduce waste.
Foolproof Tips:
- Ensure chicken is pounded evenly for even cooking.
- Don’t overcrowd your skillet when searing; cook in batches if needed.
Step-by-Step Directions
- Prep your oven: Preheat the oven to 350ºF. Setting the right temperature is crucial for even cooking.
- Flatten the chicken: Cut the chicken breasts in half lengthwise, then pound them to a ¼-inch thickness. Season each piece with salt and pepper. This step ensures tenderness and flavor absorption.
- Fill and roll: Top each chicken piece with a small handful of the prepared vegetables. Roll them tightly and secure the ends with toothpicks. This keeps the filling inside during cooking.
- Sear the chicken: Heat the olive oil in a large oven-safe skillet over medium-high heat. Add the chicken bundles and cook for 1 to 2 minutes per side or until lightly browned. This develops the flavors.
- Prepare the honey garlic sauce: In a mixing bowl, combine minced garlic, honey, soy sauce, ketchup, and oregano. Whisk until thoroughly combined. This sauce enhances the roll-ups, providing a delectable glaze.
- Put it all together: Remove the skillet from the heat. If you have extra veggies, arrange them around the chicken. Pour the honey-garlic sauce over everything. This coats the chicken in flavor.
- Bake to perfection: Transfer the skillet to the oven and bake the roll-ups for 15 minutes. Remove from the oven, flip the chicken over, and return to the oven for another 10 minutes. This helps the chicken cook through without drying out.
- Serve: Once done, remove the chicken roll-ups from the oven. Garnish with parsley and sesame seeds. Serve with rice, brown rice, or quinoa for a fulfilling meal.
Common Mistakes to Avoid & Pro Tips
- Mistake: Not pounding the chicken evenly.
- Fix: Use a meat mallet to ensure uniform thickness for even cooking.
- Mistake: Overstuffing the rolls.
- Fix: Stick to a small handful of veggies to avoid tearing the chicken.
- Mistake: Skipping the browning step.
- Fix: Don’t skip searing; it builds flavor and texture.
Pro Tips:
- Use toothpicks wisely, as they help keep the roll-ups intact.
- Let the roll-ups rest for a few minutes after baking for easier cutting.
Serving, Storage & Freezer Guide
How to Serve Vegetable Chicken Roll Ups
These Vegetable Chicken Roll Ups make an inviting main dish that pairs beautifully with a simple side salad or a grain of your choice. The contrast of flavors and textures makes every bite enjoyable. For an extra kick, drizzle more honey-garlic sauce on top before serving.
How to Store Vegetable Chicken Roll Ups
To store leftovers, let the roll-ups cool completely before placing them in an airtight container. They can be kept in the refrigerator for up to three days. When reheating, do so gently in the oven to maintain the chicken’s moisture.
Can You Freeze Vegetable Chicken Roll Ups?
Absolutely! These roll-ups are freezer-friendly. Wrap them tightly in plastic wrap and then in foil or place them in a freezer-safe container. They can be frozen for up to three months. Reheat from frozen, adjusting cooking time as necessary to ensure they are heated through.

placeholder
Frequently Asked Questions
What can I serve with Vegetable Chicken Roll Ups?
You can serve the roll-ups with rice, quinoa, or a green salad. Roasted potatoes or a light soup also make great accompaniments.
Can I make this recipe ahead of time?
Yes, you can assemble the roll-ups and store them in the fridge for a few hours or overnight before baking. Just be sure to store them covered so they don’t dry out.
What if I don’t have honey?
If honey isn’t available, you can substitute it with maple syrup or agave nectar for a similar sweetness in the sauce.
Can I use frozen vegetables for the filling?
Yes, frozen vegetables can be used, but be sure to thaw and drain them before using to avoid excess moisture in the roll-ups.
Conclusion
These Vegetable Chicken Roll Ups are more than just a meal; they’re a solution to your cooking fatigue and a way to make thoughtful family dinners easily achievable. Embrace the joy of cooking and nurturing your loved ones with this protein-packed, health-conscious dish. If this recipe reminds you of someone you love, share it with them. Your memories keep recipes alive.
Vegetable Chicken Roll Ups
Ingredients
Method
- Preheat the oven to 350ºF.
- Cut the chicken breasts in half lengthwise, then pound them to a ¼-inch thickness. Season each piece with salt and pepper.
- Top each chicken piece with a small handful of the prepared vegetables. Roll them tightly and secure the ends with toothpicks.
- Heat the olive oil in a large oven-safe skillet over medium-high heat. Add the chicken bundles and cook for 1 to 2 minutes per side or until lightly browned.
- In a mixing bowl, combine minced garlic, honey, soy sauce, ketchup, and oregano. Whisk until thoroughly combined.
- Remove the skillet from the heat. Pour the honey-garlic sauce over the chicken and any extra veggies.
- Transfer the skillet to the oven and bake the roll-ups for 15 minutes. Remove from the oven, flip the chicken over, and return to the oven for another 10 minutes.
- Once done, remove the chicken roll-ups from the oven. Garnish with parsley and sesame seeds.