
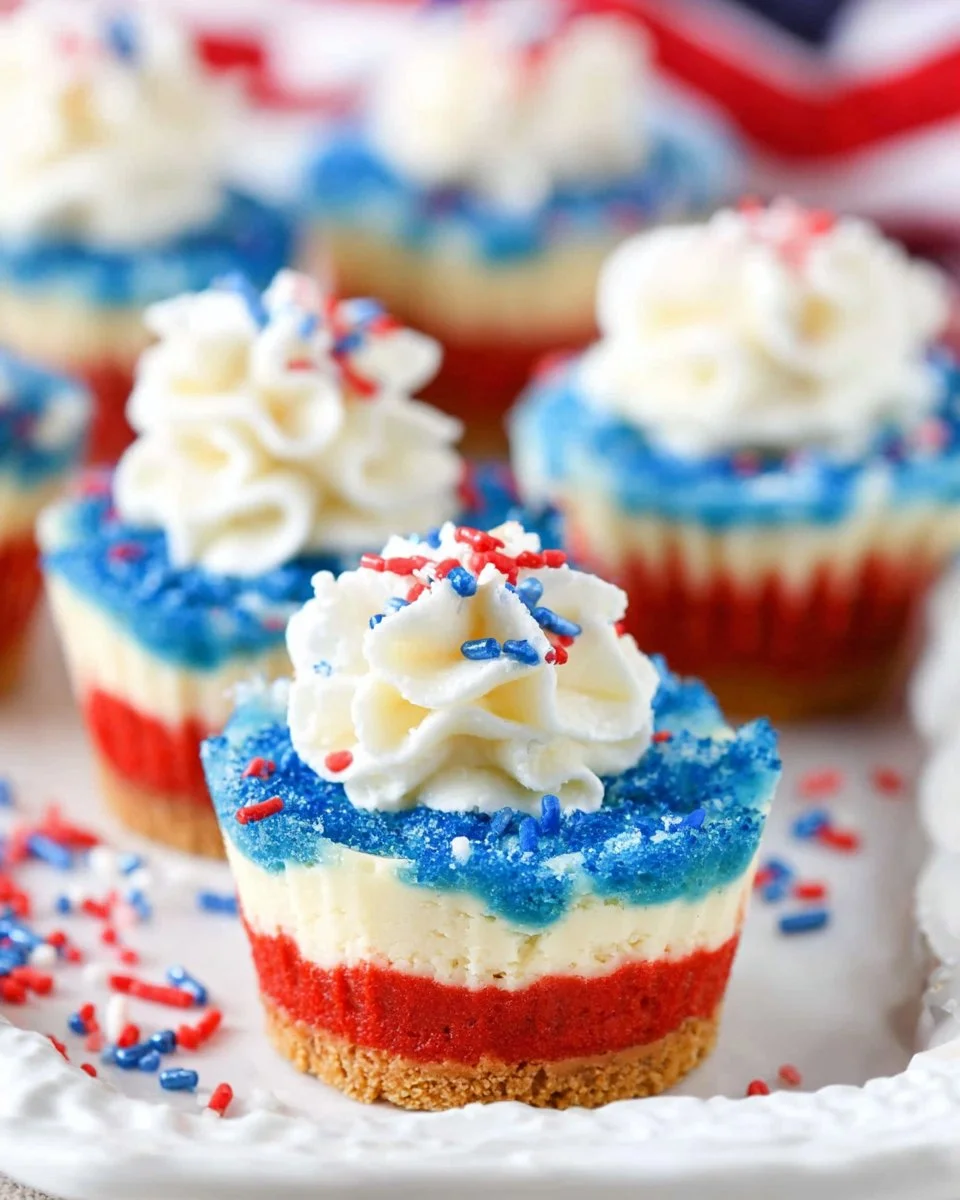
Celebrations deserve desserts that not only delight the taste buds but also enchant the eyes. Picture a dessert that captures the spirit of unity and joy: these mini cheesecakes are bursting with rich flavors and vibrant colors, transforming any gathering into a festive occasion. The creamy texture of the cheesecake pairs perfectly with buttery crusts, while the pops of red and blue make them an irresistible treat for special events, including Independence Day, Memorial Day, or any joyful summer celebration. As you take a bite, you’ll experience layers of velvety cheesecake that melt in your mouth, accented by light whipped cream and fun sprinkles. This fun treat is sure to leave an impact and have guests asking for seconds.
Creating these delightful mini cheesecakes is not only a fun activity but also an opportunity to impress loved ones with your baking skills. And don’t worry, they’re easier to make than you might think! Follow along and discover how to whip up these delightful Red, White, and Blue Mini Cheesecakes that become the star of your dessert table.
Why You’ll Love This Recipe
This recipe is all about convenience and flavor. In just a few simple steps, you can whip up a batch of stunning mini cheesecakes that are sure to be the hit of your party. They are perfect for sharing, making them ideal for gatherings and celebrations. The combination of cream cheese and sour cream results in an ultra-creamy filling that is both rich and satisfying, while the colorful layers not only provide an eye-catching presentation but also allow for creative customization.
Moreover, since these cheesecakes are mini, they are portion-controlled, meaning you can indulge without the guilt and enjoy this treat in moderation. With a touch of festive flair thanks to whipped cream and sprinkles, every bite is a delicious celebration in itself. Plus, these little delights can be made ahead of time, simplifying your event planning. You’ll find that once you experience the joy of making these mini cheesecakes, they’ll become a perennial favorite in your dessert rotation.
What Makes This Recipe Special
What sets these mini cheesecakes apart is not just their patriotic colors but also the technique and attention to detail in their preparation. The use of a cookie crumb crust adds a delightful crunch that contrasts beautifully with the creamy filling, providing the perfect foundation without being overwhelming. Additionally, the method of layering the batter allows you to control the colors and create a visually stunning dessert that’s as appealing to the eye as it is to the palate.
These cheesecakes also leverage the flavors of vanilla and buttery crust in a way that elevates traditional recipes. With the addition of heavy whipping cream in the topping, each cheesecake is elevated further, providing a light, airy finish that enhances the whole dessert experience. Perfectly portioned and incredibly festive, these treats not only serve as a sweet course but also as a centerpiece that sparks conversation and enjoyment among your guests.
Ingredients
vanilla wafer cookie crumbs: The base for a crunchy and flavorful crust.
sugar: Adds sweetness to balance the richness of the filling.
butter: Provides moisture and richness to the crust.
cream cheese: The star ingredient that creates a smooth, decadent filling.
sugar: Sweetens the cheesecake filling for a perfect balance.
flour: Helps to stabilize the filling and achieve a lovely texture.
sour cream: Adds moisture and a hint of tanginess to the filling.
vanilla extract: Enhances flavor with warm, aromatic notes.
eggs: Help set the filling and give it a rich, creamy texture.
blue gel icing color: Adds a vibrant blue layer to the cheesecake.
red gel icing color: Provides a striking red layer for visual appeal.
heavy whipping cream: Used for a luscious whipped topping.
powdered sugar: Sweetens the whipped cream for a delightful finish.
vanilla extract: Further enhances the flavor of the whipped cream.
sprinkles: For a fun, festive touch that adds pops of color.
Directions
- Preheat oven to 325°F.
- Add cupcake liners to a cupcake pan.
- Combine the vanilla wafer cookie crumbs, sugar, and melted butter.
- Divide the mixture between the cupcake liners, pressing into the bottoms.
- Bake the crusts for 5 minutes, then remove from oven.
- Allow to cool while preparing the filling.
- Reduce oven temperature to 300°F.
- In a large bowl, beat together the cream cheese, sugar, and flour until combined.
- Scrape down the sides of the bowl.
- Add sour cream and vanilla extract, beating on low until combined.
- Add the eggs one at a time, beating slowly and scraping the bowl after each addition.
- Divide the batter evenly into three bowls; leave one plain, color one red, and the other blue.
- Layer the colored batter into the crusts, starting with a tablespoon of the white batter, followed by red and then blue.
- Bake the cheesecakes for 18-20 minutes.
- Turn off oven and leave the door closed for another 10 minutes.
- Crack the oven door, allowing cheesecakes to cool for 15-20 minutes.
- Refrigerate to finish cooling.
- Once cooled, remove cheesecakes from the pan.
- To prepare the whipped cream, combine heavy whipping cream, powdered sugar, and vanilla extract in a bowl.
- Whip on high speed until stiff peaks form.
- Pipe whipped cream on top of each cheesecake and add sprinkles.
- Store cheesecakes in an airtight container in the refrigerator until serving.
- For best taste, consume within 2-3 days.
Pro Tips
- Use room temperature cream cheese to ensure a smoother filling without lumps.
- Avoid overmixing your batter to prevent air from becoming trapped, which can lead to cracks in the cheesecakes.
- Let the cheesecakes cool gradually to prevent sudden temperature changes that may crack the surface.
- Layer the colored batter carefully to maintain distinct layers for that beautiful presentation.
- Consider using mini muffin tins for smaller bite-sized versions perfect for parties or gatherings.
- Double the recipe for larger gatherings or to enjoy leftovers throughout the week.
- If desired, experiment with different gel colors to match the theme of other occasions beyond just patriotic holidays.
Common Mistakes to Avoid
- Skipping the cooling steps can lead to cracks forming in the cheesecakes.
- Using chilled eggs or cream cheese instead of room temperature can contribute to a lumpy batter.
- Overbaking can cause the cheesecakes to dry out, so watch closely during the last few minutes.
- Not allowing the cheesecakes to cool slowly in the oven can result in loss of their creamy texture.
- Not evenly distributing colored batter can lead to muddied colors, so take your time with the layering process.
- Using regular sugar instead of powdered sugar in the whipped cream can yield a grainy texture.
Variations
• Try using almond flour instead of cookie crumbs for a gluten-free option.
• For a fruit twist, layer some fresh berries between the cheesecake layers.
• Experiment with flavors by adding citrus zest to the cheesecake batter.
• Use coconut cream to create a tropical twist in the whipped topping.
Serving Ideas
Serve these delightful mini cheesecakes on a vibrant platter with colorful fruits and edible flowers to enhance their appeal. Pair them with a cup of tea or a glass of sparkling fruit-infused water. For a fun twist, consider presenting alongside a berry compote or a drizzle of chocolate sauce for added sweetness. Educate your guests on your creative process by sharing how you added the colorful layers, making the experience interactive!
Meal Prep & Storage
These mini cheesecakes are fantastic for meal prep, as they can be made in advance and stored in the refrigerator. For the best flavor and texture, store them in an airtight container in the fridge for up to three days. As they chill, the flavors meld beautifully, resulting in an even more delectable treat. If you’re preparing them for an event, consider making them the day before. Just pipe the whipped cream and add the sprinkles right before serving for that freshly made appearance!
FAQs
1. Can I make these cheesecakes ahead of time?
Yes, they’re perfect for making a day in advance! Just store them in the fridge until ready to serve.
2. How do I prevent cracks in my cheesecakes?
Make sure to let the cheesecakes cool slowly in the oven and avoid overmixing the batter.
3. Can I use a different crust?
Absolutely! Feel free to change it up with graham cracker crumbs or even crushed chocolate cookies for a different base.
4. What is the best way to store leftovers?
Keep leftovers in an airtight container in the refrigerator for optimal freshness, consuming within 2-3 days.
5. Can I freeze these mini cheesecakes?
While they can be frozen, the texture may change slightly upon thawing. It’s best to enjoy them fresh.
6. What can I use instead of gel food coloring?
You could use natural food colorings or pureed fruits for a more organic option. However, gel colors provide the most vibrant results.
Conclusion
Delight your friends and family with these cheerful and flavor-packed mini cheesecakes that showcase the joyous colors of celebration. Their simple preparation and impressive presentation make them a must-have for any festive gathering. Indulge in the creamy, dreamy layers and savor the smiles they bring!

Red, White, and Blue Mini Cheesecakes
Ingredients
Method
- Preheat oven to 325°F.
- Add cupcake liners to a cupcake pan.
- Combine the vanilla wafer cookie crumbs, sugar, and melted butter.
- Divide the mixture between the cupcake liners, pressing into the bottoms.
- Bake the crusts for 5 minutes, then remove from oven.
- Allow to cool while preparing the filling.
- Reduce oven temperature to 300°F.
- In a large bowl, beat together the cream cheese, sugar, and flour until combined.
- Scrape down the sides of the bowl.
- Add sour cream and vanilla extract, beating on low until combined.
- Add the eggs one at a time, beating slowly and scraping the bowl after each addition.
- Divide the batter evenly into three bowls; leave one plain, color one red, and the other blue.
- Layer the colored batter into the crusts, starting with a tablespoon of the white batter, followed by red and then blue.
- Bake the cheesecakes for 18-20 minutes.
- Turn off oven and leave the door closed for another 10 minutes.
- Crack the oven door, allowing cheesecakes to cool for 15-20 minutes.
- Refrigerate to finish cooling.
- Once cooled, remove cheesecakes from the pan.
- To prepare the whipped cream, combine heavy whipping cream, powdered sugar, and vanilla extract in a bowl.
- Whip on high speed until stiff peaks form.
- Pipe whipped cream on top of each cheesecake and add sprinkles.
- Store cheesecakes in an airtight container in the refrigerator until serving.
- For best taste, consume within 2-3 days.