
Indulge in a dessert that combines the unexpected yet delightful with creamy sweetness and crispy texture. Imagine biting into a dessert that looks like fried chicken but tastes like a dream: a rich, creamy ice cream coated in crunchy cornflakes. This mouthwatering treat is simultaneously playful and luxurious, turning a classic summer dessert into something truly unique. Perfect for impressing guests or satisfying a sweet tooth, this recipe stands out with its clever presentation and delicious flavor profile. It’s a comforting creation that invites enjoyment and curiosity, making it a fantastic addition to your dessert repertoire.
Quick Answer
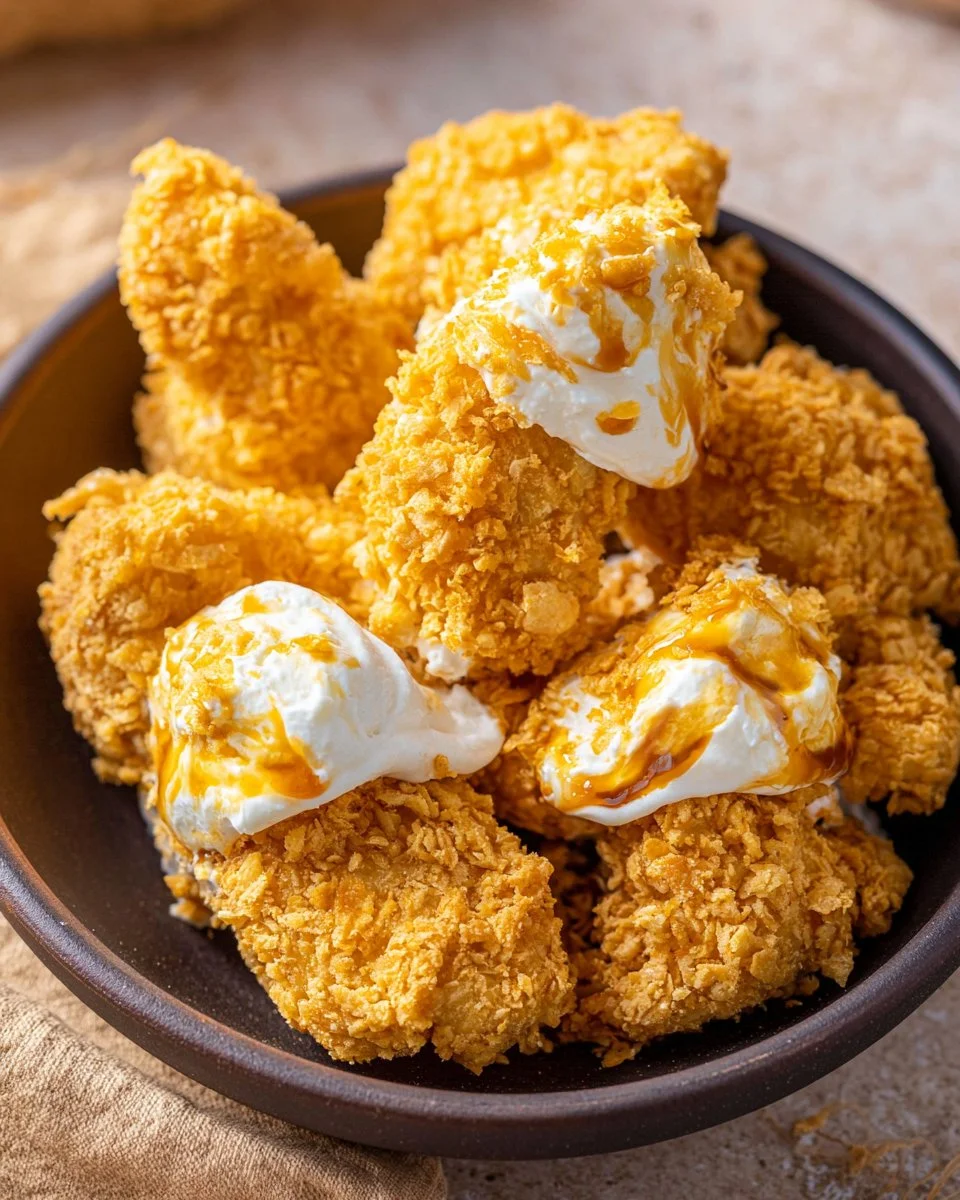
This Homemade Fried Chicken Ice Cream combines smooth ice cream with crispy cornflakes, bringing a playful twist to your dessert table.
Why You’ll Love This Recipe
This dessert is not just about looks; it entices with both flavor and texture. Here are a few reasons it will become a favorite:
- Creative twist on traditional ice cream, making it a conversation starter.
- Rich and creamy ice cream base that’s incredibly smooth.
- Crunchy cornflake coating provides great texture contrast.
- Easy to customize shapes for fun presentations.
- Perfect for parties or summer get-togethers.
- Can be made ahead of time for convenience.
- Delightfully unexpected combination that keeps dessert exciting.
What Makes This Recipe Special
The charm of this Homemade Fried Chicken Ice Cream lies in its inventive approach. While it presents as a clever illusion, it’s fundamentally a play on flavors and textures. The base is created with cold heavy cream and sweetened condensed milk, offering a rich creaminess that melts beautifully in your mouth. This is complemented by the crispiness of the cornflake coating, which provides that delightful crunch. Adding refined coconut oil to the melted white chocolate coating enhances richness, ensuring that the coating clings perfectly to each curvy ice cream piece. This thoughtful layering of flavors brings playfulness and depth, turning a familiar favorite into a delightful surprise.
Kitchen Tools You’ll Need
- Stand Mixer – Essential for whipping the cream to perfection.
- Baking Dish – Used for freezing the ice cream mixture with ease of removal.
- Parchment Paper – Helps with easy extraction of ice cream shapes.
- Microwave-Safe Bowl – Perfect for melting the white chocolate and coconut oil.
- Hot Knife – Useful for cutting the frozen ice cream into fun shapes.
- Baking Sheet – To hold the coated ice cream pieces while they freeze.
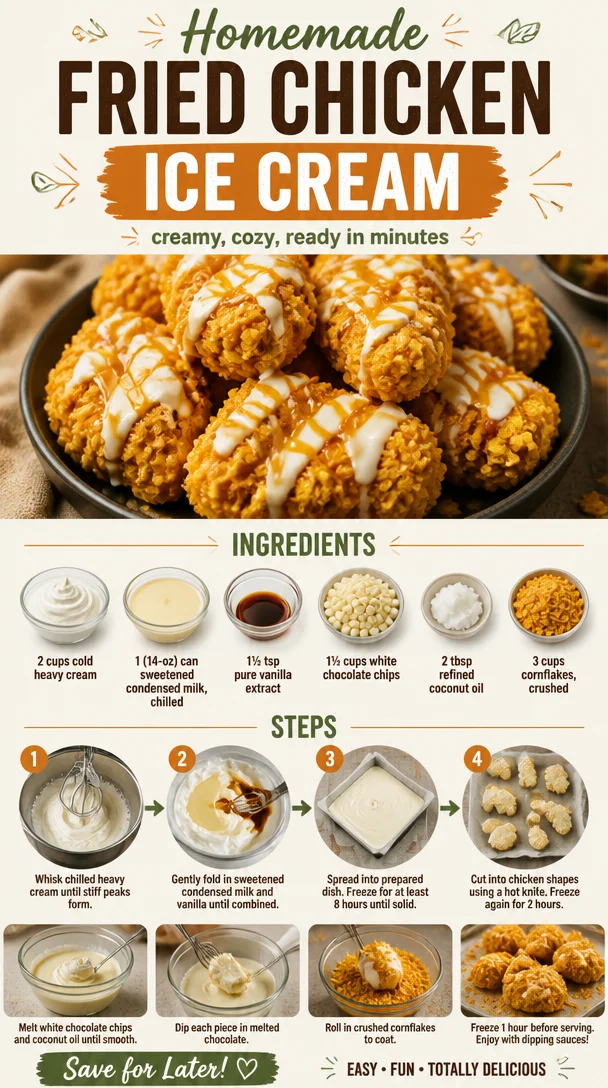
Ingredients
cold heavy cream: Provides a rich and creamy base that gives the ice cream its luxurious texture.
sweetened condensed milk: Adds sweetness and creaminess while helping to create a soft, scoopable ice cream.
pure vanilla extract: Enhances the overall flavor profile with a warm, aromatic essence.
white chocolate chips: Adds a deliciously sweet coating that melts smoothly around the ice cream.
refined coconut oil: Helps to achieve a silky chocolate coating that adheres well to the ice cream shapes.
cornflakes: Provides a crunchy texture that mimics a fried chicken coating for a fun twist on ice cream.
Ready to cook? Scroll to the recipe card below for exact measurements.
How to Make Homemade Fried Chicken Ice Cream
Phase 1 – Prep
STEP 1. Chill the Bowl. Fifteen minutes prior to beginning, pour cold heavy cream into a stand mixer bowl and chill the bowl and whisk attachment in the refrigerator.
STEP 2. Prepare the Baking Dish. Line a baking dish with parchment paper, leaving overhang for easy removal. Set aside.
Phase 2 – Cook
STEP 3. Whip the Cream. Whisk the chilled heavy cream in the stand mixer until soft peaks form, then increase speed to medium-high until stiff peaks form. Be careful not to over-whip.
STEP 4. Combine Ingredients. Gently fold in the sweetened condensed milk and vanilla extract until combined.
STEP 5. Freeze the Mixture. Transfer the mixture to the prepared baking dish and smooth into a flat layer. Freeze for at least 8 hours or until solid.
STEP 6. Shape the Ice Cream. Line a baking sheet with parchment paper. Remove ice cream from the dish and cut into chicken nugget, strip, or drumstick shapes using a hot knife.
STEP 7. Freeze Shapes. Repeat the cutting process with remaining ice cream, placing shaped pieces on the baking sheet and freezing for 2 hours.
Phase 3 – Serve
STEP 8. Melt Coating. For the coating, melt the white chocolate and coconut oil together in a microwave-safe bowl, stirring until smooth.
STEP 9. Coat the Ice Cream. Dip each ice cream shape in the melted chocolate, then roll in crushed cornflakes to coat. Return to the baking sheet.
STEP 10. Final Freeze. Freeze the coated ice cream bars for at least 1 hour before serving, or keep frozen until ready to enjoy. Serve with optional dipping sauces.
Why This Recipe Works
This ice cream experience is enhanced by its texture and flavors coming together beautifully. The airy nature of whipped cream creates a light, fluffy texture, while sweetened condensed milk lends necessary sweetness and richness. The white chocolate pairs perfectly, offering a creamy, smooth finish. The cornflake coating simulates that crunchy texture we often crave, creating a unique dessert that is both whimsical and satisfying. The method is straightforward, allowing for an easy yet impressive treat that impressively resists melting for a longer time due to its high-fat content, making it fantastic for gatherings.
Pro Tips
To ensure the best results, consider these tips:
– Always use very cold heavy cream to ensure maximum volume when whipping.
– When cutting the frozen ice cream, use a hot knife to make smooth shapes without cracking.
– Work quickly when dipping the ice cream in melted chocolate to prevent them from melting.
– Consider letting the shaped ice cream sit at room temperature for a few minutes after being frozen for easier coating.
– Store the completed ice cream bars in an airtight container to prevent freezer burn.
Common Mistakes to Avoid
Mistake: Over-whipping the cream.
Why it happens: It can happen if you are not careful while whipping.
How to fix it: Watch the cream closely and stop as soon as stiff peaks form.
Mistake: Not freezing long enough.
Why it happens: Rushing the freezing can leave the ice cream soft.
How to fix it: Ensure that the mixture has been solidified completely by freezing for the recommended time.
Mistake: Using warm chocolate to coat.
Why it happens: If the coating chocolate is too warm, it can cause the ice cream to melt.
How to fix it: Allow the melted chocolate to cool slightly before dipping the ice cream.
Mistake: Cutting shapes before the ice cream is fully solid.
Why it happens: This can lead to messy shapes.
How to fix it: Ensure the ice cream is overly frozen before attempting to cut it.
Variations
- Use Rice Krispies instead of cornflakes for a different texture.
- Incorporate different flavor extracts, like almond or orange, for unique flavor twists.
- Try drizzling with caramel or chocolate sauce for extra sweetness.
- Experiment with different shaped molds for fun presentations.
- Switch out white chocolate for milk or dark chocolate for flavor variations.
Nutrition Highlights
| Nutrient | Role |
|---|---|
| Protein | Helps support satiety and balanced meals. |
Serving Ideas
This whimsical dessert is ideal for backyard barbecues, birthday parties, or any festive occasion. Pair it with refreshing summer drinks like iced tea or lemonade for a complete treat. Serve alongside a smorgasbord of dipping sauces, such as chocolate or caramel, to elevate the experience. For a playful brunch option, serve with fresh fruit to balance the rich and creamy profile of the ice cream.
Best Occasions for This Recipe
This dessert shines at summer picnics, birthday parties, or holiday gatherings. It’s also perfect for casual game nights or movie marathons, inviting guests to indulge in a delightful blend of fun and nostalgia. Whether making a big batch to share or just as a special treat for yourself, it brings joy to any occasion.
Meal Prep & Storage
Meal Prep
This ice cream can be made in advance, allowing you to prepare ahead of any event. Simply follow the recipe, shape, and freeze until needed.
Refrigeration
Once the ice cream is ready and coated, it is not advisable to refrigerate it since it may lose texture and become too soft.
Freezing
Keep the ice cream bars in an airtight container in the freezer to ensure freshness and prevent freezer burn.
Reheating
As these ice cream bars are frozen treats, they do not require reheating. Allow them to thaw slightly at room temperature before eating for the best texture.
FAQs
How can I store the ice cream bars?
Store them in an airtight container in the freezer to keep them fresh.
Can I substitute ingredients in this recipe?
Yes, you can try using different types of chocolate or coatings as per your preference.
What should I do if the chocolate coating melts while dipping?
If the chocolate is too warm, let it cool slightly before using it to dip the ice cream.
Can I make this ice cream without a stand mixer?
Yes, you can use a hand mixer or whisk, but it may require more effort to achieve stiff peaks.
How do I make the ice cream shapes without a knife?
Using cookie cutters can yield fun shapes without needing a knife.
Save This Recipe for Later
If this whimsical dessert has piqued your interest, be sure to pin it for later! Perfect for satisfying that sweet tooth in a creative way!
Conclusion
This Homemade Fried Chicken Ice Cream is not just a dessert; it’s an experience. With its delightful contrast of creamy and crunchy, this recipe is sure to impress and satisfy everyone’s cravings for something a little different. Enjoy the playful twist and the smiles it creates whenever it makes an appearance at your table!

Homemade Fried Chicken Ice Cream
Ingredients
Method
- Chill the bowl and whisk attachment of a stand mixer in the refrigerator for 15 minutes.
- Line a baking dish with parchment paper, leaving some overhang for easy removal.
- Whip the chilled heavy cream in the stand mixer until soft peaks form, then increase speed to medium-high until stiff peaks form.
- Gently fold in the sweetened condensed milk and vanilla extract until combined.
- Transfer the mixture to the prepared baking dish and smooth into a flat layer. Freeze for at least 8 hours or until solid.
- Once frozen, remove the ice cream from the dish and cut into fun shapes using a hot knife.
- Place shaped pieces on a lined baking sheet and freeze for an additional 2 hours.
- Melt the white chocolate and coconut oil together in a microwave-safe bowl, stirring until smooth.
- Dip each ice cream shape into the melted chocolate, then roll in crushed cornflakes to coat. Return to the baking sheet.
- Freeze the coated ice cream bars for at least 1 hour before serving, or keep frozen until ready to enjoy.