
There’s something undeniably comforting about the aroma of freshly baked bread wafting through your home. If you’ve ever felt overwhelmed by the demands of daily life yet craved that warm, crusty loaf, our Dutch Oven No Knead Crusty Bread recipe is here to rescue your baking dreams. The best part? It requires minimal effort and time, giving you the satisfaction of homemade bread without the usual hassle. Perfect for those busy weeknights or quiet weekends at home, this recipe not only floods your kitchen with nostalgia but also supports your nutrition goals with its simple, wholesome ingredients.
Kitchen Frustration That Makes This Recipe a Lifesaver
Many of us struggle with cooking fatigue, particularly when juggling family responsibilities and busy work schedules. Taking the time to make meals that everyone enjoys can feel nearly impossible, especially if you’re trying to stick to a meal plan or maintain a budget. The idea of whipping up something comforting yet simple can quickly turn into frustration. This is where the Dutch Oven No Knead Crusty Bread comes to the rescue.
Imagine coming home after a long day, your heart yearning for something warm and nourishing. This bread doesn’t just satisfy your cravings; it brings that delightful feeling of cozy family gatherings right to your dinner table. With its ease of preparation, you can bake up a scrumptious loaf that complements virtually any meal, from soups to salads, fostering moments of togetherness. Remember: baking can be stress-free and enjoyable, especially with a recipe designed with your busy lifestyle in mind.
Why This Dutch Oven No Knead Crusty Bread Works So Well
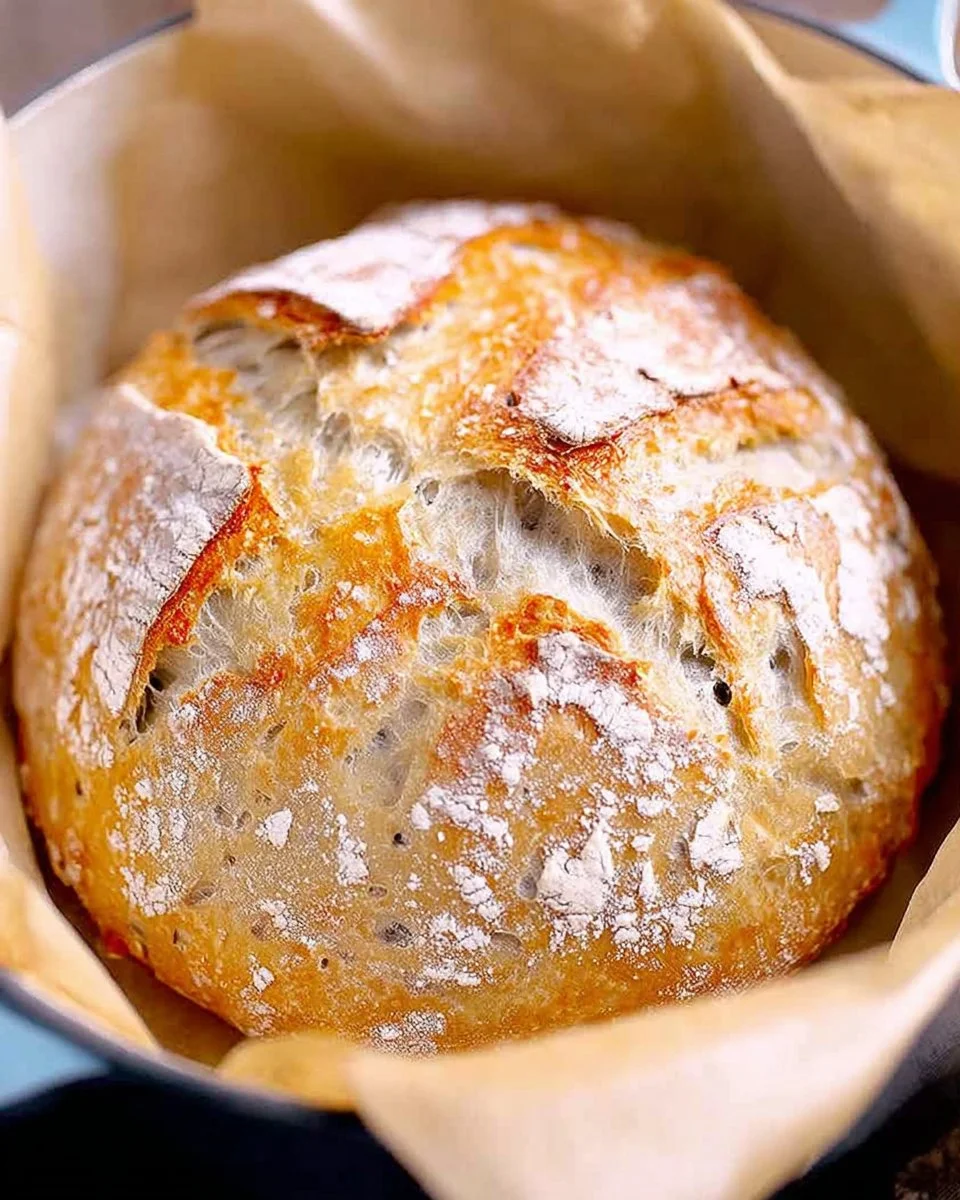
Quick Answer: This Dutch Oven No Knead Crusty Bread offers an amazing balance of flavor, texture, and convenience, making it an ideal solution for home bakers at any skill level.
This recipe boasts a deep, rustic flavor thanks to the long fermentation process, enhancing its taste while ensuring a crusty exterior with a soft, chewy crumb inside. The convenience of a no-knead method saves you time and energy without sacrificing quality. Plus, the Dutch oven creates the perfect baking environment, replicating professional steam ovens, which is essential for achieving that coveted crust.
For busy families, this bread is a time-saving hero. You can prepare the dough in advance, letting it rise while you attend to other matters. Plus, it’s a versatile staple, ready to be served with a variety of dishes, supporting your family-style meal plans without breaking the bank.
Ingredients, Substitutions & Foolproof Tips
- 1 1/2 cups warm water (about 100 degrees F): This activates the yeast and helps create a moist environment for the dough.
- 1 packet yeast (active dry, instant, or quick rise- 2.25 teaspoons): Essential for the bread’s rise, contributing to its fluffy texture.
- 1 ½ teaspoons fine grain salt: Enhances flavor and controls the fermentation process.
- 3 1/4 cups all-purpose flour: The foundation of the bread, yielding a chewy and crusty loaf.
Feel free to swap out all-purpose flour for whole wheat flour for a slightly nuttier flavor, though this may alter the texture a bit.
Step-by-Step Directions
- Mix the Ingredients: In a large bowl (or container), combine the 1 1/2 cups warm water, 1 packet of yeast, and 1 ½ teaspoons of salt. Whisk until the yeast and salt are almost dissolved.
- Add the Flour: Stir in the 3 1/4 cups all-purpose flour until a sticky dough forms. Don’t overmix; the dough should remain wet and messy.
- Let It Rise: Cover the bowl with a kitchen towel and let it rise in a warm place for 2-3 hours until doubled in size.
- Preheat Your Oven: About 30-60 minutes before baking, preheat your oven to 450 degrees F with the Dutch oven inside, covered, to heat thoroughly.
- Shape the Dough: On a floured piece of parchment paper, scrape the dough out and form it into a loaf shape. Flipping it over to ensure the floured side is on top.
- Score the Loaf: Optionally, use a sharp knife to cut a few slits across the top of the loaf, about 1/2 inch deep, creating a striking appearance.
- Bake the Bread: Carefully remove the hot Dutch oven, place the loaf inside using the parchment paper, cover, and bake for 35-40 minutes.
- Finish Baking: Remove the lid and bake for an additional 5-10 minutes until golden brown.
- Cool: Remove the bread using the parchment paper and allow it to cool on a wire rack for at least 10 minutes before slicing.
Common Mistakes to Avoid & Pro Tips
- Dough Too Wet or Dry: If the dough seems too wet, add flour a tablespoon at a time. If dry, add warm water, a tablespoon at a time.
- Insufficient Rising: Ensure your yeast is active; if the dough doesn’t rise, your yeast may be expired.
Pro Tips:
- Preheat your Dutch oven long enough to create a perfect crust.
- Let the bread cool completely for the best slicing results.
Serving, Storage & Freezer Guide
How to Serve Dutch Oven No Knead Crusty Bread
This bread pairs beautifully with soups, stews, salads, or simply with butter and jam. Slice it thick for sandwiches or use it as a base for bruschetta, taking your family-style gatherings to the next level.
How to Store Dutch Oven No Knead Crusty Bread
To maintain freshness, store the cooled bread in an airtight container at room temperature for up to 3 days. Alternatively, you can wrap it in plastic and refrigerate for up to a week.
Can You Freeze Dutch Oven No Knead Crusty Bread?
Yes! Wrap the bread tightly in plastic or foil and freeze for up to 3 months. Thaw it at room temperature; you may want to reheat it in the oven for a few minutes to regain its crispy crust.

Frequently Asked Questions
Question 1
Can I use whole wheat flour instead of all-purpose flour? Yes, whole wheat flour can be used, but it may change the texture of the bread a bit.
Question 2
How do I know when my bread is done? The bread should be a rich golden brown and sound hollow when tapped.
Question 3
Can I use instant yeast? Yes, instant yeast will work perfectly in this recipe without any modifications.
Question 4
What can I do with leftover bread? Leftover bread can be turned into croutons, breadcrumbs, or even transformed into French toast.
Conclusion
Baking this Dutch Oven No Knead Crusty Bread not only enriches your family meals but also brings a touch of comfort and nostalgia into your home. Your loved ones will appreciate the warmth and flavor of homemade bread that fits seamlessly into your busy life.
“If this recipe reminds you of someone you love, share it with them. Your memories keep recipes alive.”

Dutch Oven No Knead Crusty Bread
Ingredients
Method
- In a large bowl, combine the warm water, yeast, and salt. Whisk until the yeast and salt are almost dissolved.
- Stir in the all-purpose flour until a sticky dough forms. Don’t overmix.
- Cover the bowl with a kitchen towel and let it rise in a warm place for 2-3 hours until doubled in size.
- Preheat your oven to 450 degrees F with the Dutch oven inside, covered, to heat thoroughly, about 30-60 minutes before baking.
- On a floured piece of parchment paper, scrape the dough out and form it into a loaf shape.
- Optionally, cut a few slits across the top of the loaf, about 1/2 inch deep.
- Carefully remove the hot Dutch oven, place the loaf inside using the parchment paper, cover, and bake for 35-40 minutes.
- Remove the lid and bake for an additional 5-10 minutes until golden brown.
- Remove the bread using the parchment paper and allow it to cool on a wire rack for at least 10 minutes before slicing.