
Ah, the start of a busy morning can often feel like racing against time. The sun peeks through the curtains, and there’s barely enough time to sip a hot cup of coffee before dashing out the door. Whether you’re juggling kids, work, or the myriad of tasks that fill our lives, the need for a nourishing breakfast can easily be lost in the chaos. Wouldn’t it be lovely to have something comforting and nourishing ready to grab on your way? Enter the beautiful, heartwarming solution: Bran Muffins. These little bundles of joy are not just a treat but a delightful way to embrace a busy day filled with warmth and love.
Why You’ll Love This Bran Muffins Recipe
A Comfort Amidst the Hustle
We’ve all faced those frantic mornings when breakfast seems like an unattainable luxury. With children who are either picky eaters or prefer sweet pancakes over wholesome foods, trying to create a nutritious meal can feel discouraging. But here’s the beauty of Bran Muffins — they are soft, fluffy, and oh-so-satisfying. The familiar scent of baking muffins wafting through the kitchen can turn any hectic morning into a serene one. Plus, they’re a wonderful way to sneak in some healthy goodness, making them a perfect choice for families on the go.
The Solution: Wholesome Bran Muffins
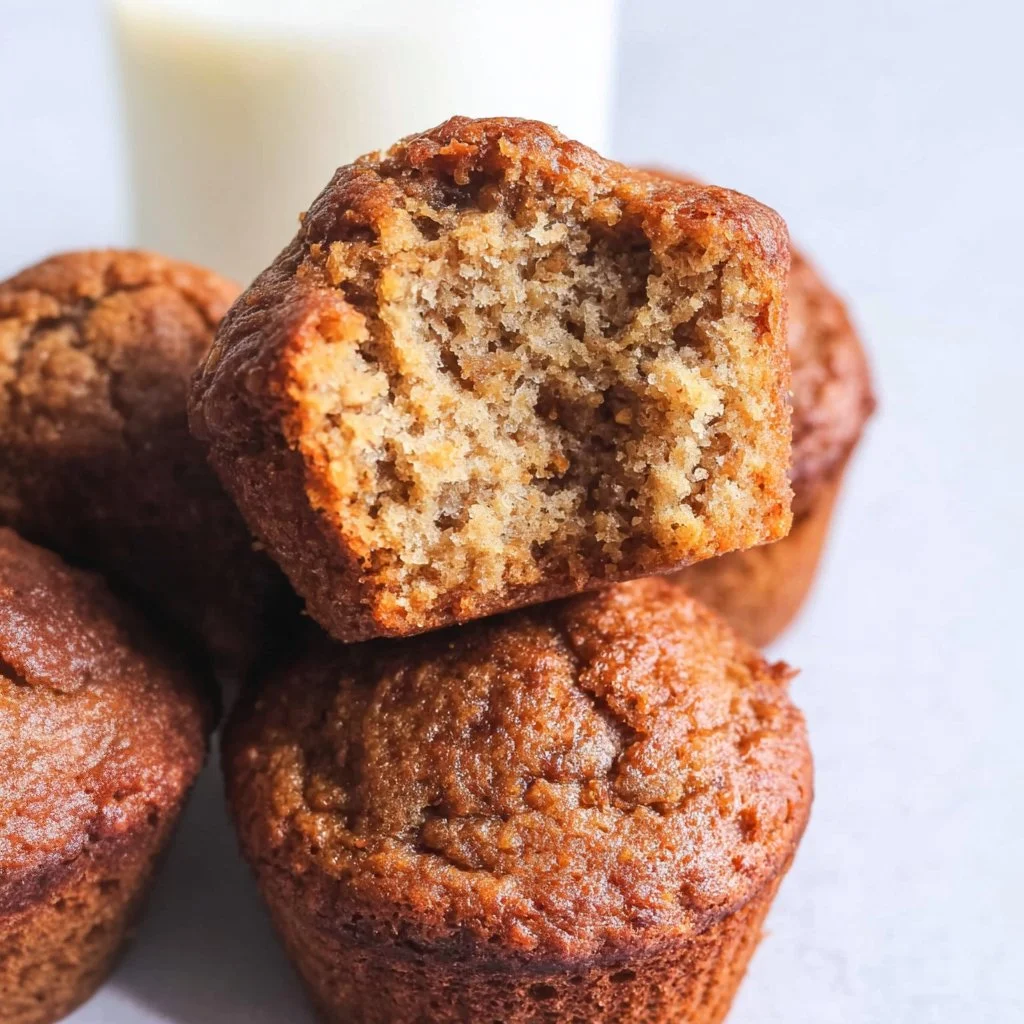
These Bran Muffins are nothing short of magic in the kitchen. They’re easy to whip up, and the ingredients are often staples in your pantry. Packed with dietary fiber and a comforting texture, these muffins will become a cherished part of your breakfast routine. Baked fresh, they offer a warm embrace that feels like a hug on a chilly morning, and you can customize them with nuts or dried fruits for an extra touch. Let’s dive in and discover how to create these delightful Bran Muffins that not only nourish your body but also warm your heart.
Quick Answer: The easiest way to make Bran Muffins creamy and rich is by using buttermilk, which adds moisture and flavor to the muffins.
Ingredients Breakdown & Prep Tips
The Heart of the Recipe
Let’s gather the ingredients that will bring these Bran Muffins to life. Here’s what you’ll need:
- 1 ¼ cups buttermilk: This magical ingredient adds moisture and richness.
- 1 ¼ cups all bran cereal: Provides fiber and a hearty texture to the muffins.
- 1 ¼ cups all-purpose flour (or whole wheat flour): Creates the muffin body; whole wheat can add a nutty flavor.
- ¼ teaspoon salt: Enhances all the flavors in the muffins.
- ½ cup sugar (or less to taste): Sweetens the muffins; adjust based on your preference.
- 1 tablespoon baking powder: The leavening agent that helps the muffins rise.
- ¼ teaspoon ground cinnamon (double for added cinnamon flavor): Adds warmth and aroma to the muffins.
- 1 large egg: Binds everything together with love.
- ¼ cup oil (see note for substitutions): Keeps the muffins moist and delicious.
Getting Started with Preparation
Now, let’s put on our aprons and dive into creating these scrumptious Bran Muffins! Here’s a straightforward step-by-step guide:
Step 1: Preheat and Prepare
Preheat your oven to 400°F (200°C) and grease a muffin tin generously. The anticipation of warm muffins baking is already filling the air!
Step 2: Soften the Cereal
In a medium bowl, combine the all bran cereal with the buttermilk. Let it sit for about 2-3 minutes until the cereal softens. The transformation is wonderful, and soon it will blend perfectly with the other ingredients.
Step 3: Mix the Dry Ingredients
In a large bowl, whisk together the flour, salt, sugar, baking powder, and cinnamon. This is where the heart of the muffin begins to take shape.
Step 4: Combine Wet Ingredients
Stir the egg and oil into the softened cereal mixture. The blend of textures and flavors is delightful — promise me you’ll take a little taste!
Step 5: Bring It All Together
Now, fold the dry ingredients into the wet mixture gently. Stir until just combined — don’t worry too much about lumps; they’ll bake out beautifully.
Step 6: Bake the Muffins
Scoop the batter into the prepared muffin cups, filling each cup about ¾ full. Pop them into the oven and bake for about 18 minutes, or until they turn a gorgeous golden brown and a toothpick inserted in the center comes out clean. Your kitchen will smell heavenly!
Step 7: Serve and Enjoy
Once baked, allow the muffins to cool slightly, or if you can’t resist, serve them warm with a pat of butter or a drizzle of honey. They are also fantastic cooled completely, wrapped individually, and stored in the fridge for up to two weeks.

Avoid These Mistakes
Common Mistakes & Fixes
- Overmixing the Batter: Mixing too vigorously can lead to dense muffins. Remember, gentle folds are key.
- Scoop Variations: Not filling the muffin tin evenly can cause some muffins to under or overbake. Be as precise as you can!
- Wrong Oven Temperature: Every oven has its quirks. If your muffins seem to be browning too quickly, consider checking your oven’s calibration for accuracy.
Pro Tips to Get It Right
- Always let your buttermilk and eggs be at room temperature before mixing; this helps bind the ingredients together seamlessly.
- For an extra cinnamon kick, don’t be afraid to double the cinnamon — this brings out a warm flavor that wraps around you like a cozy blanket.
- Share your muffins! They make wonderful gifts wrapped in pretty paper; a simple gesture that warms both hearts and bellies.
Serving, Storage & Creative Variations
Best Ways to Serve It
Picture this: a cozy kitchen filled with laughter, children giggling, and the aroma of freshly baked Bran Muffins wafting through the air. These muffins pair perfectly with a dollop of yogurt or a fresh fruit salad, making them a delightful centerpiece at your breakfast table. For a touch of fun, you could even host a muffin decorating party with jams and spreads for friends and family!
Storage, Seasonal & Dietary Variations
To keep these beauties fresh, let them cool completely before wrapping each muffin individually in plastic wrap. They can be stored in the fridge for up to two weeks or even frozen for longer freshness. When you want a treat, just pop them in the microwave for a few seconds to feel that warmth.
Feel free to experiment! Consider adding raisins, nuts, or even some chopped apples for a seasonal twist through autumn. And if you’re aiming for a lighter version, swapping out half the oil for applesauce will keep your muffins moist while lowering the fat content.
FAQ SECTION
Can I make these Bran Muffins ahead of time?
Absolutely! Prepare the batter the night before and store it in the fridge. Just bake the muffins in the morning for a fresh start!
What other ingredients can I add to my Bran Muffins?
You can customize these muffins by adding nuts, dried fruits, or even chocolate chips for a sweeter treat!
How do I know if my muffins are done?
Insert a toothpick into the center of a muffin; it should come out clean. If it has wet batter clinging to it, give them a few more minutes.
Can I use a gluten-free flour substitute for this recipe?
Yes, you can swap in a gluten-free all-purpose flour blend. Just be sure to check the packaging for equivalent measurements, as they can vary.
As you embrace these warm, nourishing Bran Muffins, remember they are a celebration of love and family. Here’s to cozy breakfasts and delightful mornings, one muffin at a time!
Bran Muffins
Ingredients
Method
- Preheat your oven to 400°F (200°C) and grease a muffin tin generously.
- In a medium bowl, combine the all bran cereal with the buttermilk. Let it sit for about 2-3 minutes until the cereal softens.
- In a large bowl, whisk together the flour, salt, sugar, baking powder, and cinnamon.
- Stir the egg and oil into the softened cereal mixture.
- Gently fold the dry ingredients into the wet mixture until just combined.
- Scoop the batter into the prepared muffin cups, filling each cup about ¾ full.
- Bake for about 18 minutes, or until golden brown and a toothpick inserted in the center comes out clean.
- Allow the muffins to cool slightly before serving warm, or cool completely and store.