

Indulging in a bowl of ice cream can swiftly transport you back to carefree childhood days, a time when every scoop was filled with joy and celebration. If you’re like many who feel overwhelmed by cooking fatigue, the craving for a sweet comfort like Birthday Cake Ice Cream often becomes a dream deferred. This delightful frozen treat is the answer to your nostalgic desires, combining the flavors of tender cake and creamy ice cream into one enjoyable dessert. This Birthday Cake Ice Cream is not just a dessert; it’s a simple, time-saving remedy to bring cheer to your family gatherings and quiet evenings at home.
Kitchen Frustration That Makes This Recipe a Lifesaver
In today’s fast-paced world, cooking can feel like an uphill struggle. Whether juggling work, family, or unexpected commitments, the desire to whip up something delicious often gets sidelined. Many find themselves worn out by the thought of meal planning or extensive recipes that take a lot of time. This is where our Birthday Cake Ice Cream becomes an invaluable ally, ready to ease your dinner fatigue and satisfy your family’s cravings in a way that feels both special and efficient.
Imagine coming home after a long day, your mind whirling with responsibilities, yet needing to provide a treat for your loved ones. The simplicity of this ice cream brings back that comforting childhood nostalgia without the stress of cooking a complex meal. With just a few effortless steps, you can treat your family to this sweet delight, making it a top choice in your weeknight dessert rotation.
Why This Birthday Cake Ice Cream Works So Well
Quick Answer: Birthday Cake Ice Cream perfectly blends the nostalgic flavors of your favorite childhood cake with the rich creaminess of ice cream. It’s an easy yet luxurious dessert option that fills your kitchen with the delightful aroma of sweet cake batter and sprinkles.
The flavor of this ice cream reflects the joy of birthdays—sweet, light, and beautifully colorful. Its texture strikes a perfect balance between creamy and light, making it enjoyable without feeling too heavy. This dessert is not only a comforting treat but also adds convenience to your meal prep routines. You can create a batch in advance and store it for those times when you need a quick family-style dessert.
From a health perspective, it’s calorie-conscious and macro-balanced, allowing you to enjoy dessert without compromising on your nutrition goals. Plus, it’s a fantastic way to make use of leftover cake mix in a budget-friendly manner, reducing waste while satisfying sweet cravings.
Ingredients, Substitutions & Foolproof Tips
- 1 cup white cake mix (unprepared and sifted): This forms the base of your ice cream, adding that signature cake flavor. There are no perfect substitutions for cake mix due to its specific blend, but ensure it’s sifted to keep the texture smooth.
- 1 1/2 cups heavy cream: This creates the rich and creamy base of the ice cream. If you’re looking for a lighter option, you can use half-and-half, but expect a slightly different texture.
- 1 1/2 cups whole or 2% milk: This dilutes the cream while keeping the mixture rich. Skim milk may be used for a low-fat option but will alter the creaminess.
- 1/2 cup granulated sugar: Sugar is essential for sweetness and helps with the creamy texture. You may substitute this with a sugar alternative based on your dietary needs.
- 1 large egg yolk (beaten): This enriches the ice cream and helps create a smoother texture. There are no perfect substitutes; however, you may try using a tablespoon of cornstarch mixed with a tablespoon of water as a thickening agent.
- Pinch of salt: Enhances flavor, balancing the sweetness. No substitution needed here.
- 1 teaspoon vanilla extract: Adds a warm, inviting flavor. Opt for pure vanilla extract for the best result.
- 1/2 teaspoon cake batter extract: This is key for that authentic cake flavor, giving your ice cream a nostalgic feel. If unavailable, you might use more vanilla extract, though the flavor will not be identical.
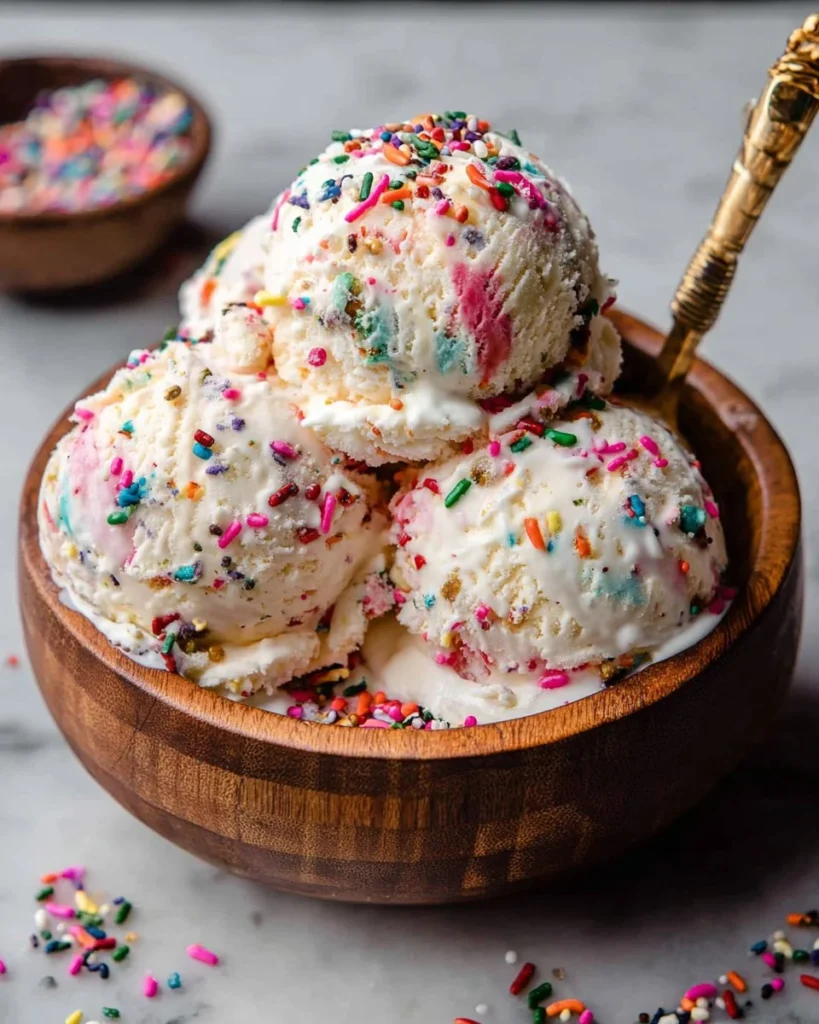
- 1/2 cup rainbow sprinkles: These add a fun, colorful aesthetic to the ice cream. Feel free to swap with themed sprinkles based on the occasion.
Step-by-Step Directions
- Combine Ingredients: In a medium saucepan, add the cake mix, sugar, heavy cream, milk, beaten egg yolk, and salt. Whisk until everything is completely smooth.
- Heat the Mixture: Cook over medium heat, stirring occasionally. Your mixture should reach 160°F, which typically takes around 5-7 minutes. Remove from heat once it reaches this temperature.
- Add Flavorings: Stir in the vanilla extract and cake batter extract until well combined. The blend of these extracts will give your ice cream its signature flavor profile.
- Chill the Mixture: Pour the mixture through a fine mesh sieve into a heat-proof container to remove any lumps. Allow it to chill in the refrigerator for about 4 hours, or until it’s completely cold.
- Churn the Ice Cream: After chilling, pour the mixture into an ice cream maker and churn according to the manufacturer’s directions. This process typically takes about 20-25 minutes until it reaches a soft-serve consistency.
- Add Sprinkles: Once the ice cream is churned, gently fold in the rainbow sprinkles to distribute them evenly throughout the mixture.
- Freeze: Transfer the churned ice cream into a freezer-safe airtight container. Freeze for 2-4 hours to fully freeze before serving.
Common Mistakes to Avoid & Pro Tips
- Avoid Overheating the Mixture: Keep an eye on your saucepan to prevent the base from exceeding 160°F, which could cook the egg yolks instead of creating a creamy base.
- Chilling Time: Allow sufficient chilling time; the colder the mixture, the better the texture during churning.
- Don’t Skip the Sieve: Always strain your mixture to guarantee a smooth and creamy consistency in your ice cream.
Pro Tips:
- For a festive touch, feel free to add mix-ins like crushed cookies or chocolate chips during the last few minutes of churning.
- If you like a firmer ice cream, leave it in the freezer a bit longer, but be sure to let it sit at room temperature for a few minutes before scooping.
Serving, Storage & Freezer Guide
How to Serve Birthday Cake Ice Cream
Serve this delectable ice cream in bowls topped with extra rainbow sprinkles for a festive look. It pairs wonderfully with fresh fruit or a drizzle of chocolate syrup. Consider serving it at birthday celebrations, family gatherings, or just as a fun late-night treat.
How to Store Birthday Cake Ice Cream
Store your ice cream in a tightly sealed freezer-safe container. It should remain fresh for up to 2 weeks in the freezer. To maintain the best texture, avoid leaving it out at room temperature for extended periods.
Can You Freeze Birthday Cake Ice Cream?
Yes, this ice cream is freezer-friendly! It can stay in the freezer for about 2-4 weeks. However, after a longer duration, the texture may change slightly; hence it is best enjoyed fresh. When ready to serve, simply let it sit for a few minutes outside the freezer to soften before scooping.

Frequently Asked Questions
Question 1
Can I use low-fat milk instead of heavy cream?
Yes, although this will alter the creaminess. For a lighter option, use half-and-half.
Question 2
How long does it take to churn ice cream?
Churning typically takes about 20-25 minutes until it reaches soft-serve consistency.
Question 3
Can I add flavors like chocolate or caramel?
Absolutely! Feel free to mix in additional flavors, just be conscious of any extra liquids you may introduce.
Question 4
What if the ice cream is too hard after freezing?
Let it sit at room temperature for a few minutes to soften before scooping to improve texture.
Conclusion
Whether you’re reminiscing about your childhood or creating beautiful family memories, this Birthday Cake Ice Cream holds the promise of sweetness and comfort. It brings simple joy into any day, making it a must-try in your home. If this recipe reminds you of someone you love, share it with them. Your memories keep recipes alive.
Birthday Cake Ice Cream
Ingredients
Method
- In a medium saucepan, add the cake mix, sugar, heavy cream, milk, beaten egg yolk, and salt. Whisk until completely smooth.
- Cook over medium heat, stirring occasionally, until the mixture reaches 160°F (about 5-7 minutes).
- Remove from heat and stir in the vanilla and cake batter extract until well combined.
- Pour the mixture through a fine mesh sieve into a heat-proof container and chill in the refrigerator for about 4 hours, or until completely cold.
- Pour the chilled mixture into an ice cream maker and churn according to the manufacturer’s directions (about 20-25 minutes).
- Gently fold in the rainbow sprinkles to evenly distribute.
- Transfer the churned ice cream into a freezer-safe airtight container and freeze for 2-4 hours until fully frozen.