

Creating a perfect balance between indulgence and practicality, New York Cheesecake Cookies are here to help you break free from kitchen frustration. If you find yourself exhausted from repeating the same recipes or struggling to stick to your meal plan, these cookies might just be the ideal solution. They deliver that rich, creamy flavor of traditional New York cheesecake but are easy to make—and budget-friendly too! With a simple list of ingredients and straightforward steps, you can whip up a batch of these yummy treats that will satisfy everyone in the family. Say goodbye to cooking fatigue and hello to a delightful cookie experience!
Kitchen Frustration That Makes This Recipe a Lifesaver
Every kitchen has its challenges—from last-minute meal planning to picky eaters who seem to turn their noses up at everything. If you’ve ever found yourself in a bind, searching for a recipe that fits your family’s demands while still feeling delicious and special, you’re not alone. Enter New York Cheesecake Cookies: a delightful twist on a classic dessert that addresses all those kitchen woes. This recipe brings the luxurious taste of cheesecake into a cookie format, allowing you to cater to dessert lovers while remaining practical. They’re perfect for feeding a crowd and can be made in less than an hour. Plus, you can even prep them ahead of time for busy weekdays!
Why This New York Cheesecake Cookies Works So Well
Quick Answer: New York Cheesecake Cookies are creamy, soft, and easy to make, delivering the nostalgic flavor of classic cheesecake in a convenient form.
The combination of cream cheese and butter creates a rich, velvety texture that mirrors the iconic dessert, while the addition of chocolate chips (if you choose to include them) provides a fun surprise element. Ideal for a calorie-conscious dessert, these cookies offer the perfect treat for family gatherings or casual cookie jars. They’re also a fantastic way to satisfy those late-night cravings without straying from your nutrition goals. For busy moms, these cookies are both time-saving and delightful, making them a staple recipe to keep on hand.
Ingredients, Substitutions & Foolproof Tips
- 1 cup cream cheese, softened: Key for that rich, cheesecake flavor; try low-fat cream cheese for a lighter option.
- 1/2 cup butter, softened: Adds creaminess and helps bind the cookies together; substituting with coconut oil can work too.
- 1 cup sugar: Sweetens the cookies; consider using a sugar substitute for a healthier option.
- 1 egg: Binds the ingredients; flaxseed meal mixed with water can be a vegan option.
- 1 teaspoon vanilla extract: Enhances flavor; vanilla bean paste can elevate the taste.
- 2 cups all-purpose flour: The main structure; whole wheat flour could be (somewhat) budget-friendly and add fiber.
- 1 teaspoon baking powder: Helps the cookies rise.
- 1/4 teaspoon salt: Balances the sweetness.
- 1/2 cup chocolate chips (optional): Adds a touch of indulgence; try dark chocolate for a healthier twist.
Step-by-Step Directions
- Preheat your oven to 350°F (175°C): This is crucial for achieving the perfect bake; let your oven warm up while you prepare the dough for even heat distribution.
- Cream together the softened cream cheese, butter, and sugar until smooth: In a large bowl, blend these ingredients for 2-3 minutes. You want a light, fluffy mixture that feels airy and welcoming.
- Beat in the egg and vanilla extract: Mix them in well for about a minute. The batter should be creamy and well-combined, with a sweet aroma wafting through the kitchen.
- In another bowl, whisk together flour, baking powder, and salt: This step ensures that the dry ingredients are evenly distributed. Take a moment to appreciate the simplicity of your ingredients coming together.
- Gradually add the dry ingredients to the wet mixture until just combined: Don’t overmix; you want soft dough that holds together but isn’t too dense. Fold in chocolate chips if using; they add a delightful burst of flavor.
- Drop spoonfuls of the dough onto a greased baking sheet: Use a cookie scoop or tablespoon to keep the portions consistent. Give each dollop enough space to spread slightly while baking.
- Bake for 12-15 minutes or until the edges are lightly golden: Keep an eye on them, as the baking time may vary. You’re looking for subtle golden edges that signal doneness.
- Allow cookies to cool before serving: Resist the temptation to dive in right away! Cooling helps set the cookies, enhancing their texture and flavor profile.
Common Mistakes to Avoid & Pro Tips
- Overmixing the dough: This can lead to tough cookies. Mix until just combined for softness.
- Not letting the butter and cream cheese soften: Cold ingredients won’t blend well, impacting the cookie’s texture. Take them out ahead of time.
- Skipping parchment paper or greasing the baking sheet: This can result in cookies sticking to the pan. Always prepare your baking surface.
Pro Tips:
- Use a cookie scoop for uniform sizing to ensure even baking.
- Let your cookies cool on a wire rack to enhance the crust’s crispness while maintaining a chewy center.
- Experiment with mix-ins like dried fruit or nuts to put a unique spin on your cookies.
Serving, Storage & Freezer Guide
How to Serve New York Cheesecake Cookies
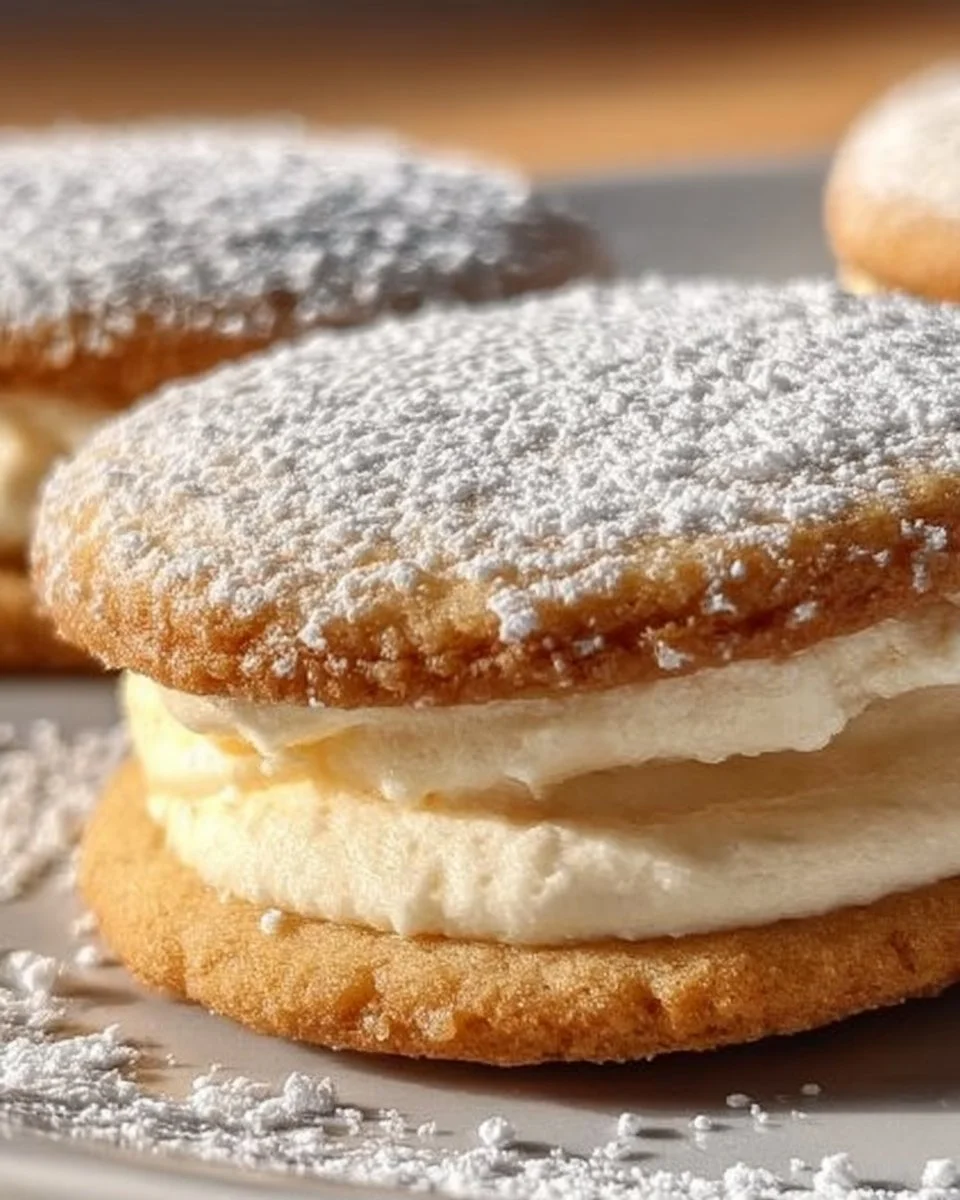
New York Cheesecake Cookies can be enjoyed warm with a glass of milk or coffee. Try stacking them high on a dessert platter for special occasions or simply place a few on a decorative plate for a casual family treat. They’re also a fantastic base for ice cream sandwiches. Just add a scoop of your favorite flavor between two cookies and enjoy!
How to Store New York Cheesecake Cookies
To keep your cookies fresh, store them in an airtight container at room temperature. They can maintain their deliciousness for up to a week. If they start to harden, simply pop them in the microwave for a few seconds to regain their soft, gooey texture.
Can You Freeze New York Cheesecake Cookies?
Absolutely! These cookies freeze beautifully, making them freezer-friendly. Allow your baked cookies to cool completely. Layer them between parchment paper in a freezer-safe container or bag, and they can last for up to three months. Thaw them in the refrigerator or let them come to room temperature before serving for the best experience.
placeholder
Frequently Asked Questions
What is the texture of New York Cheesecake Cookies like?
New York Cheesecake Cookies have a soft, chewy texture with a delightful creamy center. They closely resemble the taste and feel of traditional cheesecake, presenting a wonderful contrast with the slight crispness around the edges.
Can I substitute the cream cheese for a lower-calorie option?
Yes! You can use low-fat cream cheese or even a dairy-free cream cheese alternative. This will still provide a rich flavor but decreases the calories and fat content.
Are these cookies suitable for kids?
Definitely! Children adore the sweet, creamy flavor. Plus, you can add in fun mix-ins like chocolate chips or sprinkles to excite their taste buds.
What can I do if my cookies spread too much while baking?
This usually indicates that the butter was too warm when mixed. To remedy this in the future, try chilling the dough for about 15 minutes before baking, which helps maintain shape.
Conclusion
New York Cheesecake Cookies are more than just a treat; they’re a charming nod to cherished family memories, making them perfect for gatherings or simple snack sessions. They are practical, delicious, and embody the flavors we love in lifecycle moments. If this recipe reminds you of someone you love, share it with them. Your memories keep recipes alive.

New York Cheesecake Cookies
Ingredients
Method
- Preheat your oven to 350°F (175°C).
- Cream together the softened cream cheese, butter, and sugar until smooth for 2-3 minutes.
- Beat in the egg and vanilla extract until well combined.
- In another bowl, whisk together flour, baking powder, and salt.
- Gradually add the dry ingredients to the wet mixture until just combined, and fold in chocolate chips if using.
- Drop spoonfuls of the dough onto a greased baking sheet.
- Bake for 12-15 minutes or until edges are lightly golden.
- Allow cookies to cool before serving.