

Creating delicious memories in the kitchen often comes with challenges. Many of us face cooking fatigue, especially when trying to stick to meal plans or create something special for family gatherings. For those times when a quick and delightful solution is needed, this Strawberry Filling for Cake shines as a go-to recipe. With fresh strawberries and minimal ingredients, it caters perfectly to health-conscious individuals seeking a budget-friendly and nutritious addition to their meals. Imagine whipping up this sweet, tangy filling that not only elevates your desserts but also satisfies your family’s cravings. It’s time to embrace the joy of cooking again with this easy and versatile filling.
Kitchen Frustration That Makes This Recipe a Lifesaver
The kitchen can sometimes feel like a battleground. With long days and busy schedules, it’s easy to fall into the trap of meal fatigue. You might find yourself asking, “What can I make that is both simple and impressive?” This Strawberry Filling for Cake is more than just a recipe; it’s a solution for those overwhelming moments when creativity runs dry. It takes only 30 minutes to prepare. Whether you are filling a cake, topping pancakes, or crafting yogurt parfaits, you can satisfy your family’s sweet tooth without the fuss.
Making this Strawberry Filling is straightforward. You’ll only need a few fresh ingredients and simple kitchen tools. This allows you to stay focused on other meal prep tasks, alleviating some pressure from your cooking schedule. Consider preparing this filling ahead of time, refrigerating it until you’re ready to use, and enjoying the sweet results of your proactive planning!
Why This Strawberry Filling for Cake Works So Well
Quick Answer:
This Strawberry Filling for Cake works well due to its simple ingredients, quick preparation time, and delicious flavor that enhances a variety of desserts.
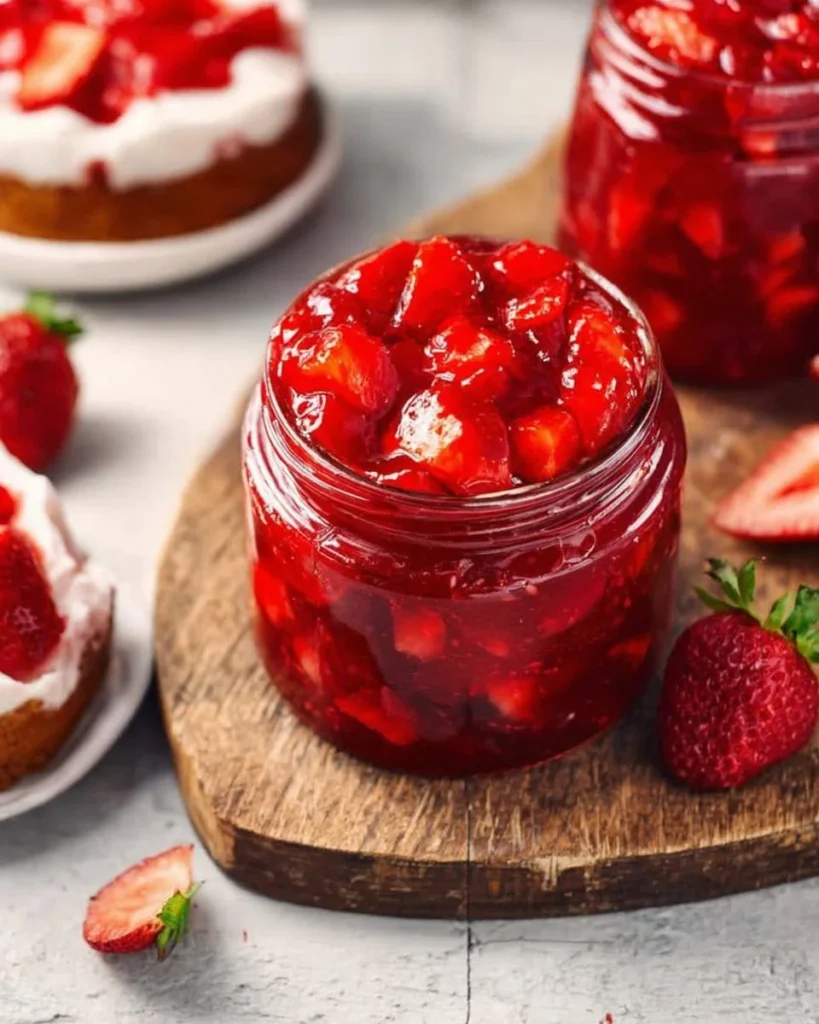
The beauty of this filling lies in its vibrant taste and smooth texture. Fresh strawberries provide a satisfying burst of flavor that can brighten up any dish. When cooked down with sugar and a little lemon juice, their natural sweetness shines. The addition of cornstarch not only thickens the mixture but also creates a jam-like consistency that clings to cakes and pancakes, providing a delightful mouthfeel.
From a health-conscious perspective, this filling is far user-friendly. With no additives or preservatives, you control the sugar level, making it family-style and appealing for various nutrition goals. Also, it’s a time-saving solution, ready in just under an hour, that supports portion control. It allows you to indulge without guilt, balancing sweetness with freshness—perfect for serving guests or enjoying at home.
Ingredients, Substitutions & Foolproof Tips
- 3 cups fresh strawberries (hulled and chopped – 450g): The star ingredient providing vibrant color and flavor.
- ⅓ cup granulated sugar (67g): Sweetens the filling, allowing you to adjust based on personal preferences.
- 1 tablespoon lemon juice (15mL): Brightens the flavor profile, enhancing the strawberries’ natural taste.
- 1 tablespoon cornstarch (8g): Acts as a thickening agent to achieve a desirable consistency.
- 1 tablespoon water (to dissolve cornstarch – 15mL): Helps blend the cornstarch smoothly into the filling.
- ½ teaspoon vanilla extract (optional – 2.5mL): Adds a delightful warmth, though it can be omitted if preferred.
For a healthier version, you can substitute the granulated sugar with honey or maple syrup, keeping in mind the need to adjust liquid levels accordingly.
Step-by-Step Directions
- Prepare Strawberries: In a medium saucepan over medium heat, combine the chopped strawberries and sugar. Cook, stirring frequently, for about 4–5 minutes, until the strawberries begin releasing their juices.
- Add Lemon Juice: Stir in the lemon juice and continue to cook for another 2 minutes. Gently mash some of the strawberries with a spoon or potato masher to help break them down.
- Create Cornstarch Slurry: In a small bowl, whisk together the cornstarch and water to form a slurry. Slowly pour this slurry into the strawberry mixture while stirring constantly.
- Thicken the Mixture: Let it simmer for 2–3 minutes until thickened to a jam-like consistency. The mixture will become glossy, indicating it is ready.
- Stir in Vanilla (if using): Remove from heat and stir in the vanilla extract, if using.
- Cool and Chill: Transfer the mixture to a bowl and let it cool to room temperature. Then refrigerate for at least 30 minutes, or until fully chilled and set.
Common Mistakes to Avoid & Pro Tips
- Mistake: Overcooking the Strawberries
- Fix: Keep a close watch and stir often to prevent sticking and burning.
- Mistake: Not Mashing Enough
- Fix: Mash a portion of the strawberries to ensure the filling has the desired texture.
- Mistake: Too Thin
- Fix: If the filling isn’t thickening, let it simmer a bit longer while stirring.
- Mistake: Using Unripe Strawberries
- Fix: Choose ripe strawberries for the best flavor—check that they are fragrant and bright red.
Pro Tips:
- Use fresh, in-season strawberries for optimal taste and nutrition.
- Experiment with flavor by adding a pinch of cinnamon or nutmeg for depth.
- This filling is versatile: use it as a topping for ice cream or mix into your morning oatmeal.
Serving, Storage & Freezer Guide
How to Serve Strawberry Filling for Cake
This Strawberry Filling for Cake pairs perfectly with a variety of desserts. Layer it between sponge cakes for a delightful birthday treat, spread it on biscuits for a comforting afternoon snack, or drizzle it over pancakes for a sweet breakfast surprise. It can also be combined with whipped cream to create a decadent layer for shortcakes or trifles. Allow your creativity to shine as you add this filling to your favorite recipes.
How to Store Strawberry Filling for Cake
To keep your Strawberry Filling fresh, store it in an airtight container in the refrigerator. It will remain good for up to one week. Be sure to let it cool completely before sealing to avoid excess moisture building up inside the container.
Can You Freeze Strawberry Filling for Cake?
Yes, you can freeze this Strawberry Filling for Cake! Pour the cooled filling into a freezer-safe container, leaving some space for expansion. It can be frozen for up to three months. To use, simply transfer it to the refrigerator overnight to thaw before serving.

Frequently Asked Questions
Question 1: Can I use frozen strawberries instead of fresh?
Using frozen strawberries is possible, but be aware that they may release more water during cooking. Adjust the sugar accordingly to balance the flavors.
Question 2: How can I make this filling sugar-free?
To make a sugar-free version, consider using natural sweeteners like stevia or erythritol, but keep in mind that the taste and texture may vary slightly.
Question 3: How do I know when the filling is thick enough?
The filling should coat the back of a spoon and have a glossy appearance. If it drips off too easily, it may need more time to cook.
Question 4: Can I enhance the flavor further?
Absolutely! Feel free to add a splash of balsamic vinegar or a tablespoon of liqueur such as Grand Marnier to elevate the flavor profile.
Conclusion
This Strawberry Filling for Cake is more than just a sweet treat; it’s a way to simplify your dessert-making process while delighting your family. Its ease of preparation and adaptability make it a perfect addition to your culinary repertoire. If this recipe reminds you of someone you love, share it with them. Your memories keep recipes alive.
Strawberry Filling for Cake
Ingredients
Method
- In a medium saucepan over medium heat, combine the chopped strawberries and sugar. Cook, stirring frequently, for about 4–5 minutes, until the strawberries begin releasing their juices.
- Stir in the lemon juice and continue to cook for another 2 minutes. Gently mash some of the strawberries with a spoon or potato masher to help break them down.
- In a small bowl, whisk together the cornstarch and water to form a slurry. Slowly pour this slurry into the strawberry mixture while stirring constantly.
- Let it simmer for 2–3 minutes until thickened to a jam-like consistency. The mixture will become glossy, indicating it is ready.
- Remove from heat and stir in the vanilla extract, if using.
- Transfer the mixture to a bowl and let it cool to room temperature. Then refrigerate for at least 30 minutes, or until fully chilled and set.