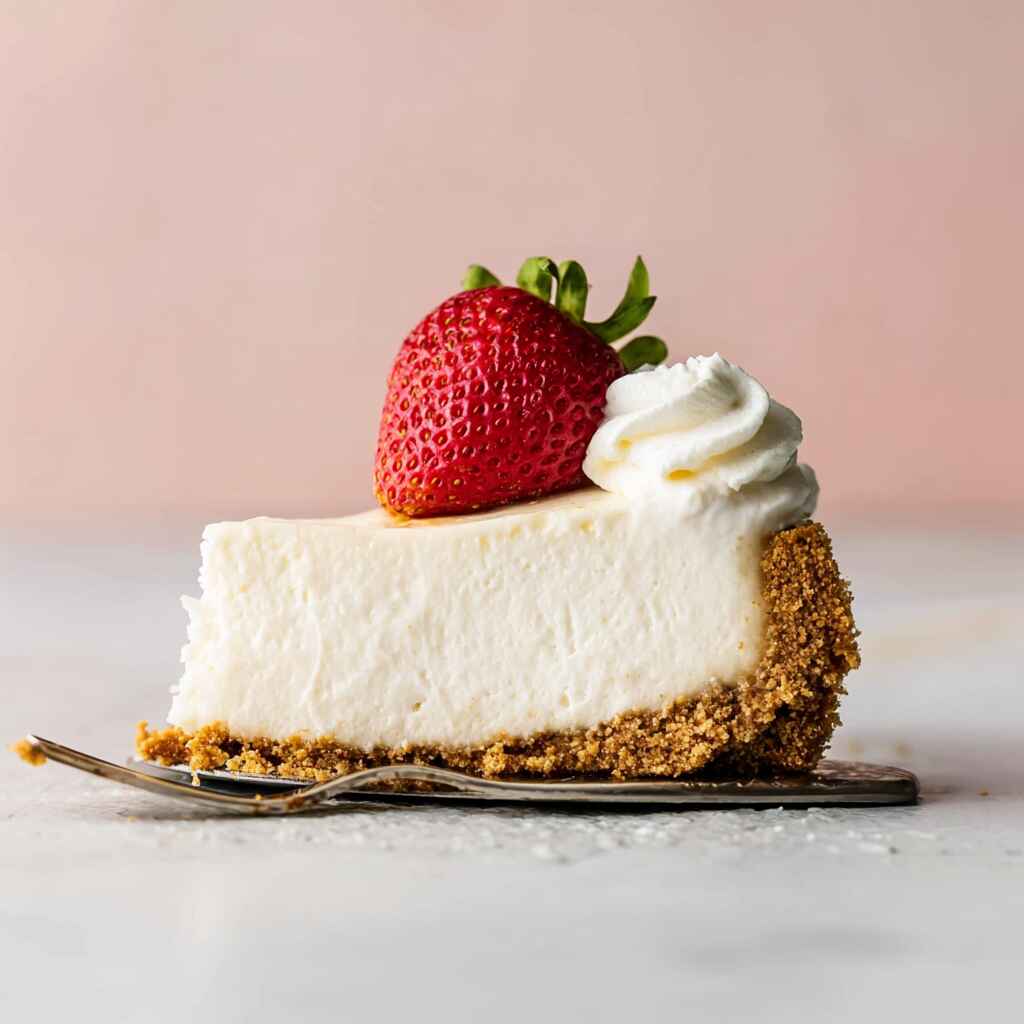
Ever craved cheesecake but didn’t want to heat up the kitchen or risk a cracked top? You’re not alone. The no-bake cheesecake recipe has become a favorite for busy home bakers who want elegance without the effort. Whether you’re hosting brunch, prepping ahead for a holiday dessert, or just need something sweet to wind down, this version delivers all the silky, tangy satisfaction of classic cheesecake without touching the oven.
Why You’ll Love This Recipe
Tired of baking flops or runny middles?
I get it. For years, I avoided cheesecakes unless I was ready for a baking marathon and a water bath setup. Then, everything changed one summer when my oven broke before a dinner party. I needed dessert fast. That was the night this no-bake cheesecake won hearts at my table and became a permanent part of my recipe book.
This Dish Solves That
This no-bake cheesecake recipe is rich yet light, indulgent yet effortless. With no eggs, no oven, and no risk of cracking, it’s practically foolproof. The graham cracker crust sets beautifully in the freezer while the creamy filling firms up like a dream in the fridge. Whether it’s topped with berries, lemon curd, or simply served as-is, it’s always impressive.
You’ll love that the filling is whipped into mousse-like perfection thanks to a key step we won’t skip. The result? Tall slices, clean cuts, and that luxurious melt-in-your-mouth texture everyone loves.
Ingredients Breakdown & Prep Tips
🧾 Ingredient List with Suggestions
Every ingredient in this no-bake cheesecake recipe has a purpose and when they come together, you get that luscious, mousse-like texture we all crave. Here’s what you’ll need and why it matters:| Ingredient | Notes |
|---|---|
| Graham cracker crumbs | The foundation of your crust classic, toasty, and buttery when mixed right. |
| Light or dark brown sugar | Adds moisture and a hint of molasses, helping the crust stay firm and flavorful. |
| Unsalted butter | Brings it all together melted and mixed to hold the crust in place. |
| Heavy cream | Whipped into stiff peaks, this adds air and lightness to the filling. |
| Full-fat brick cream cheese | Use the real bricks not the tub for a rich, stable base that firms up perfectly. |
| Granulated sugar | Sweetens and softens the cream cheese just enough without overpowering it. |
| Confectioners’ sugar | A secret weapon for structure and smoothness—no chalky finish, just creamy bliss. |
| Sour cream | Gives that signature cheesecake tang and silkiness—don’t skip it! |
| Lemon juice | Brightens the flavor and subtly enhances the cream cheese’s richness. |
| Vanilla extract | Rounding out the flavor, it adds a warm, sweet note to balance the tang. |
Prep Method with Sensory Cues
Making this no-bake cheesecake recipe is like watching clouds turn into dessert. Here’s how to do it:
- Make the Crust: Mix graham cracker crumbs, brown sugar, and melted butter until the texture feels like damp sand. Press firmly into a springform pan—up the sides too! Freeze while you make the filling.
- Whip the Cream: Cold heavy cream is key! Beat it until it holds stiff peaks (about 4–5 minutes). It should look pillowy and feel like whipped silk.
- Blend the Filling: In a separate bowl, beat cream cheese and sugars until completely smooth. Add sour cream, lemon juice, and vanilla beat again until luscious and lump-free.
- Fold Gently: Slowly fold the whipped cream into the cream cheese mixture. You want to keep the air imagine folding clouds into butter.
- Assemble & Chill: Pour the filling into your crust and smooth the top with a spatula. Cover and refrigerate at least 8 hours (overnight is best).
Want more silky filling ideas? You’ll love how we prep similar textures in our No-Bake Cheesecake Cups and the dreamy swirls in this Reese’s Peanut Butter Cheesecake.
Nutrition Highlights
| Nutrient | Per Serving |
|---|---|
| Protein | 7g |
| Carbs | 12g |
| Fat | 6g |
Avoid These Mistakes with No-Bake Cheesecake
Common Mistakes & Fixes
Even with an easy no-bake cheesecake recipe, a few missteps can lead to runny filling or a crumbly crust. Here’s how to dodge the most common pitfalls:
Using Whipped Topping Instead of Real Cream
Fix: Always use heavy cream and beat it into stiff peaks. Whipped topping lacks the structure and flavor to hold this filling together.
Not Letting the Cheesecake Chill Long Enoug
Fix: Patience pays off. Chill for at least 8 hours, but 12 is ideal. Cutting too soon results in soft, messy slices that won’t hold up on a plate.
Beating the Cream Cheese While It’s Cold
Fix: Always bring cream cheese to room temperature first. Cold cream cheese clumps and creates a lumpy texture—no one wants that.
Underpacking the Crust
Fix: Use the bottom of a measuring cup to pack it down firmly. A loose crust won’t hold together when sliced, no matter how good the filling is.
Pro Tips to Get It Right
Here’s how to take your no-bake cheesecake recipe from “yum” to “OMG can I have the recipe?”
Offset Spatula = Smooth Finish
Use an offset spatula to spread the filling smoothly. It makes a big difference in presentation especially if you’re topping with berries or sauce.
Use a Springform Pan
This isn’t optional. A springform pan allows for easy release and keeps the sides tall and elegant—just like a bakery cheesecake.
[See this technique in action in our Classic New York Style Cheesecake Recipe or explore seasonal ideas like our Pumpkin Cheesecake for autumn vibes.]
Serving, Storage & Creative Variations
Best Ways to Serve It
This no-bake cheesecake recipe is a showstopper whether you’re serving brunch, celebrating a birthday, or just indulging on a Tuesday.
- Top with Fresh Berries: Strawberries, raspberries, or blueberries add brightness and color.
- Lemon Curd or Salted Caramel: Spoon a swirl on each slice for a bakery-style finish.
- Chocolate Drizzle or Ganache: For the chocoholics in your life.
- Whipped Cream Rosettes: Use a piping bag and large tip for that extra flourish.
Pair it with espresso or herbal tea for a cozy moment or serve it chilled at summer parties when no one wants the oven on!
Storage + Seasonal or Dietary Variations
Storage Tips:
- Store covered in the fridge for up to 5 days.
- For longer storage, freeze the fully set cheesecake (not before chilling!) wrapped in plastic and foil for up to 3 months.
- Thaw overnight in the fridge before slicing.
Dietary or Seasonal Twists:
- Mini Cheesecakes: Make them in a muffin tin for portion-controlled treats see our No-Bake Cheesecake Cups for the full tutorial.
- Chocolate Crust: Swap graham crackers for chocolate cookie crumbs for a deeper flavor.
- Autumn Flair: Add cinnamon to the crust and serve with warm Salted Caramel Apple Pie Bars on the side.
Frequently Asked Questions
1. Can I make this no-bake cheesecake ahead of time?
Yes, and it’s actually better that way! Prepare it a day in advance and let it chill overnight for the firmest slices and best flavor.
2. What can I use if I don’t have a springform pan?
A deep-dish pie pan or an 8×8-inch square baking dish works too. Just line it with parchment for easier lifting.
3. How do I keep the crust from crumbling?
Make sure to pack the crust tightly and freeze it while you make the filling. Brown sugar helps it set firmly.
4. Can I freeze no-bake cheesecake?
Yes! After chilling, wrap it well and freeze for up to 3 months. Thaw overnight in the fridge before slicing.
Conclusion
This no-bake cheesecake recipe is more than dessert it’s comfort, convenience, and a crowd-pleaser rolled into one creamy slice. Whether you top it with berries, lemon curd, or a simple dollop of whipped cream, every bite whispers indulgence without effort.
If this dish brings back a memory, pass it on. Someone you love might need it today.

No-Bake Cheesecake
Ingredients
Method
- Step 1 Stir together graham cracker crumbs, brown sugar, and melted butter. Press into springform pan and freeze.
- Step 2 Whip cold heavy cream into stiff peaks using a mixer.
- Step 3 Beat cream cheese, granulated sugar, confectioners’ sugar, sour cream, lemon juice, and vanilla until smooth.
- Step 4 Gently fold the whipped cream into the cheesecake base until fully combined.
- Step 5 Pour filling into crust and smooth the top. Cover and refrigerate for at least 8 hours, preferably overnight.
- Step 6 Release from pan, slice, and serve with desired toppings.
