

Many of us face kitchen fatigue when it comes to whipping up family meals, particularly when trying to adhere to nutrition goals while keeping everyone satisfied. Enter Crispy Chicken Caesar Sliders—an elevated twist on traditional sliders that satisfies those cravings while being friendly on the wallet. These protein-packed delights offer a mouthwatering blend of flavors and textures that will reignite your passion for cooking, making this recipe a true lifesaver in your meal planning journey.
Kitchen Frustration That Makes This Recipe a Lifesaver
There’s something about the unpredictability of family meals that can lead to stress. You plan, you shop, but when it comes time to cook, you’re left scrambling for something that everyone will love. The evening rush, coupled with the desire to stick to a meal plan, can make dinner feel like a daunting task rather than a pleasant gathering. This is where the Crispy Chicken Caesar Sliders shine. They are not only easy to prepare but also serve as a budget-friendly option for feeding a crowd. Each slider is a mini meal, blended with nostalgic flavors that remind us of family dinners long treasured. A practical tip: prepare a double batch to enjoy them throughout the week, effortlessly reducing waste while adhering to your nutrition goals.
Why This Crispy Chicken Caesar Sliders Works So Well
Quick Answer: Crispy Chicken Caesar Sliders combine crunchy, breaded chicken with fresh romaine and a creamy dressing to create a satisfying meal that your whole family will love.
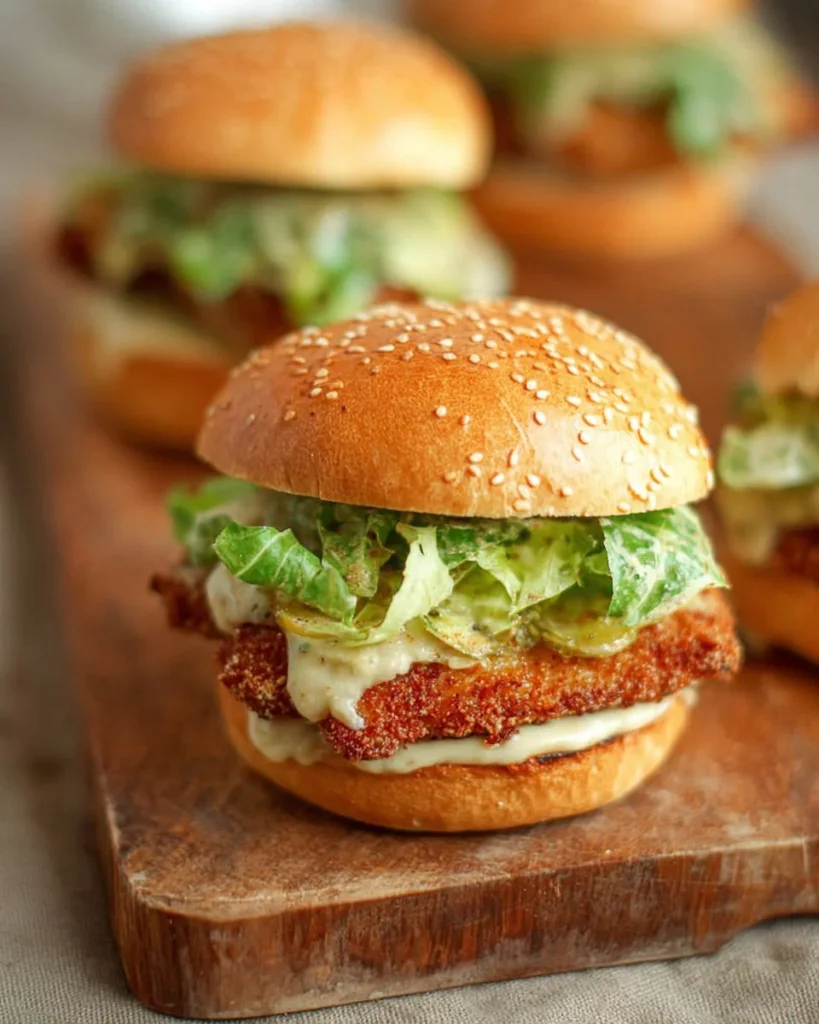
The magic of these sliders lies in their irresistible combination of textures and flavors. The crispy chicken cutlets, infused with spices and perfectly breaded, bring a satisfying crunch to each bite. Tossed in a tangy Caesar dressing, fresh romaine lettuce adds a crispness that balances the dish beautifully. The layers of flavor, from the savory garlic notes to the rich parmesan, elevate these sliders beyond average fare. Plus, they are time-saving—ideal for weeknight dinners or casual gatherings, making them a staple in any health-conscious home.
Ingredients, Substitutions & Foolproof Tips
- 2 chicken breasts: Skinless and boneless for easy handling.
- Salt and black pepper, to taste: Essential seasonings for flavor.
- 1 tsp paprika: Adds a hint of smokiness.
- 1/2 cup all-purpose flour: For breading; can substitute with gluten-free flour.
- 2 eggs: Binds the coating to the chicken.
- 1 cup breadcrumbs (panko works best): For extra crunch; can use regular breadcrumbs as well.
- Vegetable oil, for frying: Opt for olive oil spray for a healthier air-fried version.
- 4 medium buns (or 6–8 small slider buns): Choose whole grain for added nutrition.
- 2 cups romaine lettuce, chopped: Offers freshness and crunch.
- 2 tbsp finely grated parmesan cheese: Enhances the Caesar flavor profile.
- 2/3 cup (about 7 tbsp) good-quality mayonnaise: The base of the dressing; low-fat options available.
- 1 tbsp Dijon mustard: Adds tanginess to the dressing.
- 1 garlic clove, minced: Essential for flavor.
- 2 tbsp fresh lemon juice: Adds brightness.
- 1 tbsp Worcestershire sauce (or 1 anchovy fillet, finely mashed): For depth of flavor.
- 1/4 cup finely grated parmesan cheese: To mix into the dressing for creaminess.
Step-by-Step Directions
- Prep the Chicken: Slice each chicken breast horizontally to create thinner cutlets, then cut into slider-sized pieces. Season with salt, pepper, and paprika for flavor.
- Set Up Bread Station: Create a breading station: place flour in one bowl, beaten eggs in another, and breadcrumbs in a third. This efficient setup will streamline your cooking process.
- Bread the Chicken: Coat each piece of chicken in flour, then egg (repeat flour and egg one more time), and finally coat in breadcrumbs, pressing lightly to help the coating stick. This double-dip method ensures extra crunch.
- Fry the Chicken: Fry in hot oil over medium heat for 3–4 minutes per side, until golden and cooked through. If air frying, spray with olive oil and cook at 200°C (400°F) for 12–15 minutes, flipping halfway.
- Rest the Chicken: Let the chicken rest for a few minutes to lock in juices and maintain moisture.
- Make the Caesar Dressing: In a medium bowl, combine mayonnaise, Dijon mustard, and minced garlic. Add lemon juice and Worcestershire sauce (or mashed anchovy), mixing until smooth, then stir in the finely grated parmesan until creamy.
- Prepare the Salad: Toss the chopped romaine with 2 tablespoons of prepared Caesar dressing and 2 tablespoons of parmesan cheese until well coated.
- Toast the Buns: Slice the slider buns in half. Toast the cut-side down on a dry pan until browned. This adds extra flavor and prevents sogginess.
- Assemble the Sliders: Spread Caesar dressing on the bottom half of the toasted buns, top with a crispy chicken piece and a generous scoop of the Caesar salad mixture, finishing with a sprinkle of extra parmesan.
- Serve Immediately: Close the sliders and enjoy the warm, savory flavors immediately for the best experience.
Common Mistakes to Avoid & Pro Tips
- Mistake 1: Not seasoning the chicken properly. Fix: Always season to enhance flavor.
- Mistake 2: Skipping the resting period. Fix: Letting food rest keeps things juicy.
- Mistake 3: Not toasting buns. Fix: Toasting adds more flavor and structure.
- Pro Tip 1: Prep sliders ahead of time for easy assembly before mealtime.
- Pro Tip 2: Use an air fryer for a healthier version without compromising on taste.
Serving, Storage & Freezer Guide
How to Serve Crispy Chicken Caesar Sliders
These sliders are perfect for family dinners, lunchboxes, or even casual gatherings with friends. Pair them with sweet potato fries or a fresh side salad for a complete meal.
How to Store Crispy Chicken Caesar Sliders
Store leftover sliders in an airtight container in the refrigerator for up to three days. Keep the extras dressing separately to avoid sogginess.
Can You Freeze Crispy Chicken Caesar Sliders?
Yes, you can freeze the cooked chicken cutlets. Flash freeze them on a baking tray and then transfer to a freezer-friendly bag. They can be reheated directly from frozen for a quick meal option.

Frequently Asked Questions
What can I serve with Crispy Chicken Caesar Sliders?
Pair these sliders with roasted vegetables or a light pasta salad for a well-rounded meal.
Can I make the sliders gluten-free?
Absolutely! Substitute all-purpose flour with your favorite gluten-free flour and use gluten-free breadcrumbs.
How can I make these more kid-friendly?
You can reduce the seasoning slightly and offer a mild dipping sauce instead of the Caesar dressing if your kids prefer.
How long do these last in the fridge?
Crispy Chicken Caesar Sliders can last up to three days in the refrigerator when stored properly.
Conclusion
Crispy Chicken Caesar Sliders are more than just a meal—they’re a comforting, nostalgic recipe that brings families together. Easy to make, delicious to eat, and perfect for any occasion, they stand out as a fantastic option for those busy weeks. If this recipe reminds you of someone you love, share it with them. Your memories keep recipes alive.
Crispy Chicken Caesar Sliders
Ingredients
Method
- Slice each chicken breast horizontally to create thinner cutlets, then cut into slider-sized pieces. Season with salt, pepper, and paprika.
- Create a breading station: place flour in one bowl, beaten eggs in another, and breadcrumbs in a third.
- Coat each piece of chicken in flour, then egg, repeat flour and egg one more time, and finally coat in breadcrumbs.
- Fry chicken in hot oil over medium heat for 3–4 minutes per side until golden. For air frying, spray with olive oil and cook at 200°C (400°F) for 12–15 minutes.
- Let the chicken rest for a few minutes.
- In a medium bowl, combine mayonnaise, Dijon mustard, minced garlic, lemon juice, and Worcestershire sauce, mixing until smooth. Stir in the finely grated parmesan.
- Toss chopped romaine with 2 tablespoons prepared Caesar dressing and parmesan.
- Toast sliced slider buns on a dry pan until browned.
- Spread Caesar dressing on the bottom half of the toasted buns, add a piece of crispy chicken, and top with Caesar salad mixture.
- Close the sliders and serve immediately.