
Creamy desserts can be a disaster if they crack, collapse, or taste more like sweetened bricks than indulgent bites. If you’ve ever tried to impress guests with a homemade cheesecake and ended up with a sunken, overbaked mess you’re not alone. The Classic New York Style Cheesecake Recipe is legendary for its rich texture and unapologetic decadence, but mastering it requires more than just cream cheese and hope.
Table of Contents
Why You’ll Love This Recipe
Because You Deserve A Cheesecake That Never Cracks
You’ve likely wrestled with water baths, jiggly middles, and that dreaded cheesecake canyon that splits like a fault line. I remember my first New York cheesecake sinking right before serving. I cried, then sliced and we all ate it anyway. But I wanted better. I wanted a no-fail formula that gave me confidence, not chaos.
This Recipe Solves All That (And Tastes Incredible)
This classic New York style cheesecake recipe uses simple ingredients, but its magic lies in method: a room-temp batter, a slow bake, and a long cool-down. It solves common struggles with a luscious, dense-yet-creamy texture and a crust that stays crisp under pressure.
Plus, it’s entirely halal-friendly no gelatin, no shortcuts.
Here’s why it works so well:
- Uses cornstarch to help stabilize without changing flavor
- Bakes low and slow for a smooth top
- Overnight chill = restaurant-quality texture
Two recipes that pair beautifully with this dessert are the Easy Homemade Berry Sauce and the No-Fail Cheddar Biscuits because if you’re baking anyway, go big.
Ingredients Breakdown & Prep Tips
Ingredient List with Suggestions
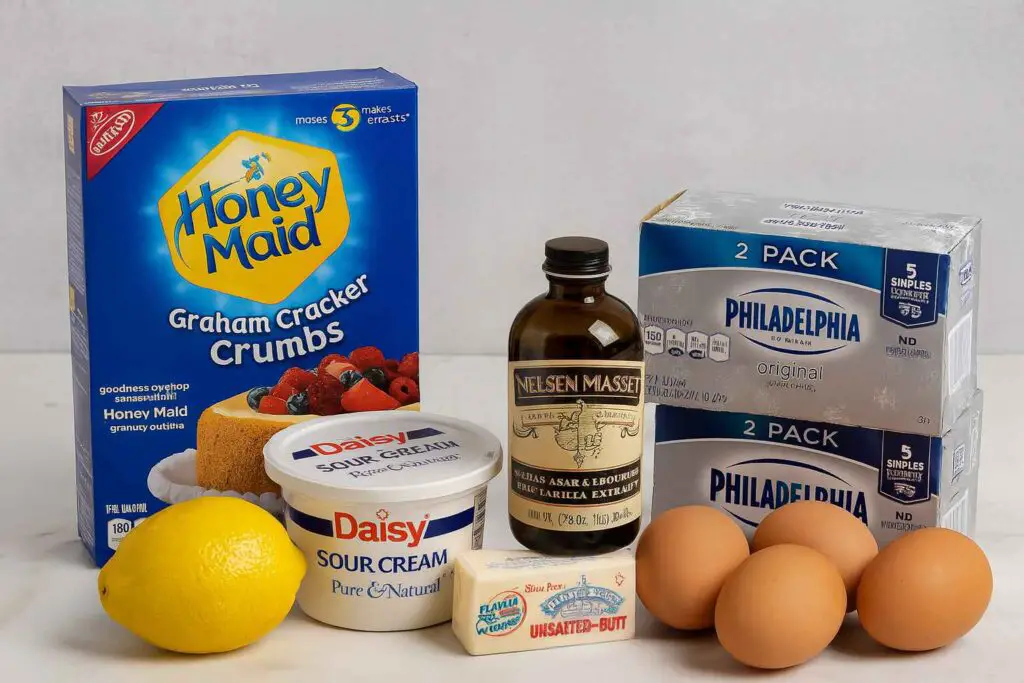
Every bite of this Classic New York Style Cheesecake is a testament to how the simplest ingredients can transform into something extraordinary. Here’s the breakdown:| Ingredient | Notes |
|---|---|
| Graham cracker crumbs | The foundation of that buttery, crumbly crust honey grahams work best |
| Unsalted butter | Melted for binding the crust; unsalted keeps flavors balanced |
| Sugar | A touch in the crust and a generous measure in the filling for sweetness |
| Salt | A small but mighty ingredient to sharpen the flavor |
| Cream cheese | Four blocks of full-fat cream cheese give that signature dense creaminess |
| All-purpose flour | Helps stabilize the filling and prevent cracks |
| Vanilla extract | For warmth and depth opt for pure extract over imitation |
| Lemon zest & juice | Adds brightness and a subtle tang that cuts through richness |
| Eggs | Added one at a time to ensure smooth, lump-free blending |
| Sour cream | The finishing touch for that silky, tangy bite |
If you’re a fan of citrus in desserts, you’ll also enjoy the zesty comfort of this family lemon pudding cake.
Prep Method with Sensory Cues
Cheesecake is all about patience and precision. Here’s how to make the process simple and stress-free:
- Prepare Your Pan
Wrap the springform pan tightly in foil and spray with nonstick spray. You should feel confident no water can sneak in. - Press & Bake the Crust
Combine crumbs, butter, sugar, and salt, then press firmly into the pan. After 10 minutes of baking, the crust will smell warm and nutty. - Mix the Filling Slowly
Beat cream cheese, sugar, and flour until just smooth. Add lemon zest, juice, vanilla, and salt. Eggs go in one at a time, then finish with sour cream. The batter should be glossy and creamy — never overmixed. - Bake in a Water Bath
Pour batter over crust, place the pan in a roasting pan, and add hot water. Bake until the cheesecake jiggles slightly in the center — the hallmark of doneness. - Cool Gently & Chill Overnight
Patience is key. Cool in the water bath, then refrigerate at least 8 hours for that clean, velvety slice.
Here’s a nutrition highlight per slice:
| Nutrient | Per Serving |
|---|---|
| Protein | 11g |
| Carbs | 59g |
| Fat | 43g |
For another creamy comfort food classic, check out this easy creamy tomato soup it’s the savory cousin to cheesecake’s indulgence.
Avoid These Mistakes
Common Mistakes & Fixes
Even seasoned bakers fall into these traps. Let’s save your cheesecake from disaster with these simple fixes:
1. Using cold ingredients
Cold cream cheese or eggs will make your batter lumpy. Let everything sit at room temperature for at least an hour before mixing.
2. Overbeating the batter
Incorporating too much air can cause puffing and cracking. Mix on low to medium speed and stop once combined.
3. Skipping the water bath
Dry oven heat is your cheesecake’s worst enemy. A water bath ensures even, gentle heat. If you’re unsure how, refer to our Cinnamon Raisin Sourdough Bread article for oven tips.
4. Rushing the cooling process
Cooling it too fast = cracks. Let it sit in the turned-off oven for an hour, then cool on the counter before refrigerating overnight.
5. Opening the oven too soon
Tempting, I know. But even one peek before the hour mark can drop the temperature enough to ruin the structure.
Pro Tips to Get It Right
✓ Use a thermometer
A perfectly baked cheesecake reaches an internal temperature of 150–155°F. Don’t rely solely on the jiggle test.
✓ Wrap the pan tightly in foil
Water baths can leak into the crust. Use two layers of heavy-duty foil to seal the bottom and sides of the springform pan.
✓ Bake a test mini first
Got doubts? Use a ramekin to bake a mini tester portion alongside the big one. It lets you taste and adjust.
If you want more no-fail baking ideas, check out Cinnamon Sugar Sourdough Bread for a cozy companion to this cheesecake.
Serving, Storage & Creative Variations
Best Ways to Serve It
This cheesecake is a showstopper, perfect for:
- Celebrations: Birthdays, holidays, or Ramadan feasts
- Weeknight indulgence: Slice and serve with Mini Loaf Pan Desserts
- Elegant brunches: Top with whipped cream and seasonal fruit
- Drizzle heaven: Try it with fresh berry coulis or Strawberry Cream Cheese Frosting
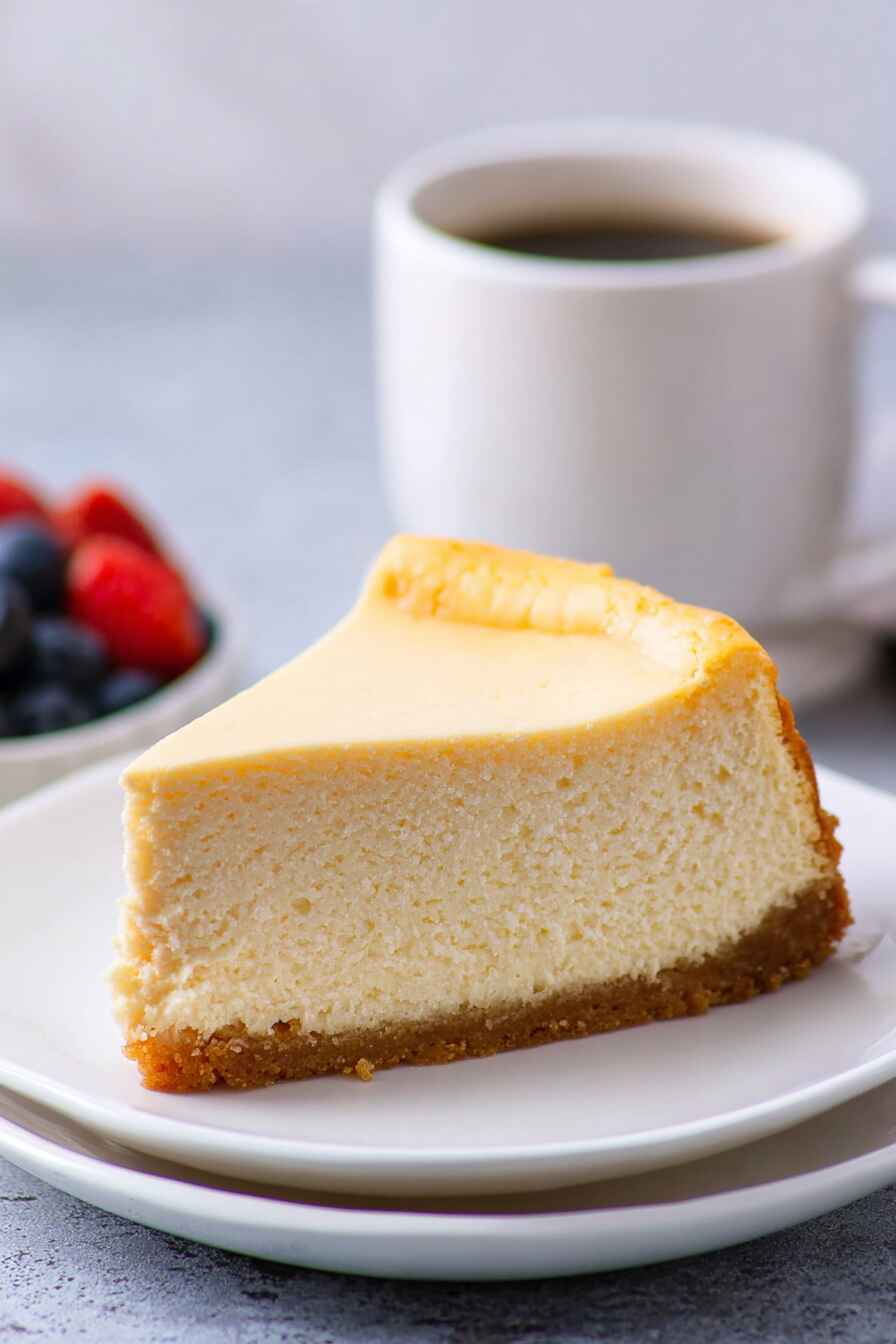
To slice it cleanly, dip your knife in warm water and wipe it between cuts. Your guests will swear it came from a patisserie.
Storage + Seasonal or Dietary Variations
Storage Tips:
- Store in the fridge, covered, for up to 5 days.
- To freeze: Slice, wrap in plastic + foil, then freeze up to 2 months. Thaw overnight in fridge.
- Avoid freezing with toppings add fresh when ready to serve.
Variations:
- Fall Favorite: Add a cinnamon swirl or pumpkin purée
- Summer Fresh: Top with peach slices and mint like our Southern Peach Cobbler
- Gluten-Free: Use almond flour or crushed gluten-free cookies for crust
- Low-Sugar: Swap sugar with monk fruit or erythritol (1:1 ratio)
Looking for more? This recipe also pairs beautifully with our No-Bake Cheesecake Cups for mini party desserts.
FAQ: Classic New York Style Cheesecake
What is the difference between New York style cheesecake and regular cheesecake?
New York style cheesecake uses more cream cheese and egg yolks, giving it a dense, rich, and creamy texture. It’s always baked unlike no-bake versions and often includes sour cream for added tang and smoothness.
What is the difference between New York style cheesecake and classic cheesecake?
“Classic” cheesecake can mean different things regionally, but New York style is known for its high, dense texture and pure cream cheese base. Other classic versions might include ricotta or cottage cheese for a lighter consistency.
Can I make New York cheesecake without a springform pan?
Technically yes, but it’s not recommended. A springform pan allows for easy release without damaging the cake. If using a regular pan, line it well with parchment and expect a tougher time removing it cleanly
Can I freeze slices of New York cheesecake?
Absolutely! Wrap individual slices in plastic wrap and foil, then freeze in a zip-top bag. Cheesecake can be frozen for up to 2 months. Thaw overnight in the fridge before serving for best texture and flavor.
Conclusion: A Slice of Comfort, Straight from My Kitchen
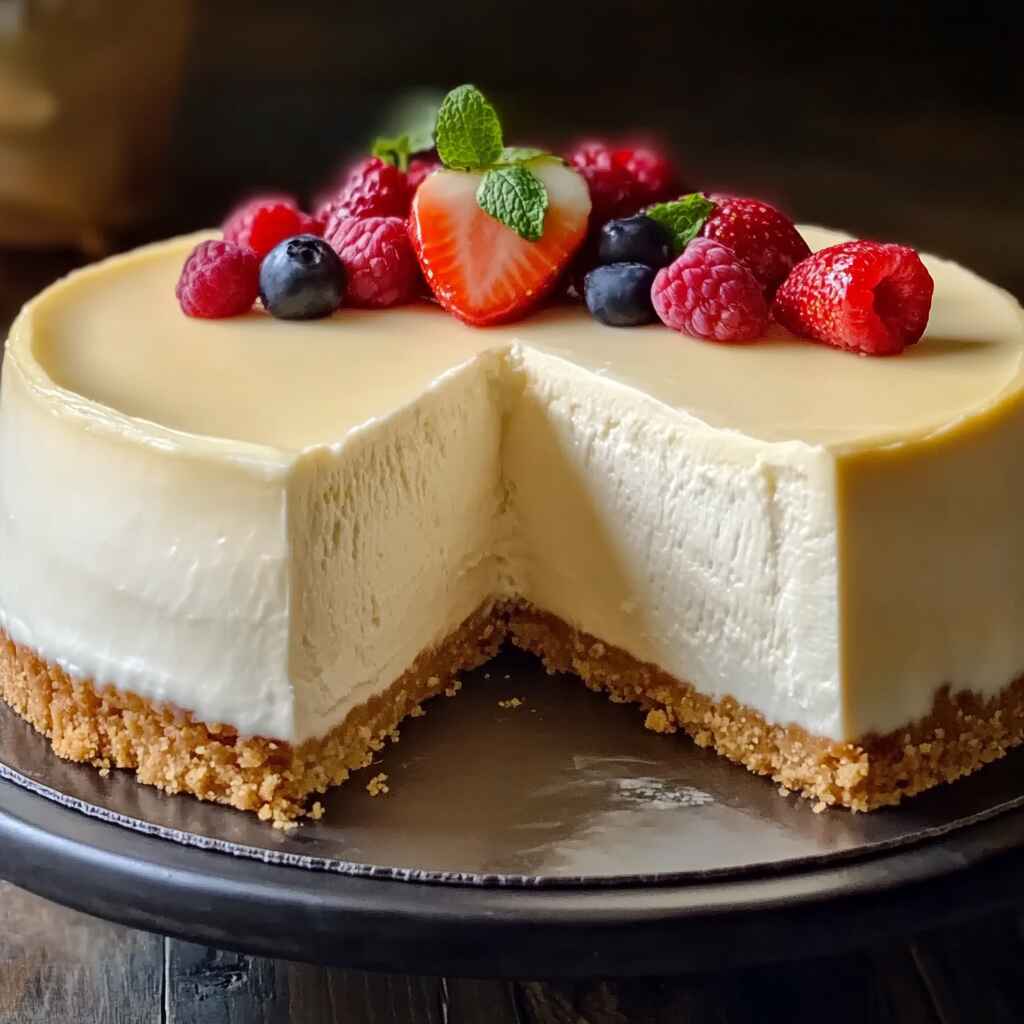
There’s something timeless and comforting about a classic New York style cheesecake the buttery crust, the rich and silky center, and the joy of serving a slice that brings everyone to the table. Whether you’re making it for a birthday, a dinner party, or simply to satisfy a craving, this cheesecake is a love letter in every bite.
It’s more than a dessert; it’s a memory-maker. And just like every recipe from my golden kitchen, it’s proof that simple ingredients and a little patience can create something truly special.
YOU MAY ALSO LIKE
You may also love these:
Classic New York Style Cheesecake Recipe
Ingredients
Method
- Preheat oven to 375°F. Wrap springform pan in foil and spray with nonstick spray.
- Mix crust ingredients and press firmly into pan. Bake 10 minutes, then set aside.
- Reduce oven temperature to 325°F. Boil water for the water bath.
- Beat cream cheese, sugar, and flour until smooth. Add vanilla, lemon zest, juice, and salt.
- Add eggs one at a time, mixing gently. Stir in sour cream until blended.
- Pour filling into crust. Place springform pan in roasting pan, add hot water 1 inch up sides.
- Bake 1 hour 30–45 minutes until center jiggles slightly but is not liquidy.
- Cool in water bath, then remove foil. Chill at least 8 hours or overnight.
- Slice with hot knife, wiping between cuts. Serve plain or with berry sauce.