
Life can be a swirl of busyness—one moment you’re juggling work deadlines, and the next, you’re rushing your kids to soccer practice, all while trying to figure out what’s for dessert. On nights when time is short, and comfort is a must, there’s nothing that warms the heart quite like a rich, creamy dessert. Enter the Burnt Vanilla-Bean Cheesecake: a luscious treat that’s perfect for making your chaotic week a little sweeter. This cheesecake’s caramelized top and smooth, velvety interior are like a comforting embrace after a long day, begging to be indulged in slow, savoring bites.
Why You’ll Love This Burnt Vanilla-Bean Cheesecake Recipe
The Universal Struggle of Figuring Out Dessert
As the evening unfolds, you may find yourself standing in front of a fridge filled with ingredients—yet nothing seems to spark excitement. Perhaps you’re a busy parent trying to find a dessert that even the pickiest of eaters will adore, or maybe you’re looking for a treat to impress guests after a cozy gathering. The thought of tackling a complicated dessert might seem daunting, but fear not! The Burnt Vanilla-Bean Cheesecake is here to save the day with its easy-to-follow steps that create an impressive dessert, leaving both your heart and your belly satisfied.
Comfort in Each Bite: How This Dish Brings Joy
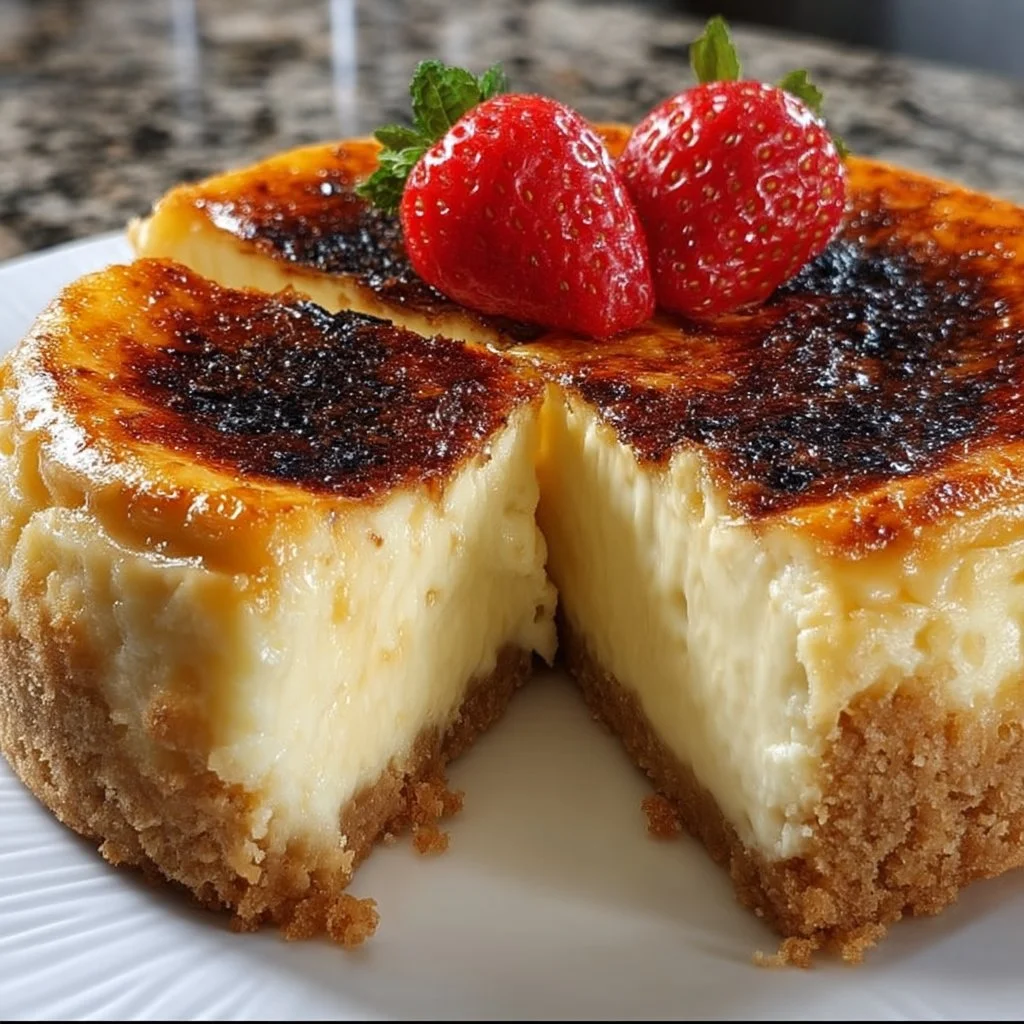
When you take that first slice of Burnt Vanilla-Bean Cheesecake, you are met with a rich blend of flavors awakening your taste buds. The graham cracker crust gives way to a creamy filling that dances between sweet and tangy notes, all kissed with hints of vanilla. Each mouthful transports you to a cherished memory—a family gathering, a quiet evening by the fire, or a celebration of life’s little joys. This cheesecake doesn’t just satiate your sweet tooth; it invites you to pause, savor, and indulge in those special moments that truly matter.
Quick Answer: The easiest way to make Burnt Vanilla-Bean Cheesecake creamy and rich is by using soft cream cheese that blends smoothly with the other ingredients.
Ingredients Breakdown & Prep Tips
What You’ll Need for This Decadent Cheesecake
- 2 cups graham cracker crumbs: These will form the buttery foundation of your cheesecake, bringing texture and flavor.
- 1/2 cup unsalted butter, melted: It helps bind the crumb mixture while adding richness.
- 1 cup granulated sugar: Sweetens the filling, balancing the tanginess of the cream cheese.
- 4 packages (8 oz each) cream cheese, softened: The star of the show, providing the cheesecake’s famous creamy texture and flavor.
- 1 cup sour cream: Adds a lovely tang and creaminess to the filling, enhancing its flavor.
- 1 tablespoon vanilla extract: Infuses the cheesecake with warm vanilla notes.
- 1 teaspoon vanilla bean paste: For that beautifully flecked vanilla appearance and concentrated flavor.
- 4 large eggs: Adds structure to the cheesecake to help it set perfectly.
- 1/4 cup sugar for topping: Used for caramelizing the top of the cheesecake, creating a delightful crunch.
Prep Method
Creating a Burnt Vanilla-Bean Cheesecake is as enjoyable as eating it! Follow these steps to bring this dreamy dessert to life.
Step 1: Preheat the Oven
Set your oven to 325°F (160°C). This gentle heat allows the cheesecake to cook evenly and achieve that beautiful burnt top without cracking.
Step 2: Prepare the Crust
In a mixing bowl, combine the graham cracker crumbs and melted butter. Mix until the crumbs are evenly coated and then press the mixture firmly into the bottom of a greased 9-inch springform pan. This crust serves as the delightful base for your creamy filling.
Step 3: Make the Filling
In a large bowl, beat the softened cream cheese and granulated sugar together until you have a smooth and creamy mixture. Next, add the sour cream, vanilla extract, and vanilla bean paste, mixing until everything is thoroughly combined.
Step 4: Add the Eggs
Crack the eggs into your mixture one at a time, mixing well after each addition. This step ensures that your filling is light and fluffy, lending the cheesecake its silky texture.
Step 5: Pour and Bake
Pour the filling over the crust that you prepared earlier. Bake for 60-70 minutes or until the center is set but still slightly jiggles. This unique method creates a wonderfully creamy inside with a bit of that characteristic burnt charm on top.
Step 6: Cool in the Oven
Turn off the oven and let your cheesecake cool inside with the door ajar for an hour. This gradual cooling helps prevent cracks from forming on the surface.
Step 7: Chill Thoroughly
Refrigerate the cheesecake for at least 4 hours or overnight. This step is essential for the flavors to deepen and the texture to firm up.
Step 8: Caramelize the Top
Just before serving, sprinkle an even layer of sugar over the cheesecake. Use a kitchen torch to caramelize the sugar until it turns golden and crispy, adding a delightful contrast to the creamy filling.
Step 9: Slice and Serve
Let the topping cool slightly before slicing into this heavenly treat. Serve it up and watch as smiles spread across the faces of your family and friends.
Avoid These Mistakes
Common Mistakes & Fixes
- Overmixing the Filling: Mixing too vigorously can incorporate too much air, which might make the cheesecake puff up in the oven and then sink. Mix just until smooth to avoid this.
- Skipping the Cooling Step: If you cut into the cheesecake too soon, the filling might not have set properly, resulting in a messy slice. Patience is key; give it time to chill and firm up.
- Not Using Softened Cream Cheese: Cold cream cheese doesn’t blend well, leading to a lumpy filling. Always let your cream cheese sit at room temperature for at least 30 minutes before starting.
Pro Tips to Get It Right
- Prepping Ingredients Ahead: Take a few moments to measure out all your ingredients before starting. This can help streamline the process and make it less stressful.
- Don’t Rush the Baking: Every oven is different. Start checking at the 60-minute mark, but sometimes those few extra minutes make all the difference for that perfect consistency.
- Celebrate Imperfections: If your cheesecake cracks, don’t fret! A delicious topping will cover it, and it will still taste like a dream.
Serving, Storage & Creative Variations
Best Ways to Serve It
Imagine gathering around the table with your loved ones, warm flickers from candles illuminating their delighted faces as you slice into the Burnt Vanilla-Bean Cheesecake. Serve it with fresh berries or a drizzle of chocolate or caramel sauce, maybe even a dollop of whipped cream, adding an extra layer of joy. It’s the perfect ending to any meal—be it a cozy family dinner or a festive holiday feast.
Storage, Seasonal & Dietary Variations
For storing leftovers, cover the cheesecake tightly and keep it in the refrigerator for up to five days. If you want to save some for a later date, you can freeze individual slices! Wrap each slice in plastic wrap and aluminum foil, then store in an airtight container for up to three months. When you’re ready to indulge, simply let the slices thaw in the fridge overnight and enjoy.
If you’re feeling adventurous, consider making a seasonal variation! Try swapping the vanilla bean for pumpkin spice in the fall or infusing it with fresh citrus zest for a summery twist.
FAQ Section
Can I make this cheesecake ahead of time?
Absolutely! This cheesecake keeps well in the fridge for up to five days, and it’s even better after a night of chilling as the flavors meld beautifully.
What can I do if I don’t have a kitchen torch?
If you don’t have a torch, you can place the sugar-topped cheesecake under the broiler for a couple of minutes until caramelized. Just watch it closely—it can burn quickly!
Can I use low-fat cream cheese?
While low-fat cream cheese can be used, keep in mind it may alter the texture and flavor of the cheesecake. For the best results, full-fat cream cheese is recommended.
How can I tell when my cheesecake is done baking?
The cheesecake is done when the edges are set, but the center still has a slight jiggle. It will continue to cook slightly once removed from the oven.
With this comforting Burnt Vanilla-Bean Cheesecake, you’ll be whisking away the chaos of the day, one creamy slice at a time. Whether it’s for a special occasion or a sweet ending to your everyday meals, this cheesecake is sure to bring warmth and joy to your home. Enjoy every moment in the kitchen, and remember, it’s about the love you put into it that truly makes it unforgettable.
Burnt Vanilla-Bean Cheesecake
Ingredients
Method
- Preheat the oven to 325°F (160°C).
- In a mixing bowl, combine graham cracker crumbs and melted butter. Press mixture firmly into the bottom of a greased 9-inch springform pan.
- In a large bowl, beat softened cream cheese and granulated sugar until smooth. Add sour cream, vanilla extract, and vanilla bean paste, mixing until combined.
- Add the eggs, one at a time, mixing well after each addition.
- Pour the filling over the crust. Bake for 60-70 minutes until the center is set but still jiggles slightly.
- Turn off the oven and let the cheesecake cool inside with the door ajar for an hour.
- Refrigerate for at least 4 hours or overnight.
- Just before serving, sprinkle an even layer of sugar over the cheesecake. Use a kitchen torch to caramelize the sugar until golden and crispy.
- Slice and serve, optionally with fresh berries or a drizzle of chocolate or caramel sauce.