
Is there anything better than coming home after a long day and having the comforting aroma of something delightful wafting through the air? If you’re like me, finding quick, easy, and satisfying meals is a culinary quest of love. Enter the Pita Pizza a delightful twist on traditional pizza that’s perfect for busy weeknights or those moments when you crave something crispy and cheesy without the fuss.
Imagine pulling golden-brown, cheesy rounds from your oven, with every slice beckoning to be shared. Let’s dive into this family-friendly recipe that promises to put a smile on your face and warmth in your heart.
Why You’ll Love This Pita Pizza Recipe
A Universal Struggle: Dinner Dilemma
We’ve all been there, standing in front of the fridge at the end of a hectic day, wondering what’s for dinner. The kids are hungry, you’re tired, and the last thing you want to do is whip up an elaborate meal that requires a hundred ingredients and hours of prep time. Pita Pizza is the magic solution here it’s simple, quick, and always a hit!
This Dish Solves That
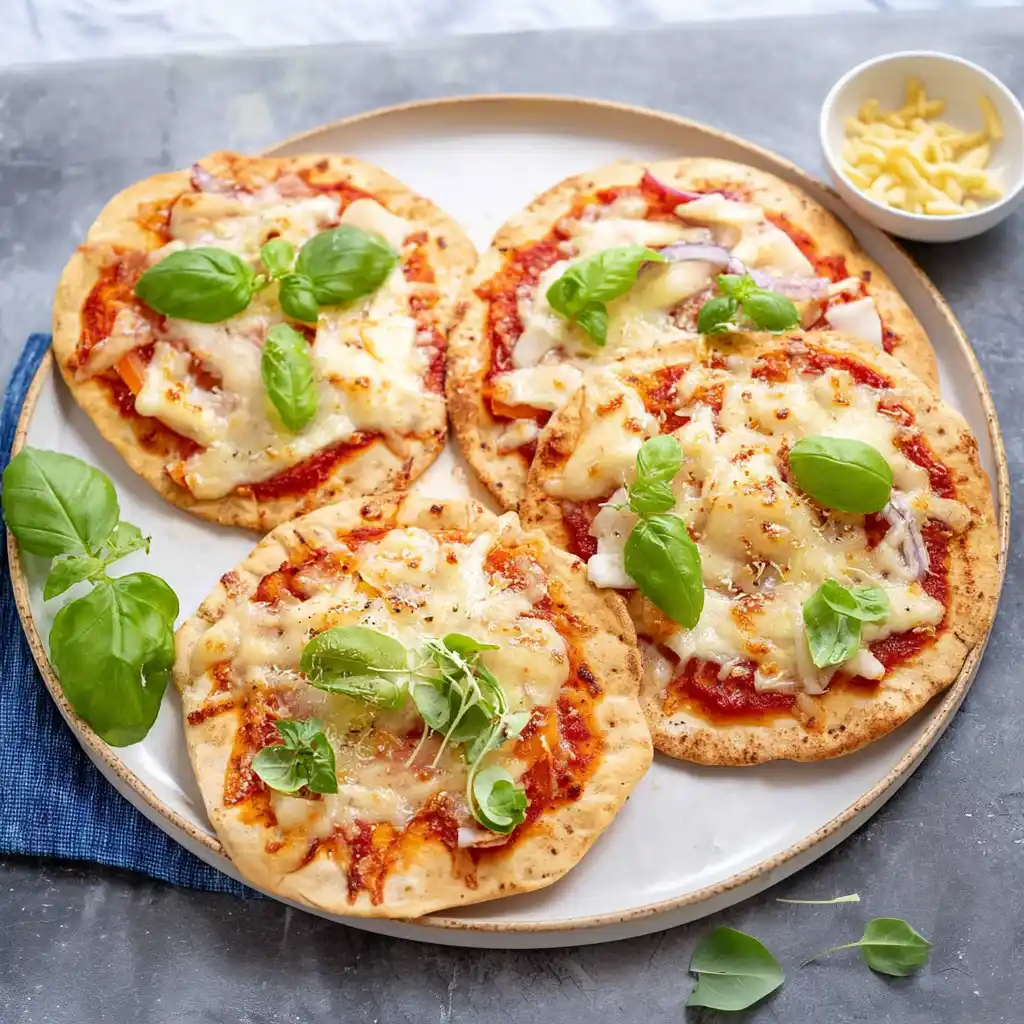
Just picture it! You can make Pita Pizza in under 15 minutes, and it requires only a few humble ingredients. It brings joy not just from its delightful flavors but also from the laughter and chatter that fills your home when everyone gathers around to dig in. Each bite is a canvas of gooey cheese, rich marinara, and fresh basil, minus the guilt of excess fuss.
The simplicity and comfort of Pita Pizza mean you can use it as a base for all kinds of toppings, lighting up those creative sparks as you personalize it to your heart’s content. Whether you add a sprinkle of pepperoni, colorful bell peppers, or even a handful of spinach leaves, the options are as endless as your imagination.
Ingredients Breakdown & Prep Tips
Ingredient List with Suggestions
Using quality ingredients can enhance the flavor of your Pita Pizza tremendously. Here’s what you’ll need:
| Ingredient | Notes |
|---|---|
| 4 thick Greek-style pita breads | Provides a sturdy base perfect for piling on toppings. |
| 2 tablespoons extra-virgin olive oil | This adds a touch of richness and helps the pita crisp up beautifully. |
| 2 cups marinara sauce | The heart of your pizza! Go for homemade or your favorite store-bought brand. |
| 1/2 teaspoon garlic powder | A whisper of garlic adds a cozy aroma. |
| 1/2 teaspoon Italian seasoning | Brings in those warm, herby flavors we all love. |
| 1/2 teaspoon salt (optional) | Enhances flavor balance but can be omitted if desired. |
| 1/2 teaspoon black pepper | A dash for a little bite. |
| 2 cups shredded mozzarella cheese | Essential for that gooey melty goodness! |
| Fresh basil leaves (torn if large) | A fresh finish to add brightness. |
| Crushed red-pepper flakes (for serving, optional) | Adds heat if desired! |
Prep Method with Sensory Cues
- Preheat the oven to 425°F and line 2 large rimmed baking sheets with parchment paper. The warmth from the oven filling your kitchen is the first step in a loving ritual.
- Brush the tops of the pita breads with olive oil and set them oiled-side up on the prepared sheets. Picture that gentle sheen glistening on the bread, just waiting to be dressed.
- Spread about 1/2 cup marinara on each pita, leaving a 1/2-inch border. As you slather on the sauce, the fragrant, tangy aroma will entice everyone around.
- Season with garlic powder, Italian seasoning, salt, and pepper. These herbs and spices will fill the air with their mouthwatering aroma.
- Top each pita with 1/2 cup shredded mozzarella, letting it heap generously.
- Bake until the cheese is melted and lightly golden and the edges of the pita are crisp, about 10-12 minutes. Watch through the oven window as it transforms into a bubbly golden delight.
- Sprinkle the basil leaves and crushed red pepper on top, slice, and serve. Each slice will make you feel the warmth of a home-cooked meal.
| Nutrient | Per Serving |
|---|---|
| Protein | 7g |
| Carbs | 12g |
| Fat | 6g |
Avoid These Mistakes
Common Mistakes & Fixes
- Not Preheating the Oven: Your pita needs that blast of hot air to crisp properly. Preheat for best results!
- Overloading with Toppings: While it’s tempting to pile on toppings, remember that too much can make the pita soggy. Less is more!
- Using Low Quality Cheese: Cheap cheese might not melt beautifully. Opt for a quality mozzarella for that gooey finish.
- Skipping the Oil: Forgetting to brush with olive oil can lead to a less flavorful crust. Give your pita a loving coat!
Pro Tips to Get It Right
- Experiment with Toppings: Try fresh veggies, cooked meats, or even a drizzle of balsamic glaze after baking. The world is your oyster!
- Make it Personal: Encourage your family to customize their own pitas. It will turn into a fun activity and let everyone add their favorite flavors.
Serving, Storage & Creative Variations
Best Ways to Serve It
Gather around the table with your loved ones and watch them light up with joy at the sight of these pitas. Pita Pizza is perfect for movie night, game day snacks, or even a casual family dinner. Serve with a simple side salad or some homemade garlic bread for a cozy feast.
Storage + Seasonal or Dietary Variations
These pita pizzas are best enjoyed fresh but can be stored for up to three days in an airtight container in the fridge. You can also freeze individual uncooked pita pizzas for a quick future meal. Just pop them in the oven from frozen—easy peasy!
For a fun seasonal twist, consider using fresh autumn vegetables like squash or zucchini as toppings in the summer months or roasted pumpkin puree in the fall.
FAQ SECTION
What is the best way to store leftover Pita Pizza?
Leftover Pita Pizza is best kept in the refrigerator in an airtight container for up to three days. Simply reheat in the oven for a crispy finish!
Can I use whole wheat pita?
Absolutely! Whole wheat pita adds more fiber and a richer taste, making your Pita Pizza even healthier.
How do I make a gluten-free version?
Look for gluten-free pita options in your local grocery store or make your own if you’re feeling adventurous!
What should I serve with Pita Pizza?
A crisp side salad, some garlic knots, or a warm bowl of soup make wonderful companions for your Pita Pizza!
Conclusion
Our beloved Pita Pizza is not just a meal; it’s a comforting experience that can bring friends and family together. If this dish brings back a memory, pass it on. Someone you love might need it today. You can create new memories and traditions around the kitchen table, each slice warm with love and laughter.
For more delicious ideas, check out my other recipes, like Creamy Tomato Soup or One-Pot Chicken Rice Bake.
YOU MAY ALSO LIKE
Pita Pizza
Ingredients
Equipment
Method
- Preheat oven to 425°F and line two large rimmed baking sheets with parchment paper.
- Brush tops of pitas with olive oil and place oiled-side up on prepared sheets.
- Spread about 1/2 cup marinara on each pita, leaving a 1/2-inch border.
- Season with garlic powder, Italian seasoning, salt, and pepper.
- Top each pita with 1/2 cup shredded mozzarella.
- Bake 10–12 minutes, until cheese is melted and lightly golden and pita edges are crisp.
- Sprinkle basil leaves and crushed red pepper on top, slice, and serve.