
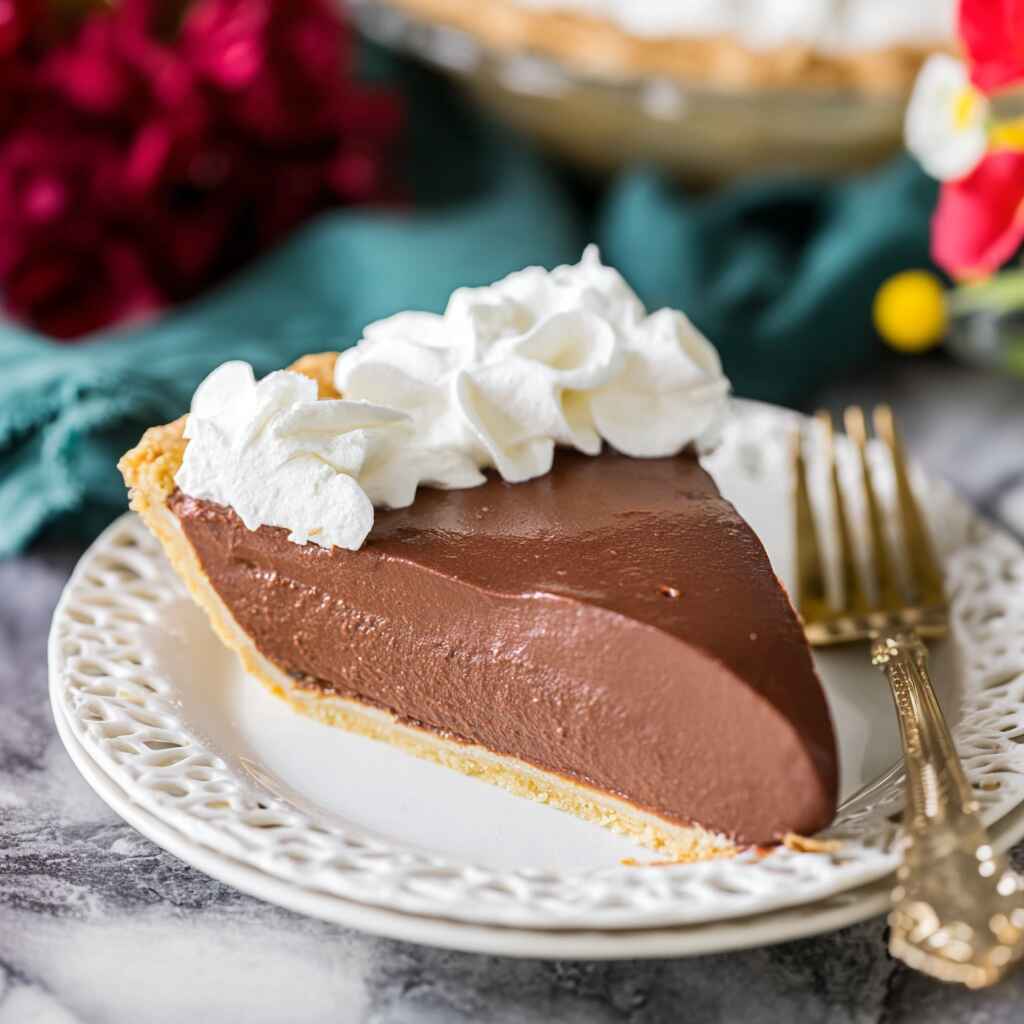
There’s something magical about a slice of chocolate pie the way the fork glides through its silky filling, the cool creaminess against a crisp crust, and the familiar comfort it brings. For many of us, dessert is more than sugar; it’s a memory, a reminder of childhood kitchens where laughter and cocoa mingled in the air. This chocolate pie recipe is not just about making something sweet, it’s about creating a moment worth savoring. Whether you’re sharing it at Sunday dinner or sneaking a late-night bite, this recipe proves that the simplest ingredients can deliver the richest joy.
Why You’ll Love This Recipe
When Dessert Meets Daily Struggle
Life gets busy family meals can feel rushed, and desserts often get skipped. I remember nights when my mother would pull out a chocolate pie, still cooling on the counter, and everything slowed down. It wasn’t just dessert; it was togetherness.
This Dish Solves That
This chocolate pie recipe gives you back those moments. Easy enough for a weeknight, yet indulgent enough for celebrations, it brings comfort and sophistication to your table. The beauty of a good chocolate pie recipe is its balance: rich without being heavy, sweet without overwhelming. If you’ve ever wanted a dessert that feels like home but looks bakery-worthy, this is it.
Ingredients Breakdown & Prep Tips
Ingredient List with Suggestions
Below is a simple breakdown of the ingredients that make this chocolate pie irresistibly good with helpful notes to make sure every bite turns out silky, sweet, and rich.| Ingredient | Notes |
|---|---|
| Prepared Pie Crust | Use a homemade, blind-baked buttery crust for the best flaky texture. Graham cracker or Oreo crusts work too! |
| Granulated Sugar | Sweetens and helps thicken the filling for a velvety, pudding-like texture. |
| Cornstarch | Preferred over flour for a smoother, more stable filling. |
| Salt | Just a pinch enhances the deep cocoa flavor without overpowering. |
| Egg Yolks | Thickens and enriches the filling. Save the whites for meringue or macarons! |
| Whole Milk | Gives body and balance to the cream don’t substitute with low-fat. |
| Heavy Cream | Brings that luscious, spoon-coating richness. Can also use heavy whipping cream. |
| Dark Chocolate Bar (60% cacao) | Deep, complex chocolate flavor. Ghirardelli or any high-quality bar works well. |
| Unsalted Butter | Added last for silky shine and softness. Salted butter not recommended. |
| Vanilla Extract | Rounds out the chocolate with warmth and depth. |
| Whipped Cream (optional) | Cool, airy contrast to the dense pie. Decorate or dollop as you like. |
Prep Method with Sensory Cues
Let’s make it melt-in-your-mouth smooth. Here’s how to prep this chocolate pie with confidence.
- Whisk Dry Ingredients: Combine sugar, cornstarch, and salt in a heavy saucepan. It should look powdery and well blended.
- Mix Wet Ingredients: Whisk egg yolks, milk, and cream until golden and smooth. No streaks!
- Combine Over Heat: Slowly pour the wet into the dry while whisking. Cook over medium heat, never high patience is key.
- Watch for Thickening: Stir frequently until it resembles a rich pudding. Coats the back of a spoon? You’re there.
- Add Chocolate, Butter & Vanilla: Remove from heat and stir until glossy and luxurious.
- Strain & Fill: Pour through a mesh strainer to catch lumps, then into the baked crust. Smooth the top and cover with plastic wrap.
- Chill 6 Hours or Overnight: The hardest part is waiting. Once set, top with whipped cream and serve cold.
Nutrition Highlights
| Nutrient | Per Serving |
|---|---|
| Protein | 6g |
| Carbs | 56g |
| Fat | 32g |
Avoid These Mistakes
Common Mistakes & Fixes
Even classic recipes can trip you up. Avoid these pie pitfalls for that flawless, bakery-style result:
- Overheating the filling:
Cranking the heat makes the pudding seize or curdle. Use medium heat only and stir patiently. The filling should thicken slowly not boil rapidly. - Skipping the strainer:
Tiny cooked egg bits or unmixed cornstarch can leave lumps. Always pour the filling through a fine mesh strainer for that ultra-smooth finish. - Using low-fat dairy:
Whole milk and heavy cream are essential for structure. Anything lighter can cause a runny, unstable pie that won’t slice cleanly. - Serving too soon:
This pie needs at least 6 hours of chill time to set completely. Cutting too early means messy slices and disappointment.
Pro Tips to Get It Right
- Prep mise en place:
Have your butter chopped, chocolate ready, and vanilla measured before you start. Once the filling starts thickening, there’s no pause button. - Make it a showstopper:
Decorate with whipped cream using a piping bag and star tip for elegant swirls. Or top with chocolate curls or shavings. - Add a salted finish:
A sprinkle of flaky sea salt just before serving enhances the chocolate flavor like magic.
Serving, Storage & Creative Variations
Best Ways to Serve It
Chocolate pie deserves the spotlight. Serve it:
- Chilled with whipped cream on holidays, birthdays, or Sunday suppers.
- With coffee or a glass of milk for a comforting contrast.
- Alongside fresh berries or mint for color and a pop of brightness.
- On its own, straight from the fridge no one’s judging!
The flaky crust + glossy pudding + cool cream = ultimate spoonful joy.
Storage + Seasonal or Dietary Variations
Storage:
- Refrigerate tightly wrapped for up to 4 days.
- Do not freeze the filling can separate.
Reheating:
- This pie is served cold. Just slice and enjoy!
Seasonal Twists:
- Add a pinch of cinnamon or espresso powder in fall for warmth.
- Swirl in raspberry sauce for a fruity holiday take.
Dietary Adjustments:
- Use a gluten-free crust to make this pie celiac-friendly.
- Lactose-free milk alternatives won’t yield the same creamy texture best to stick with dairy here.
FAQ Section
Why is my chocolate pie runny?
Your filling likely didn’t thicken enough on the stovetop. Make sure it’s cooked until it visibly thickens and coats the back of a spoon before removing from heat.
Does chocolate pie need to be refrigerated?
Yes. It’s a custard-based pie and must be refrigerated for at least 6 hours (or overnight) to properly set and stay safe to eat.
Can I use a graham cracker crust instead?
Absolutely! A graham or Oreo crust adds a sweet crunch and complements the rich filling beautifully just make sure it’s pre-baked.
Can I make chocolate pie ahead of time?
Yes! It’s even better the next day. You can prep it 1–2 days in advance and store it covered in the fridge until ready to serve.
CONCLUSION
Chocolate pie is more than a dessert it’s a reminder of slow afternoons, shared slices, and memories wrapped in whipped cream. This chocolate pie recipe invites you to pause and savor the joy of something made from scratch, with love and care.
Chocolate Pie Recipe That Feels Like Home
Ingredients
Method
- In a heavy-bottomed saucepan, whisk together sugar, cornstarch, and salt.
- In another bowl, whisk together egg yolks, milk, and cream until smooth.
- Slowly add the wet mixture into the dry while whisking constantly.
- Cook over medium heat, stirring, until thickened to a pudding-like consistency.
- Remove from heat. Stir in chopped chocolate, butter, and vanilla.
- Pour through a mesh strainer into a bowl to remove lumps.
- Transfer filling into baked pie crust and smooth the top.
- Cover with plastic wrap touching the surface and chill for 6+ hours.
- Top with whipped cream and serve cold.