
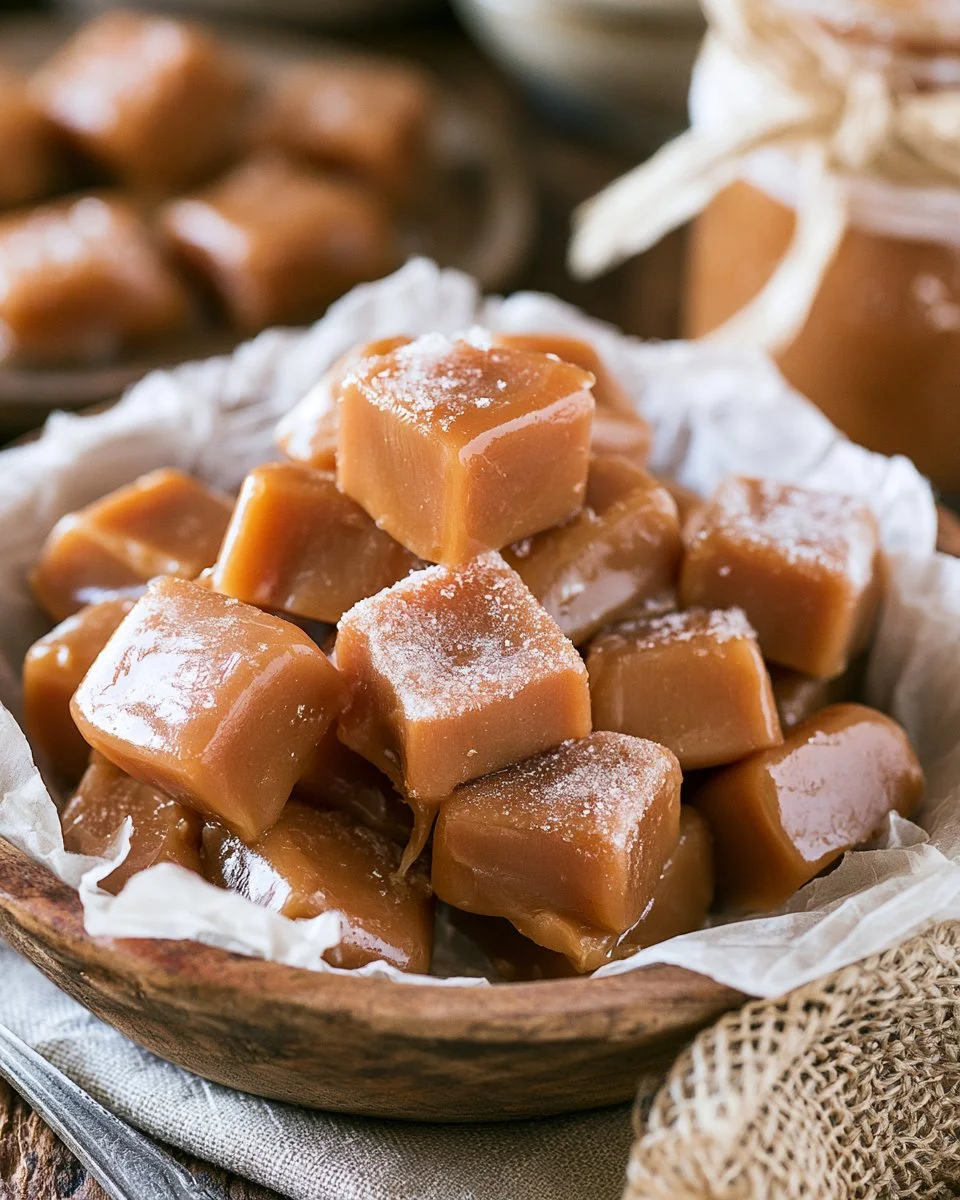
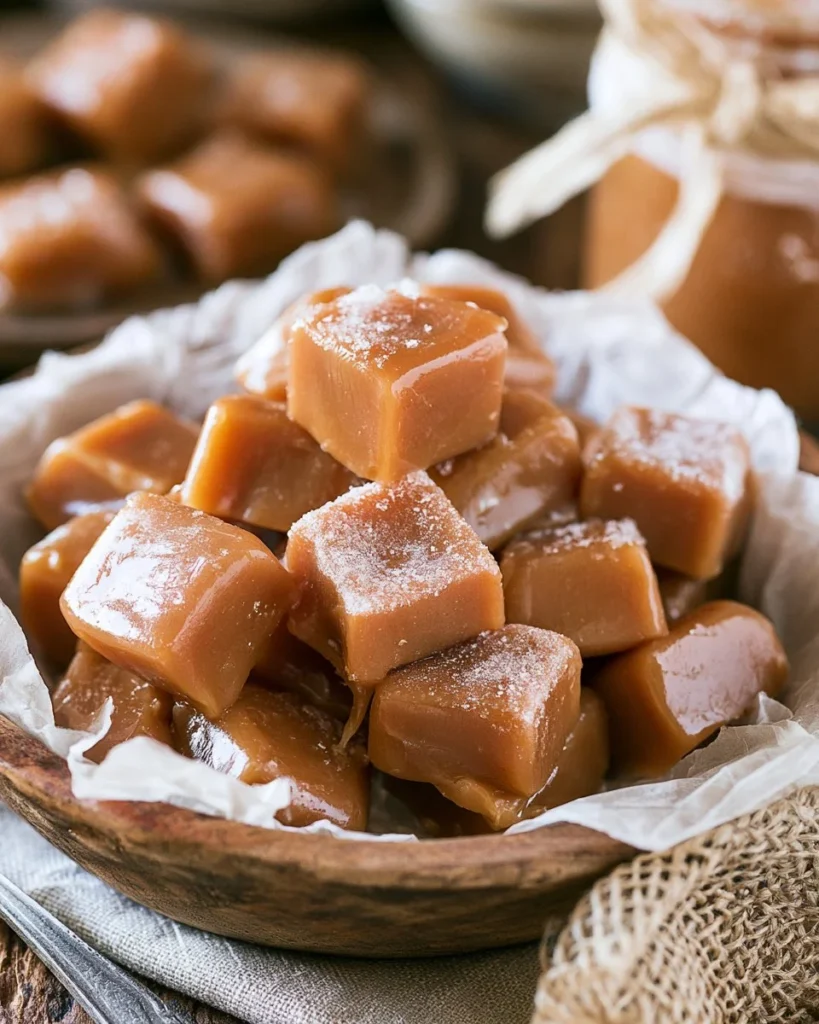
There’s something truly magical about homemade caramels that brings back memories of sweet indulgence and cozy gatherings. Picture the rich, creamy texture melting in your mouth as the delightful flavor envelopes your senses, creating a moment of pure bliss. These soft homemade caramels are perfect for sharing, adding to gift baskets, or simply savoring with a cup of tea. The process might seem intimidating, but with the right steps, you can achieve that perfect melt-in-your-mouth experience at home. Imagine impressing your friends and family with these luscious treats—they’re bound to become a favorite!
Quick Answer
If you’re craving a delightful homemade candy, these soft caramels are your answer. They’re rich, buttery, and easy to make with just a few ingredients!
Why You’ll Love This Recipe
This caramel recipe is a classic treat that everyone can enjoy, and here’s why:
- Simple ingredients combine to create a rich flavor.
- Customizable thickness based on pan size.
- Long shelf life, perfect for making ahead.
- Perfect for holiday gifts and special occasions.
- Impressive for any dessert table or candy buffet.
- Enticing aroma that fills your home while cooking.
What Makes This Recipe Special
The key to these soft homemade caramels lies in the blending of sugar, cream, and butter—each enhancing the overall flavor and texture. The boiling process caramelizes the sugar, resulting in that signature deep amber color while allowing for a creamy texture when the heavy cream and butter are incorporated. Using a candy thermometer to achieve precise cooking temperatures makes a world of difference, ensuring the perfect consistency for both smoothness and firmness without the risk of burning. These caramels not only satisfy your sweet tooth but also evoke cherished memories of family traditions and celebrations.
Kitchen Tools You’ll Need
- Instant candy thermometer – for accurately measuring temperatures while cooking.
- Pastry brush – to wash down the sides of the pan and prevent crystallization.
- 8 or 9-inch baking pan – ideal for setting the caramel mix as it cools.
- Medium to large saucepan – for cooking the caramel mixture evenly.
- Pre-cut wax paper wrappers – to wrap the caramels once cooled for easy storage.
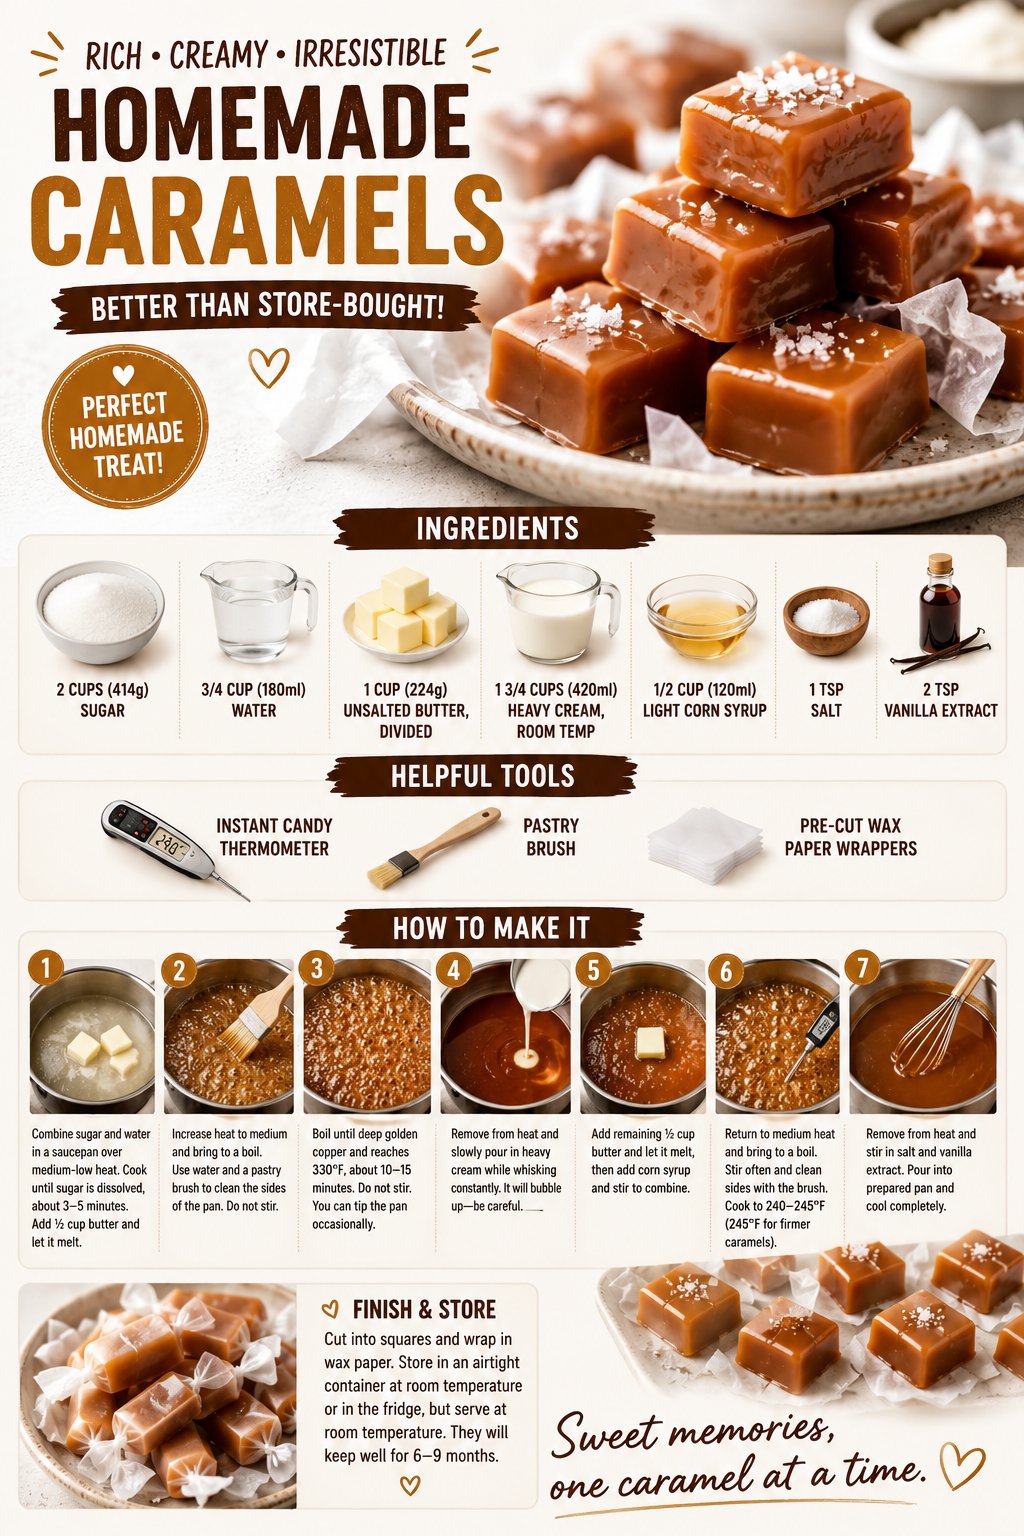
Ingredients
- sugar: The main sweetener that caramelizes to create depth of flavor.
- water: Helps dissolve the sugar initially and creates the right consistency.
- unsalted butter: Adds richness and creaminess to the caramels.
- heavy cream: Infuses the caramels with a smooth texture and decadent flavor.
- light corn syrup: Prevents crystallization, ensuring a silky consistency.
- salt: Balances the sweetness and enhances flavors.
- vanilla extract: Adds warmth and aromatic flavor to the caramels.
Ready to cook? Scroll to the recipe card below for exact measurements.
How to Make Soft Homemade Caramels
Phase 1 – Prep
STEP 1. Prepare the pan. Line an 8 or 9-inch baking pan with parchment paper. Either size pan will work, the 8-inch will just give you thicker caramels.
STEP 2. Combine sugar and water. In a medium to large saucepan, combine the sugar and water. Cook over medium-low heat until the sugar is completely dissolved, about 3 to 5 minutes. Add ½ cup of the butter and let it melt.
Phase 2 – Cook
STEP 3. Boil the mixture. Turn the heat up to medium and bring the mixture to a boil. Use water and a pastry brush to clean the sides of the pan (this helps the residue on the sides of the pan not cause crystallization). Stop whisking and don’t whisk at all during this part (again to help avoid crystallization).
STEP 4. Monitor for color. Allow to boil until the mixture turns a deep golden copper color and reaches 330°F, about 10-15 minutes, maybe longer depending on your stove. Keep an eye on it, but do not stir. If needed, you can occasionally tip the pan from side to side to help things cook evenly, and to give you a look at how dark it is and make sure it isn’t burning.
STEP 5. Add cream carefully. Remove the pan from the heat and immediately add in the heavy whipping cream in a slow, steady stream. The caramel will bubble up quite a bit, so be careful with this step. Whisk quickly and well as you add the cream, whisking until well combined. The color will be a little lighter and more milky; that’s ok. It will darken more when it boils again.
STEP 6. Melt remaining butter. Add the remaining ½ cup of butter and let it melt, then add the corn syrup and stir to combine.
STEP 7. Return to heat. Place the pan back over medium heat and bring to a boil (it’ll happen quickly). Stir often with a silicone spatula to help prevent burning. After stirring, you can use water and a pastry brush to clean the sides of the pan again.
STEP 8. Cook to desired firmness. Cook the caramel until it reaches 240-245°F. The higher the temperature, the firmer the caramels will be. If you don’t have a candy thermometer, test it by dropping a spoonful of hot caramel into a cup of ice water. If you can shape it into a fairly firm but slightly sticky ball, it should be ready.
STEP 9. Add salt and vanilla. Remove from heat and stir in the salt and vanilla extract. It will bubble up a bit, so be careful.
STEP 10. Cool the caramel. Pour the caramel mixture into the prepared pan and allow to cool completely. They can cool at room temperature or in the fridge. They are firmer and easier to cut when cold, and are softer (but totally still cut-able) at room temperature.
STEP 11. Wrap and store. Cut the caramels to your desired size and wrap them in wax paper. Store them in an air-tight container at room temperature or in the fridge, but serve at room temperature. They should keep well at room temperature for about six to nine months.
Why This Recipe Works
The beauty of this soft homemade caramel recipe is in the balance of textures and flavors. The sugar caramelizes perfectly to create a deep, rich flavor, while the combination of heavy cream and butter results in a luscious, smooth texture that melts in your mouth. Gradually adding the cream creates the right chemical reaction, allowing for a delightful consistency without being overly sticky or hard. Cooking it to the correct temperature ensures that the caramels remain soft yet hold their shape, making them a delightful treat for any occasion!
Pro Tips
To perfect your soft homemade caramels, consider the following tips:
- Make sure your pot is large enough as the mixture will expand while cooking due to bubbling.
- Use a silicone spatula to consistently stir and scrape the sides of the pot; it reduces the chances of crystallization.
- Allow the caramels to cool at room temperature before cutting them for cleaner edges.
- If storing in the fridge, allow them to reach room temperature before serving to achieve the perfect soft texture.
- Try varying the cooking time to adjust the firmness—cook longer for firmer caramels.
Common Mistakes to Avoid
This recipe can be intimidating, but being aware of common pitfalls can make all the difference:
- Mistake: Not washing down the sides of the pan.
- Why it happens: It’s easy to forget this step, thinking it’s not necessary.
- How to fix it: Always have your pastry brush handy and clean the sides of the pan regularly to prevent crystallization.
- Mistake: Overcooking the caramel.
- Why it happens: It’s tempting to leave the caramel unattended.
- How to fix it: Continuously monitor the color and temperature to maintain the ideal consistency.
- Mistake: Adding the cream too quickly.
- Why it happens: Impatiently rushing the process can cause overflow and splatters.
- How to fix it: Add the cream slowly and stir consistently for a smoother blend.
Variations
- Sea Salt Caramels: Sprinkle sea salt on top before they cool for added flavor.
- Chocolate-Dipped Caramels: After cutting, dip caramels in melted chocolate for a decadent treat.
- Nutty Caramels: Add chopped nuts to the mixture before pouring it into the pan.
- Flavored Caramels: Experiment with different extracts like almond or hazelnut for unique flavors.
Nutrition Highlights
| Nutrient | Role |
|---|---|
| Protein | Helps support satiety and balanced meals. |
Serving Ideas
These soft homemade caramels can be enjoyed in many delightful ways! Serve them in a decorative candy dish at parties for a sweet treat, include them in gift baskets during the holidays, or simply enjoy them as an indulgent snack after dinner. Their charming appearance wrapped in wax paper makes them perfect for sharing on special occasions, adding a homemade touch that everyone will appreciate.
Best Occasions for This Recipe
Soft homemade caramels are wonderful for special occasions like holidays, birthdays, or family gatherings. They also make great gifts for teachers, friends, or loved ones during the festive season. Whether wrapped in pretty packaging or served on a table at a get-together, these caramels bring sweetness to any event!
Meal Prep & Storage
Meal Prep
Caramels can be made ahead of time, making them ideal for meal prep sessions. Simply prepare them in batches and store them properly for future use.
Refrigeration
Store cut caramels in an airtight container if you’re keeping them in the fridge. They will keep fresh for a longer time that way.
Freezing
Although not typically frozen, you can freeze caramels for extended preservation. Just ensure they are tightly wrapped in wax paper and placed in a sealed container.
Reheating
If you prefer softening your chilled caramels, simply let them sit at room temperature for a few minutes before enjoying them.
FAQs
Can I use a different type of sugar?
Yes, you can experiment with brown sugar for a deeper flavor, but this will affect the consistency and color.
How do I know if the caramel is done?
You’ll know when it reaches the desired temperature of 240-245°F or when it forms a firm but soft shape in cold water.
Can I use this recipe for other candies?
This caramel recipe is great for making various candies; just remember to adjust flavors and ingredients for different outcomes.
How do I store leftovers?
Keep them in an airtight container at room temperature or in the fridge, but enjoy at room temperature for the best texture.
What should I do if my caramels turn out too hard?
If they’re too firm, they were likely cooked at a higher temperature; next time, try cooking to a lower temperature for softer results.
Save This Recipe for Later
Want to revisit this delightful treat later? Save it to your Pinterest board or share it with friends to spread the joy of soft homemade caramels!
Conclusion
Making soft homemade caramels is a gratifying experience that yields delicious results. With simple ingredients and the right techniques, you can create a treat that’s perfect for any occasion. Whether enjoyed alone or shared with loved ones, these caramels are bound to be a hit. So grab your ingredients, channel your inner candy maker, and indulge in the sweet rewards of this delightful recipe!
Soft Homemade Caramels
Ingredients
Method
- Line an 8 or 9-inch baking pan with parchment paper.
- In a medium to large saucepan, combine sugar and water. Cook over medium-low heat until the sugar is completely dissolved, about 3 to 5 minutes. Add ½ cup of the butter and let it melt.
- Turn the heat up to medium and bring the mixture to a boil. Clean the sides of the pan with water and a pastry brush to prevent crystallization.
- Allow to boil until the mixture turns a deep golden copper color and reaches 330°F, about 10-15 minutes.
- Remove the pan from heat and add the heavy whipping cream in a slow, steady stream. Whisk quickly until well combined.
- Add the remaining ½ cup of butter and corn syrup, stirring to combine.
- Return the pan to medium heat and bring to a boil again, stirring often to prevent burning.
- Cook until it reaches 240-245°F, testing with a spoon in ice water for the desired firmness.
- Remove from heat and stir in the salt and vanilla extract.
- Pour the caramel mixture into the prepared pan and allow to cool completely.
- Cut the caramels to your desired size and wrap them in wax paper.
- Store in an airtight container at room temperature or in the fridge, but serve at room temperature.