

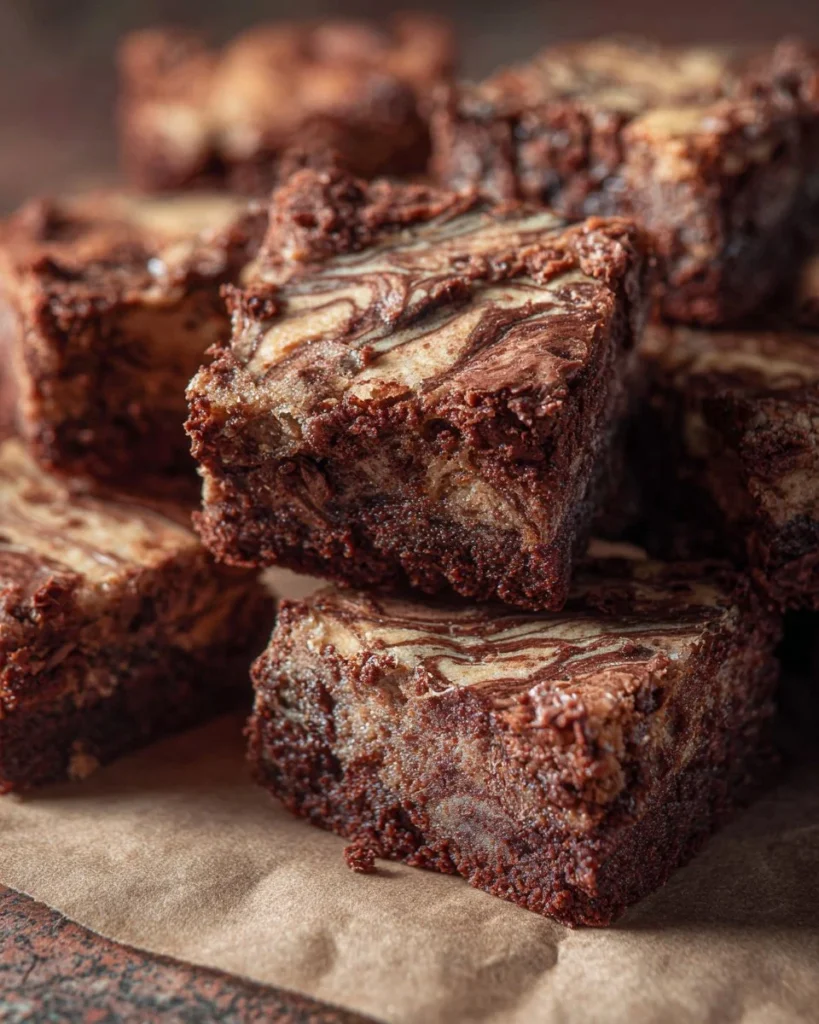
Indulge your senses with a delightful treat that perfectly balances rich flavors and luscious textures. Imagine biting into a perfectly baked brownie, where the deep intensity of dark chocolate intertwines with the smooth sweetness of white chocolate. Each square promises a melty, fudgy experience that satisfies your chocolate cravings like nothing else. These homemade delights are perfect for gatherings, snack time, or simply treating yourself after a long day. Picture them fresh from the oven, their tempting aroma wafting through your kitchen as you eagerly await the moment you can dig in. The layered swirls of chocolate not only look gorgeous but also provide a mouthwatering contrast that elevates the classic brownie experience. Let’s get ready to create a batch of these irresistible marble brownies that will have everyone reaching for seconds (and thirds!).
Why You’ll Love This Recipe
This brownie recipe is a standout because it combines two beloved flavors into one irresistible dessert. The contrast of dark and white chocolate creates a visually stunning marbled effect, making them as beautiful to look at as they are to eat. With ingredients you likely already have on hand, this recipe requires minimal prep time, making it perfect for those last-minute dessert cravings. Each brownie is rich, fudgy, and packed with intense chocolate flavor, ensuring satisfaction in every bite. Add to that the simplicity of the process—melt, mix, bake, and enjoy— and you’ve got a winning recipe that feels both luxurious and effortless. Ideal for family gatherings, potlucks, or just a cozy night in, these brownies bring comfort and joy straight from your oven.
What Makes This Recipe Special
What truly sets this recipe apart is its harmonious blend of flavors and textures that will elevate your dessert game. The combination of rich dark chocolate and creamy white chocolate provides a flavor profile that is both indulgent and balanced, appealing to all chocolate lovers. The marrying of luscious fudginess typical of brownies with the buttery smoothness of white chocolate creates a unique culinary experience that is hard to resist. Furthermore, the elegant marbling design not only enhances the visual appeal but also allows for a delightful surprise with every bite. This recipe is easily adaptable, giving you the freedom to customize it with ingredients like nuts or additional flavorings without compromising its essence. Whether it’s a casual get-together or a special celebration, these brownies will be the star of the dessert table.
Ingredients
dark chocolate: A rich base that provides deep, intense chocolate flavor.
white chocolate: Adds creaminess and sweetness, balancing the richness.
butter: Contributes to a moist texture and rich taste.
granulated sugar: Sweetens the brownie and enhances the overall flavor.
eggs: Binds the ingredients and contributes to a fudgy texture.
vanilla extract: Infuses warmth and depth to the flavor.
all purpose flour: Provides structure and helps create the perfect chewy texture.
salt: Enhances flavors and balances the sweetness (only if unsalted butter is used).
How to Make Homemade Marble Brownies
STEP 1. Preheat the oven. Set your oven to 350°F (180°C) to prepare for baking.
STEP 2. Prepare the pan. Grease and flour an 8-inch square pan or line it with parchment paper for easy removal.
STEP 3. Melt the chocolate. Melt the dark chocolate and white chocolate separately, then allow them to cool to a lukewarm temperature.
STEP 4. Cream butter and sugar. In a mixing bowl, cream the softened butter and granulated sugar until fluffy, which should take about 2-3 minutes.
STEP 5. Add eggs. Beat in the eggs one at a time, ensuring each is well incorporated before adding the next, followed by the vanilla extract.
STEP 6. Combine dry ingredients. Stir in the all-purpose flour and salt using a wooden spoon or spatula, mixing until just combined.
STEP 7. Mix chocolate batter. Transfer half of the brownie batter to a clean bowl and stir in the melted dark chocolate, while keeping the other half in the mixing bowl to incorporate the white chocolate.
STEP 8. Layer the batter. Spread half of the dark chocolate batter on the bottom of the prepared pan.
STEP 9. Drop white chocolate batter. Drop spoonfuls of the white chocolate batter on top of the dark chocolate layer, gently spreading it as best you can.
STEP 10. Add remaining batter. Spoon the remaining dark chocolate batter on top, then use the tip of a knife to swirl both batters together for a marbled effect.
STEP 11. Bake the brownies. Place the pan in the preheated oven and bake for 20-25 minutes, until the edges start to pull away from the pan.
STEP 12. Test for doneness. Use a toothpick to check; it should come out with moist crumbs attached.
STEP 13. Cool and cut. Let the brownies cool in the pan on a wire rack before cutting them into 16 squares. Enjoy your delicious creation!

Pro Tips
To achieve the best results, consider these pro tips for your marble brownies. Start with room temperature eggs, as they blend more easily into the batter. When melting chocolate, be cautious and melt it gently to avoid burning; a double boiler works wonderfully, or use the microwave in small increments, stirring in between. For added flavor, try infusing espresso powder for a deeper chocolate taste or a pinch of cinnamon for warmth. Allow the brownies to cool completely before cutting; this helps them set and makes clean slices easier. If you prefer slightly gooier brownies, reduce the baking time slightly. Always use fresh ingredients, particularly the baking staples, to ensure the best flavor and texture in your baked goods.
Common Mistakes to Avoid
Even seasoned bakers can run into pitfalls. Here are some common mistakes to watch out for. Firstly, don’t overmix the batter after adding the flour; this could lead to tough brownies instead of soft, fudgy ones. Ensure the chocolate is cooled enough before mixing it into the batter; hot chocolate can cook the eggs and affect the final texture. Baking times may vary depending on your oven, so keep an eye on the brownies—start checking for doneness a few minutes before the suggested bake time. Using the wrong size pan can also alter the cooking time and brownie texture, so stick to the recommended size. Lastly, resist the urge to cut the brownies too soon; letting them completely cool helps them firm up and makes for cleaner cuts.
Variations
• Incorporate nuts for added crunch.
• Add chocolate chips for extra melty goodness.
• Experiment with flavored extracts like almond for a unique twist.
• Top with a sprinkle of sea salt for enhanced flavor.
• Substitute coconut flour for a gluten-free option.
Serving Ideas
These decadent brownies can be served in various delightful ways. Top with a scoop of vanilla ice cream for a classic a la mode experience, or drizzle with caramel sauce for a touch of sweetness. Serve warm with a dusting of powdered sugar for an elegant presentation, or alongside fresh berries for a refreshing contrast. You can also enjoy them as a mid-afternoon snack paired with coffee or tea. For special occasions, consider placing them on a dessert platter with a selection of other sweets for a beautiful dessert spread.
Meal Prep & Storage
For those looking to meal prep, these brownies can be made ahead of time and stored for later enjoyment. Keep them in an airtight container in a cool area for up to 3 days at room temperature, or extend their life by refrigerating them. For longer storage, freeze the brownies tightly wrapped in plastic wrap, followed by aluminum foil, up to 3 months. When ready to enjoy, let them thaw in the refrigerator overnight or bring to room temperature before serving. For an extra special treat, warm individual squares in the microwave for a few seconds just before serving for that freshly baked taste.

FAQs
Can I use different types of chocolate?
Yes, you can substitute milk chocolate for the dark chocolate if you prefer a sweeter brownie.
Are these brownies gluten-free?
Using gluten-free flour instead of all-purpose flour can make these brownies gluten-free.
Can I add nuts to the recipe?
Absolutely! Adding chopped walnuts or pecans will add texture and flavor to your brownies.
How do I store leftover brownies?
Store brownies in an airtight container at room temperature for up to three days or in the fridge for a week.
Can I make these brownies ahead of time?
Definitely! They store well and can even be frozen for future indulgence. Just ensure they are wrapped properly to avoid freezer burn.
Conclusion
These marble brownies capture the richness of chocolate while offering a stunning visual appeal, making them a must-try in your baking repertoire. Whether you savor them yourself or share with loved ones, they embody comfort and joy in every square. Happy baking!
Marble Brownies
Ingredients
Method
- Preheat your oven to 350°F (180°C) to prepare for baking.
- Grease and flour an 8-inch square pan or line it with parchment paper for easy removal.
- Melt the dark chocolate and white chocolate separately, then allow them to cool to a lukewarm temperature.
- In a mixing bowl, cream the softened butter and granulated sugar until fluffy (about 2-3 minutes).
- Beat in the eggs one at a time, ensuring each is well incorporated before adding the next, followed by the vanilla extract.
- Stir in the all-purpose flour and salt using a wooden spoon or spatula, mixing until just combined.
- Transfer half of the brownie batter to a clean bowl and stir in the melted dark chocolate, leave the rest in the mixing bowl to incorporate the white chocolate.
- Spread half of the dark chocolate batter on the bottom of the prepared pan.
- Drop spoonfuls of the white chocolate batter on top of the dark chocolate layer, gently spreading it as best you can.
- Spoon the remaining dark chocolate batter on top, then use a knife to swirl both batters together for a marbled effect.
- Place the pan in the preheated oven and bake for 20-25 minutes, until the edges start to pull away from the pan.
- Check doneness with a toothpick; it should come out with moist crumbs attached.
- Let the brownies cool in the pan on a wire rack before cutting into 16 squares.