

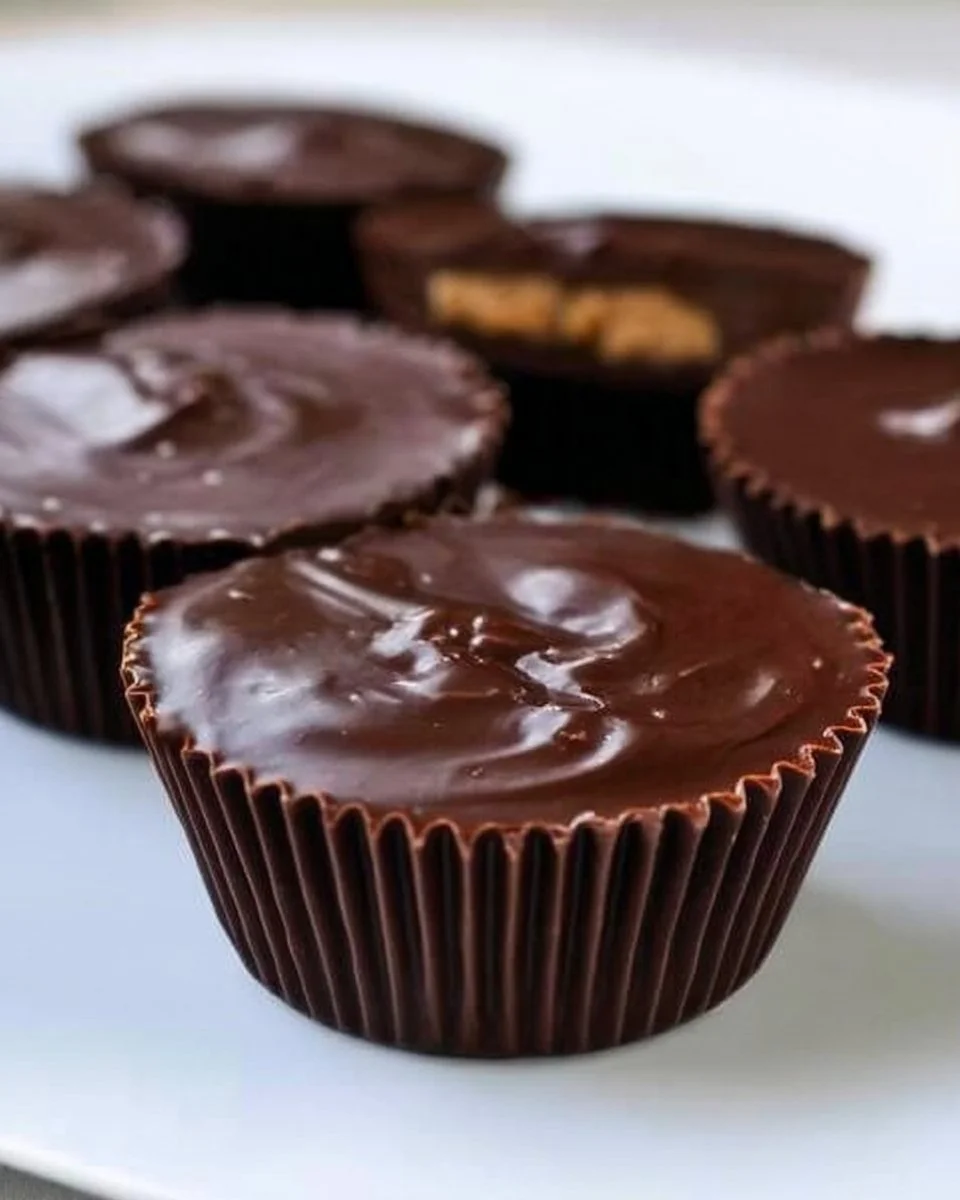
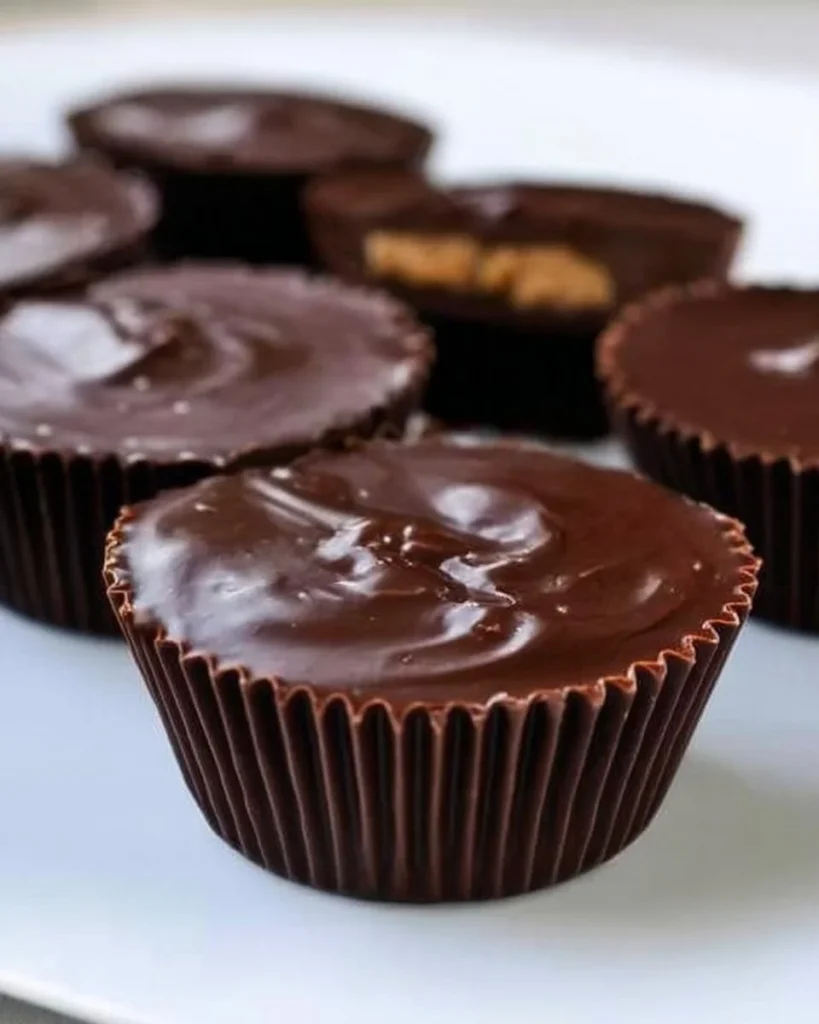
Making candy at home can evoke nostalgia and provide a calming, enjoyable moment in an often busy life. If you’ve ever found yourself craving something sweet yet wholesome, this recipe for Homemade Chocolate Peanut Butter Cups may be just what you need. Not only do these delicious treats satisfy your sweet tooth, but they also align with your health-conscious lifestyle and your family’s meal plan. With a perfect balance of creamy peanut butter and rich chocolate, this recipe is designed to elevate your snack time and make every bite count.
Kitchen Frustration That Makes This Recipe a Lifesaver
In today’s fast-paced world, preparing snacks that cater to both family preferences and personal health goals can feel overwhelming. Perhaps you’ve come home to tired kids or peers looking for a quick treat, only to realize that the store-bought candies are too sugary or packed with artificial ingredients. This is where our Homemade Chocolate Peanut Butter Cups come in, serving as a practical solution for cooking fatigue and financial strain.
Making these peanut butter cups at home allows you to manage your ingredient choices better, ensuring everything is as nutritious and delicious as possible. Plus, who doesn’t love the joy of creating something special? As you whip up this recipe with just a few minutes of prep, you’ll discover how easy it is to keep your kitchen stocked with a delight that’s both budget-friendly and loved by the whole family.
Why This Homemade Chocolate Peanut Butter Cups Works So Well
Quick Answer: Homemade Chocolate Peanut Butter Cups blend rich flavors with a satisfying texture, providing a protein-packed snack that’s easy to make.
What really sets these Homemade Chocolate Peanut Butter Cups apart is their perfect combination of creamy and crunchy. The smooth peanut butter filling, mixed with a hint of graham cracker and a touch of vanilla, pairs beautifully with velvety chocolate. Moreover, the time-saving aspect can’t be overlooked; this recipe can be whipped up in under an hour, with minimal cleanup. When looking for a snack that the whole family can enjoy while meeting your nutrition goals, these peanut butter cups hit just the right note.
Ingredients, Substitutions & Foolproof Tips
- 12 ounces High-Quality Chocolate Bar (Chocolate Chips or melting wafers, Milk or Semisweet): For a luscious and rich chocolate layer.
- 1 cup Creamy Peanut Butter: Provides the signature flavor and creamy texture.
- 3/4 cup Powdered Sugar: Adds sweetness and helps bind the filling.
- 2 Tablespoons Graham Cracker (finely crushed): A touch of crunch and classic flavor.
- 1 teaspoon Pure Vanilla Extract: Enhances flavors and provides depth.
- 2 Tablespoons Salted Butter (softened): Adds creaminess and richness to the filling.
- 20 miniature muffin or cupcake liners (may use an assortment of sizes): Essential for shaping your chocolate cups.
- Tip: If you’re looking for a healthier option, consider using dark chocolate and natural peanut butter without added sugars.
Step-by-Step Directions
- Prepare the Chocolate: Chop the chocolate bar into small pieces, placing 1 1/2 cups into a large microwave-safe bowl while reserving 1/2 cup for tempering. Melt the chocolate at 50% power in 30-second intervals, stirring in between, until smooth.
- Temper the Chocolate: After melting, add the reserved 1/2 cup of chocolate to the melted chocolate. Stir frequently until everything is fully melted and perfectly blended.
- Set Up Muffin Liners: Place the miniature muffin liners on a baking sheet to make it easy to fill them with chocolate.
- Fill Chocolate Liners: Pour tempered chocolate into each liner until they are about one-quarter full. Use a pastry brush or clean paintbrush to brush the chocolate up the sides of the liner.
- Let Set at Room Temperature: Allow the chocolate to set for 15-20 minutes at room temperature, ensuring it firms up properly.
- Prepare Peanut Butter Filling: In a mixing bowl, combine creamy peanut butter, powdered sugar, graham cracker crumbs, vanilla extract, and softened butter. Mix until the ingredients are well combined.
- Add Filling to Chocolate Cups: Scoop the peanut butter mixture into the chocolate-coated liners, filling them about three-quarters full.
- Top with Remaining Chocolate: Pour more melted chocolate on top of the peanut butter filling in each liner to seal it.
- Final Setting: Let the chocolate-covered cups set at room temperature for another 15-20 minutes, then transfer them to the refrigerator until completely firm.
Common Mistakes to Avoid & Pro Tips
- Mistake: Not tempering the chocolate correctly.
- Fix: Make sure to follow the steps for melting and adding reserved chocolate to retain a glossy texture.
- Mistake: Overfilling the cups.
- Fix: Leave enough room for the top chocolate layer to seal the filling without spilling over.
- Mistake: Not allowing enough time for setting.
- Fix: Be patient; letting them set properly ensures they hold their shape.
Pro Tips
- Use dark chocolate for a richer flavor and health benefits.
- Experiment with flavored peanut butter, like chocolate or cinnamon, to switch things up.
- Consider switching out graham crackers for crushed nuts for added texture and nutrition.
Serving, Storage & Freezer Guide
How to Serve Homemade Chocolate Peanut Butter Cups
These delectable Homemade Chocolate Peanut Butter Cups make for a wonderful after-school snack or a special treat at family gatherings. Serve them chilled or at room temperature, depending on your preference; they are delightful either way!
How to Store Homemade Chocolate Peanut Butter Cups
To keep your Homemade Chocolate Peanut Butter Cups fresh longer, store them in an airtight container in your refrigerator. They can last for up to two weeks, allowing your family to savor the flavor without worry.
Can You Freeze Homemade Chocolate Peanut Butter Cups?
Yes, you can freeze Homemade Chocolate Peanut Butter Cups! To do so, place them in a single layer in a freezer-safe container or on a baking sheet covered with plastic wrap until frozen solid. Once they’re frozen, they can be transferred to a sealed bag or container for up to three months. Enjoy them straight from the freezer for a cool treat!
placeholder
Frequently Asked Questions
Can I use a different nut butter instead of peanut butter?
Absolutely! Almond butter or sunflower seed butter can be great substitutes if you have allergies or prefer different flavors.
What type of chocolate is best for melting?
High-quality chocolate bars designed for melting are ideal. You can also use chocolate chips, but ensure they are of good quality for better flavor and texture.
How do I achieve a smoother chocolate finish?
Make sure to temper your chocolate properly and avoid overheating it, as this can lead to a grainy texture. Also, ensure all your utensils are completely dry, as any moisture can affect the melting process.
Can I make these in a larger size?
Of course! You can use standard muffin tins instead of miniature ones, increasing the filling and chocolate amounts accordingly. Just remember that baking times may differ!
Conclusion
Creating your own Homemade Chocolate Peanut Butter Cups can be a fulfilling way to celebrate your love of nostalgic treats while meeting your family’s nutrition goals. This recipe is not just about indulging in dessert; it’s a step towards mindful eating and smart meal planning. If this recipe reminds you of someone you love, share it with them. Your memories keep recipes alive.
Homemade Chocolate Peanut Butter Cups
Ingredients
Method
- Chop the chocolate bar into small pieces, placing 1 1/2 cups into a large microwave-safe bowl while reserving 1/2 cup for tempering. Melt the chocolate at 50% power in 30-second intervals, stirring in between, until smooth.
- After melting, add the reserved 1/2 cup of chocolate to the melted chocolate. Stir frequently until everything is fully melted and perfectly blended.
- Place the miniature muffin liners on a baking sheet to make it easy to fill them with chocolate.
- Pour tempered chocolate into each liner until they are about one-quarter full. Use a pastry brush or clean paintbrush to brush the chocolate up the sides of the liner.
- Allow the chocolate to set for 15-20 minutes at room temperature, ensuring it firms up properly.
- In a mixing bowl, combine creamy peanut butter, powdered sugar, graham cracker crumbs, vanilla extract, and softened butter. Mix until the ingredients are well combined.
- Scoop the peanut butter mixture into the chocolate-coated liners, filling them about three-quarters full.
- Pour more melted chocolate on top of the peanut butter filling in each liner to seal it.
- Let the chocolate-covered cups set at room temperature for another 15-20 minutes, then transfer them to the refrigerator until completely firm.