
Caramelized onions are not just a flavorful addition to your meals; they can solve various cooking dilemmas we face in our busy lives. If you’re striving to stick to your meal plan or looking to elevate your dishes without spending hours in the kitchen, learning how to make caramelized onions can be a game changer. These sweet, golden gems pack a protein-packed punch and are a fantastic way to enhance the flavor of countless recipes while being budget-friendly. With just a handful of ingredients, this dish can save you time while helping to reduce food waste, making it the perfect solution for the health-conscious cook.
Kitchen Frustration That Makes This Recipe a Lifesaver
Have you ever found yourself feeling overwhelmed in the kitchen, juggling multiple dishes, and wishing for a simple yet impactful way to add flavor? You’re not alone. Many home cooks experience kitchen fatigue, often leading to rushed meals and disappointing flavors. That’s where caramelized onions come in. This recipe not only makes use of staple ingredients you probably already have but also turns them into something truly magical.
Cooking caramelized onions can initially feel like an extra step amid the clutter of meal prep. However, setting aside just a bit of time to create these delectable onions can transform your cooking routine. By integrating this simple recipe into your meal prep, you can create meals that are richer and more satisfying without straying from your nutrition goals. Just envision topping your burgers, salads, or pasta with those golden caramelized slices, and you’ll quickly realize how this humble dish can simplify your weeknight cooking and keep you excited about healthy meals.
Why This Caramelized Onions Works So Well
Quick Answer: Caramelized onions are rich in flavor, easy to prepare, versatile, and can be made ahead, perfectly aligning with your meal planning needs.
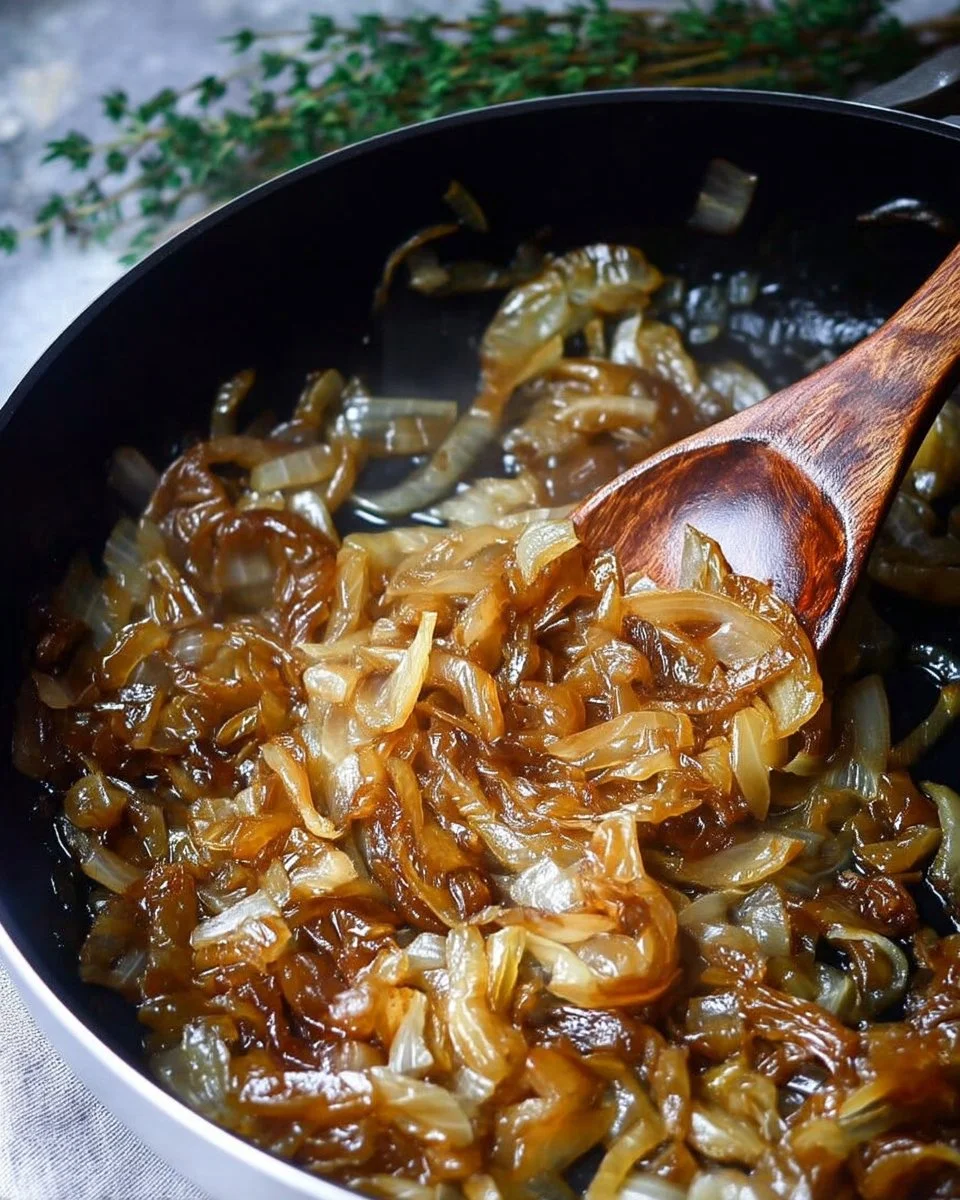
Caramelized onions work so well because they transform everyday ingredients into something extraordinary. The process enriches flavors and adds a complex sweetness that elevates any dish. The combination of butter and canola oil ensures cooking at the right temperature for perfect caramelization, while the addition of fresh thyme brings a fragrant, earthy note that complements the rich, caramelized flavor.
This recipe is also time-saving. Once you start cooking, you can step away from the kitchen, letting the onions work their magic without requiring constant attention. Plus, they can be made in larger batches, providing that much-desired meal prep advantage. Imagine a week where you can effortlessly grab these sweet gems from the fridge to enhance your protein-packed meals, bring balance to your dishes, and reduce food waste!
Ingredients, Substitutions & Foolproof Tips
- 2 tablespoons butter: Adds rich flavor and aids in the cooking process.
- 1 tablespoon canola oil: Prevents the butter from burning while enhancing the dish’s overall texture.
- 3 large yellow onions, peeled, halved, and thinly sliced: The star ingredient for sweetness and depth.
- 1 teaspoon kosher salt: Enhances the natural flavors of the onions.
- 3 sprigs fresh thyme leaves only: Provides a fresh herbaceous note.
- 1 tablespoon white balsamic vinegar (optional): Adds brightness and complexity to the flavor profile.
Tips for Success:
- Use fresh onions for the best flavor and texture.
- Adjust the heat as needed to prevent burning; slow and steady gives the best result.
- If using vinegar, add it during the last 10 minutes to maximize its flavor impact.
Step-by-Step Directions
- Melt the butter and oil: In a large cast iron or heavy-bottomed skillet over medium-high heat, melt the butter with the canola oil until shimmering. This foundation is crucial for caramelization.
- Add the onions and salt: Once melted, add the onions and sprinkle with kosher salt. Stir well to mix. You should hear a gentle sizzle as the onions hit the pan.
- Cook until starting to soften: Allow the onions to cook for about 5 minutes, stirring occasionally. You’ll notice them beginning to soften but avoid browning at this stage.
- Reduce heat and cover: Lower the heat to medium-low, cover with a lid, and continue to cook, stirring every 10 to 15 minutes. This slow cooking process is key to achieving the perfect caramelization.
- Add liquid if needed: If the onions begin to burn, add a splash of water or broth. Don’t worry, this is normal; embrace the pace of your cooking journey.
- Finish with vinegar (optional): In the last 10 minutes of cooking, if desired, stir in the white balsamic vinegar for added depth of flavor.
- Cook for up to an hour: Continue this process for up to 1 hour until the onions are rich, golden brown, and deliciously fragrant.
- Serve or store: Serve immediately or store in an airtight container in the refrigerator for up to one week. Get ready to enjoy!
Common Mistakes to Avoid & Pro Tips
- Mistake: High heat can lead to burning.
- Fix: Keep the heat low and be patient.
- Mistake: Not stirring enough can lead to uneven cooking.
- Fix: Make it a routine to check and stir every 10–15 minutes.
- Mistake: Using pre-sliced onions.
- Fix: Always slice your own; fresher flavor and texture.
Pro Tips:
- Try varying the herbs used alongside the thyme, such as rosemary or parsley.
- Make a larger batch and freeze some for quick future meals.
- Combine caramelized onions with cooked protein for a quick, nutrient-dense meal.
Serving, Storage & Freezer Guide
How to Serve Caramelized Onions
Caramelized onions are incredibly versatile! Serve them atop grilled steaks, mix them into burgers, or fold them into vegetarian dishes such as savory galettes or roasted vegetable salads. They can also beautifully accompany cheeses on a charcuterie board or be used as a topping for homemade pizzas.
How to Store Caramelized Onions
After cooking, allow the caramelized onions to cool before transferring them to an airtight container. You can safely store them in the refrigerator for up to one week. Keeping them on hand will help you turn any ordinary meal into something special effortlessly.
Can You Freeze Caramelized Onions?
Absolutely! To freeze, let the onions cool completely, then portion them into freezer bags or containers. Squeeze out any excess air before sealing. You can keep them frozen for up to three months. When you’re ready to use them, they can be thawed in the fridge or added directly to your cooking.

placeholder
Frequently Asked Questions
What type of onions are best for caramelizing?
Yellow onions are generally preferred for caramelization due to their natural sweetness. However, you can also try sweet onions like Vidalia or even red onions for a different flavor profile.
Can I make caramelized onions ahead of time?
Yes! Caramelized onions can be made in advance and stored in the refrigerator for a week or frozen for longer storage.
How long do caramelized onions last in the fridge?
Stored properly in an airtight container, they can last up to one week in the refrigerator.
Can I add other ingredients while caramelizing onions?
Yes! Add a splash of wine or a bit of sugar to enhance sweetness if desired. You can also mix in additional vegetables or herbs as desired.
Conclusion
Caramelized onions are not just a culinary delight; they’re a simple solution to common cooking woes. They elevate your meals, provide emotional comfort, and fit seamlessly into a health-conscious and budget-aware lifestyle. With this recipe in your repertoire, you’ll be ready to tackle kitchen fatigue and create memorable dishes. If this recipe reminds you of someone you love, share it with them. Your memories keep recipes alive.

Caramelized Onions
Ingredients
Method
- In a large cast iron or heavy-bottomed skillet over medium-high heat, melt the butter with the canola oil until shimmering.
- Once melted, add the onions and sprinkle with kosher salt. Stir well to mix.
- Allow the onions to cook for about 5 minutes, stirring occasionally until they begin to soften.
- Lower the heat to medium-low, cover with a lid, and continue to cook, stirring every 10 to 15 minutes.
- If the onions begin to burn, add a splash of water or broth.
- In the last 10 minutes of cooking, if desired, stir in the white balsamic vinegar.
- Continue cooking for up to 1 hour until the onions are rich, golden brown, and fragrant.
- Serve immediately or store in an airtight container in the refrigerator for up to one week.