
Cooking fatigue is a common problem in our busy lives, especially when trying to keep meals interesting, nutritious, and family-friendly. Fortunately, this Easy Vegan Chickpea Curry offers a simple solution, with its vibrant spices and budget-friendly ingredients, without sacrificing taste or nutrition. Packed with protein and fiber, this comforting dish can be a delightful addition to your meal plan while also supporting your macro-balanced nutrition goals. Let’s dive into how this recipe can transform your cooking routine!
Kitchen Frustration That Makes This Recipe a Lifesaver
Many of us experience a similar frustration in the kitchen: the struggle to prepare meals that are wholesome, delicious, and easy to make after a long day. How many times have you found yourself staring blankly at your pantry, wishing for inspiration? The Easy Vegan Chickpea Curry directly addresses this dilemma. It perfectly combines pantry staples like canned chickpeas and spices, minimizing waste and maximizing flavor.
In just one pot, you can create a meal that nourishes your body and warms your heart. This recipe takes approximately 30 minutes from start to finish, making it an excellent time-saving choice for busy weeknights. Plus, it brings a delightful burst of flavor that your family will appreciate. A practical tip: keep your spice collection stocked to turn everyday ingredients into delightful dishes!
Why This Easy Vegan Chickpea Curry Works So Well
Quick Answer: This Easy Vegan Chickpea Curry not only packs a punch of flavor but also offers a multitude of health benefits, making it a satisfying choice for any meal.
This dish excels in delivering a rich, creamy texture thanks to unsweetened almond milk that seamlessly blends with spices to create a delightful sauce. The combination of chickpeas and tomatoes adds depth to the curry, providing a hearty meal in addition to its protein-packed profile.
Emotionally, cooking and sharing this curry can be nostalgic. Many people have fond memories of family meals filled with rich flavors and laughter, making this recipe perfect for bringing everyone together around the table. Most importantly, this dish aligns with health-conscious living, as it supports blood sugar levels and helps maintain your nutrition goals without compromising taste.
Ingredients, Substitutions & Foolproof Tips
- 1/2 red onion (chopped): Adds sweetness and depth to the curry; you can substitute with yellow or white onion.
- 1 clove of garlic (minced): Enhances the flavor profile; feel free to add more cloves if you love garlic.
- 1 tablespoon curry powder: Provides the essential curry flavor; consider trying garam masala for a variation.
- 1 teaspoon cumin powder: Brings warmth; necessary for that authentic curry taste.
- 1 teaspoon ground coriander: Adds a citrusy flavor; can be replaced with additional cumin.
- 1 teaspoon ground paprika: Gives color and mild flavor; smoked paprika can be used for a smokier profile.
- 1 teaspoon dried ginger: Offers a hint of spice; you could use fresh ginger for a bolder flavor.
- 1 teaspoon ground turmeric: Adds health benefits and vibrant color; must-have for traditional curry.
- 1 (14-ounce) can of diced tomatoes: Provides acidity; can use fresh tomatoes as a substitute (around 2 cups).
- 1 (14-ounce) can of low sodium or no salt added chickpeas (drained and rinsed): Packed with protein and fiber; other legumes like lentils can also work.
- 1 1/2 cups unsweetened almond milk: Keeps the curry creamy and dairy-free; coconut milk is a tasty alternative.
- 2 tablespoons maple syrup: Balances the spices; agave or another sweetener can also substitute.
- Salt and pepper to taste: Essential for flavor enhancement.
Step-by-Step Directions
- Preheat the skillet: Preheat a large nonstick skillet over medium heat. This will ensure even cooking and prevent sticking.
- Cook onions and garlic: Toss in the chopped red onion and minced garlic along with a couple of tablespoons of water. Cook until the onions turn soft, usually about 2-3 minutes, stirring often to avoid burning.
- Add spices: Sprinkle the dry spice mixture (curry powder, cumin, coriander, paprika, and ginger) over the onions and garlic. Mix well until the spices coat the onions evenly and cook for another minute. Add a little water if necessary to prevent the mixture from sticking.
- Combine main ingredients: Add the diced tomatoes, chickpeas, and almond milk to the pan. Stir well until everything is combined. Bring the mixture to a simmer, cooking for 2-3 minutes until heated through.
- Finish the curry: Reduce the heat to medium-low, stir in the maple syrup, and season to taste with salt and pepper. Let the curry simmer for an additional 2-3 minutes, allowing the flavors to meld beautifully.
- Serve: Remove the pan from heat and serve over brown rice or enjoy it by itself as a warming, nourishing soup.
Common Mistakes to Avoid & Pro Tips
- Mistake 1: Not sautéing the onions and garlic long enough.
- Fix: Ensure they are soft and aromatic before adding spices.
- Mistake 2: Adding the spices too late.
- Fix: Incorporate them early to maximize their flavors.
- Mistake 3: Using overly salty canned products.
- Fix: Choose low sodium options to better control seasoning.
- Mistake 4: Overcooking the tomatoes.
- Fix: Add them just a few minutes before finishing.
- Pro Tip 1: Feel free to add veggies like spinach or bell peppers for additional nutrients.
- Pro Tip 2: If you prefer a thicker curry, let it simmer longer or blend a portion of it.
Serving, Storage & Freezer Guide
How to Serve Easy Vegan Chickpea Curry
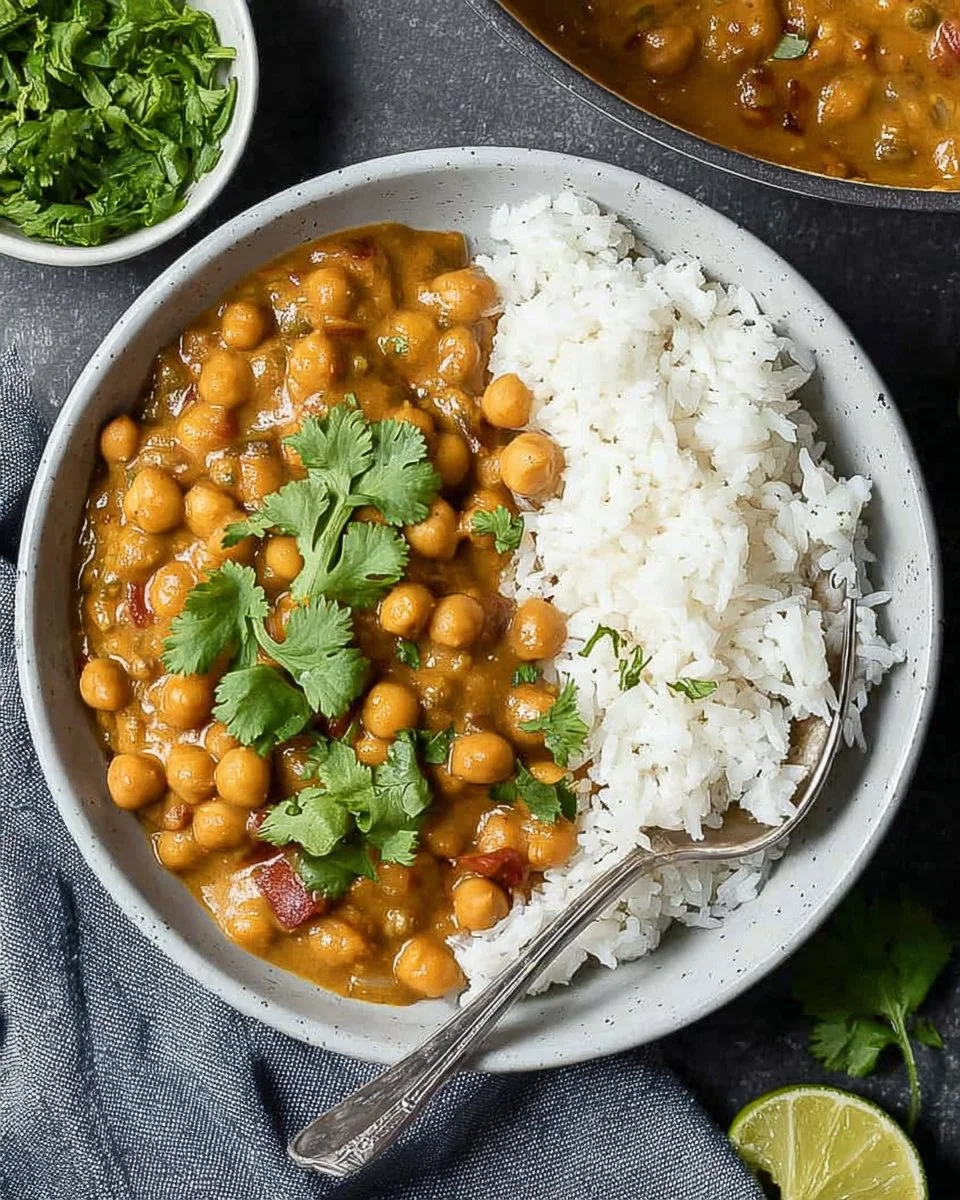
Serve this Easy Vegan Chickpea Curry over a bed of fluffy brown rice or quinoa for added texture and nutrients. Garnish it with fresh herbs such as cilantro or parsley for a pop of color and additional freshness. It also pairs exquisitely with naan or pita bread for a heartier meal.
How to Store Easy Vegan Chickpea Curry
Allow any leftovers to cool completely before transferring them into an airtight container. Store in the refrigerator for up to 3 days. This dish’s flavors deepen as it sits, making it even more delicious the next day!
Can You Freeze Easy Vegan Chickpea Curry?
Yes, you can freeze the Easy Vegan Chickpea Curry! Portion it into freezer-friendly containers once cooled. It can be stored in the freezer for up to 3 months. When ready to enjoy, simply thaw it in the refrigerator overnight and reheat on the stovetop or in the microwave until warmed through.

Frequently Asked Questions
What can I serve with chickpea curry?
Chickpea curry pairs well with brown rice, quinoa, or whole grain naan. For a lighter option, you can serve it over a bed of leafy greens.
Can I use fresh chickpeas instead of canned?
Yes! However, you’ll need to soak and cook the fresh chickpeas before adding them to the recipe, as they require longer cooking times.
Is this chickpea curry gluten-free?
Yes, this recipe is naturally gluten-free as it contains only plant-based ingredients and spices. Just check that the curry powder you use is also gluten-free.
Can I add more vegetables to the curry?
Absolutely! Adding vegetables like bell peppers, spinach, or even sweet potatoes can enhance the nutrition and flavor profile of your curry.
Conclusion
Incorporating this Easy Vegan Chickpea Curry into your meal rotation can breathe new life into your cooking routine. It’s a flavorful, protein-packed meal that supports your health and satisfies everyone at the table. If this recipe reminds you of someone you love, share it with them. Your memories keep recipes alive.

Easy Vegan Chickpea Curry
Ingredients
Method
- Preheat a large nonstick skillet over medium heat.
- Toss in the chopped red onion and minced garlic with a couple of tablespoons of water. Cook until the onions turn soft, about 2-3 minutes.
- Sprinkle the dry spice mixture (curry powder, cumin, coriander, paprika, and ginger) over the onions and garlic. Mix well and cook for another minute.
- Add the diced tomatoes, chickpeas, and almond milk to the pan. Stir well and bring to a simmer, cooking for 2-3 minutes.
- Reduce heat to medium-low, stir in the maple syrup, and season to taste with salt and pepper. Let simmer for an additional 2-3 minutes.
- Remove from heat and serve over brown rice or enjoy alone.