
There’s something wonderfully comforting about the sound of sizzling chicken in a hot pan. It’s that symphony of crunch that fills our kitchens and souls with warmth and familiarity. Whether you’re trying to satisfy a last-minute dinner craving or looking to impress family and friends, Crispy Chicken Cutlets are the perfect solution. With a golden crust on the outside and juicy chicken on the inside, this dish has been a family favorite for generations. Let’s dive into the delicious world of crispy goodness!
Why You’ll Love This Crispy Chicken Cutlets Recipe
The Daily Struggle
Have you ever found yourself staring into the fridge at the end of a long day, trying to figure out what to make for dinner? We’ve all been there, feeling that twinge of frustration mixing with hunger pangs, wondering how to whip up something quick, satisfying, and delicious. When the clock is ticking and everyone is hungry, it can feel overwhelming. But guess what? There’s hope!
This Dish Solves That
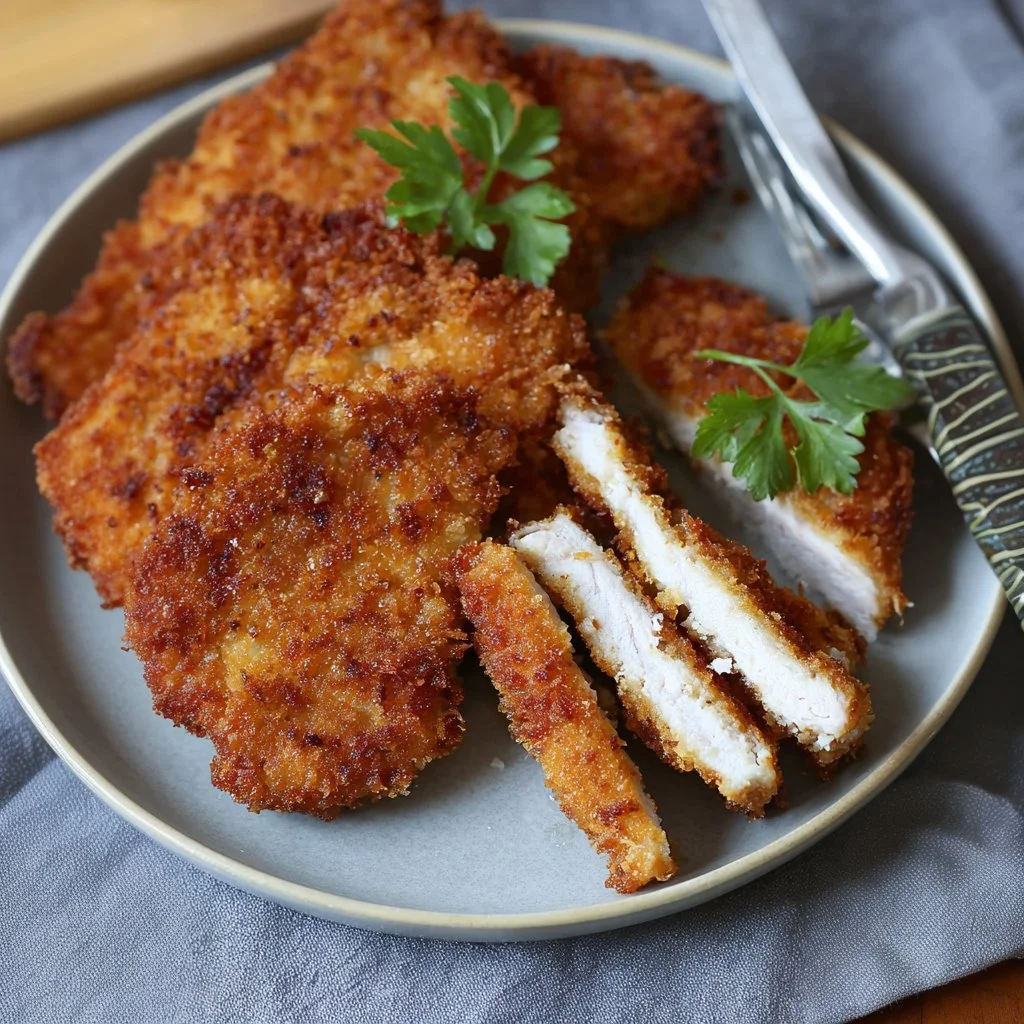
Enter Crispy Chicken Cutlets. This delightful dish offers the comfort of crispy goodness that transforms a hectic evening into a memorable mealtime. With each bite, you’ll relish in the crunch that gives way to tender, juicy chicken — it’s pure magic on a plate. Whether paired with a side of creamy mashed potatoes or a light salad, these cutlets are versatile enough to shine in every meal. Moreover, they bring that nostalgic touch, reminding us of moms and grandmas who knew how to make weeknight dinners feel special.
Quick Answer: The easiest way to make Crispy Chicken Cutlets creamy and rich is by using seasoned breadcrumbs mixed with a bit of Parmesan cheese for that extra layer of flavor.
Before we dive into the preparation, let’s gather those enticing ingredients that will transform your kitchen into a haven of mouthwatering aromas.
Ingredients Breakdown & Prep Tips
Ingredient List
- 2 pounds thin sliced chicken breasts — The star of the show; look for pieces that are uniformly thin for even cooking.
- 1 cup all-purpose flour — This is our base for that delicious crust.
- 1 tablespoon seasoned salt — Adds a burst of flavor that makes a world of difference.
- 2 eggs — These create a beautiful binding layer for our breadcrumb coating.
- 1 tablespoon water — A little added moisture for the egg mixture.
- 1 teaspoon hot sauce — Just a hint of heat to make the flavors pop; use your favorite for a personalized touch.
- 2 cups panko breadcrumbs — These create the ultimate crispy exterior.
- 1 teaspoon garlic powder — A flavor booster that complements the chicken beautifully.
- 1 teaspoon kosher salt — Simple yet essential for enhancing taste.
- 1/2 teaspoon black pepper — Adds that much-needed warmth.
- 1/4 cup Parmesan cheese — For a rich, cheesy flavor that takes it over the top.
- 1 cup light oil (light olive oil, canola oil, or vegetable oil) — We need enough to fry until crispy!
Finally, let’s get our hands a bit messy and dive into the prep work!
Prep Method with Sensory Cues
- Trim and Prep: Trim chicken breasts of any excess fat, if necessary, and pat them dry. This step ensures that they fry up beautifully crisp and not soggy.
- Prep the Stations: In one shallow bowl, whisk together the flour and seasoned salt, creating that first layer of flavor. In a second bowl, beat the eggs, water, and hot sauce together until smooth. Finally, in a third bowl, mix together the panko breadcrumbs, garlic powder, kosher salt, black pepper, and Parmesan cheese, ensuring it smells deliciously aromatic.
- The Dipping Process: Dip each chicken breast into the flour mixture, shaking off the excess flour. Next, immerse it into the egg mixture, letting any extra egg drip off before transferring it to the panko mixture. Make sure to coat thoroughly, then place on a platter. The anticipation of those crunchy bites is almost unbearable!
- Heat the Oil: In a 10-inch skillet, pour in the oil and heat over medium heat until it reaches 350°F. A quick test to know it’s ready is to dip the back of a wooden spoon into the oil—if bubbles form immediately, you’re good to go!
- Fry to Perfection: Carefully place each chicken cutlet in the hot oil, frying for 2 to 3 minutes on each side. Be gentle; we don’t want splatters! If the chicken browns too quickly, simply adjust the heat down to medium-low. Avoid overcrowding the pan—this allows each cutlet to fry evenly and get that gorgeous golden color.
- Drain and Serve: Once done, transfer the cooked chicken to a paper towel-lined plate to absorb any excess oil. Repeat with the remaining cutlets until all are crispy and ready to be devoured.
- Plate It Up: Serve warm with your favorite sides, and watch as smiles spread around the table!
Avoid These Mistakes
Common Mistakes & Fixes
- Wet Chicken: Don’t skip the drying step before seasoning. Moisture will prevent that unbeatable crust from forming.
- Overcooked Oil: If your oil is too hot, your chicken will brown too quickly, burning on the outside while remaining raw inside. Keep an eye and adjust the heat as necessary.
- Crowding the Pan: Always fry in batches! Overcrowding leads to steaming instead of frying, which means no crispy crust.
Pro Tips to Get It Right
- Consistency is Key: Try to keep all chicken pieces as uniform in size as possible. This ensures that everything cooks evenly.
- Make Ahead Magic: You can prepare the cutlets ahead of time and store them in the fridge, ready to fry right before dinner.
- Serve with Love: Pair your cutlets with a homemade dipping sauce or alongside a colorful salad for a delightful meal. Check out our Garlicky Feta Chicken Salad for a refreshing contrast!
Serving, Storage & Creative Variations
Best Ways to Serve It
Crispy Chicken Cutlets are perfect for cozy dinners, casual gatherings, or even a quick lunch. Serve them with fluffy mashed potatoes, steamed broccoli, or a crisp green salad. They also make fantastic sandwiches for a lunchtime treat—just add your favorite toppings and condiments!
Storage + Seasonal or Dietary Variations
These cutlets can be stored in an airtight container in the fridge for up to three days. If you wish to freeze them, place them in a single layer on a baking sheet until solid, then transfer to a freezer bag. Try different flavor variations by adding herbs or spices to the breadcrumb mixture or using a spicy dipping sauce for a kick!
If you’re inspired, why not check out our comforting Creamy Parmesan One-Pot Chicken and Rice for another delicious meal idea?
FAQ Section
How do I make my chicken cutlets extra crispy?
To ensure maximum crispiness, use panko breadcrumbs and fry in hot oil. Letting the hot oil do its job creates a delightful crunch!
Can I use chicken thighs instead of breasts?
Absolutely! Thighs will give you a juicier result, just ensure they are thinly sliced or pounded to an even thickness.
What dipping sauces pair well with these cutlets?
Honey mustard, ranch, or a spicy sriracha mayo work beautifully! Your creation can elevate the dish to new heights.
Can I bake the cutlets instead of frying them?
Baking is possible! Simply place the breaded cutlets on a baking sheet, spray with oil, and bake at 400°F for about 20-25 minutes, flipping halfway.
Conclusion
Crispy Chicken Cutlets are more than just a meal; they’re a comforting embrace at the dinner table, inviting conversation, laughter, and love. If this dish brings back a memory, pass it on. Someone you love might need it today! For more delicious dishes that warm the heart, don’t forget to explore our Black Bean Corn Salad recipe and share the joy of cooking with those who matter most.
Crispy Chicken Cutlets
Ingredients
Method
- Trim chicken breasts of any excess fat and pat them dry.
- In a shallow bowl, whisk together the flour and seasoned salt.
- In a second bowl, beat the eggs, water, and hot sauce together until smooth.
- In a third bowl, mix panko breadcrumbs, garlic powder, kosher salt, black pepper, and Parmesan cheese.
- Dip each chicken breast into the flour mixture, then into the egg mixture, and finally into the panko mixture, ensuring thorough coating.
- In a skillet, heat the oil over medium heat until it reaches 350°F.
- Carefully place each chicken cutlet in the hot oil, frying for 2 to 3 minutes on each side.
- Transfer the cooked chicken to a paper towel-lined plate to absorb excess oil.
- Serve warm with your favorite sides.